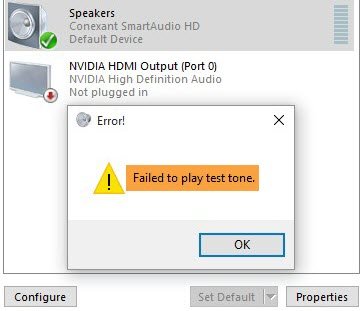
 The error ‘failed to play test tone’ indicates a problem between the sound device connected and Windows. This error message is displayed when you try to play a test sound after encountering a problem with the sound device. Though it is normally classified as a hardware error, it is a software error and can be rectified quickly.

Table of Contents
Common errors you might find with the Audio on your PC:
The Laptop Has no Sound and Cannot Play the Test Tone.
Both desktop and laptop PCs are affected by this problem; some laptops have the problem more frequently than other desktop PCs.
The Sound Card shows “Failed To Play the Test Tone Error.”
If you’re experiencing this issue with your PC, you should know that anything can impact a sound card; it affects both dedicated and built-in sound cards.
Here are a few methods to fix this error:
7 Ways to Fix Failed to Play Test Tone Error
Restart Windows Audio
This is the most common solution and is one of the easiest methods. However, few users reported it to be a temporary solution.
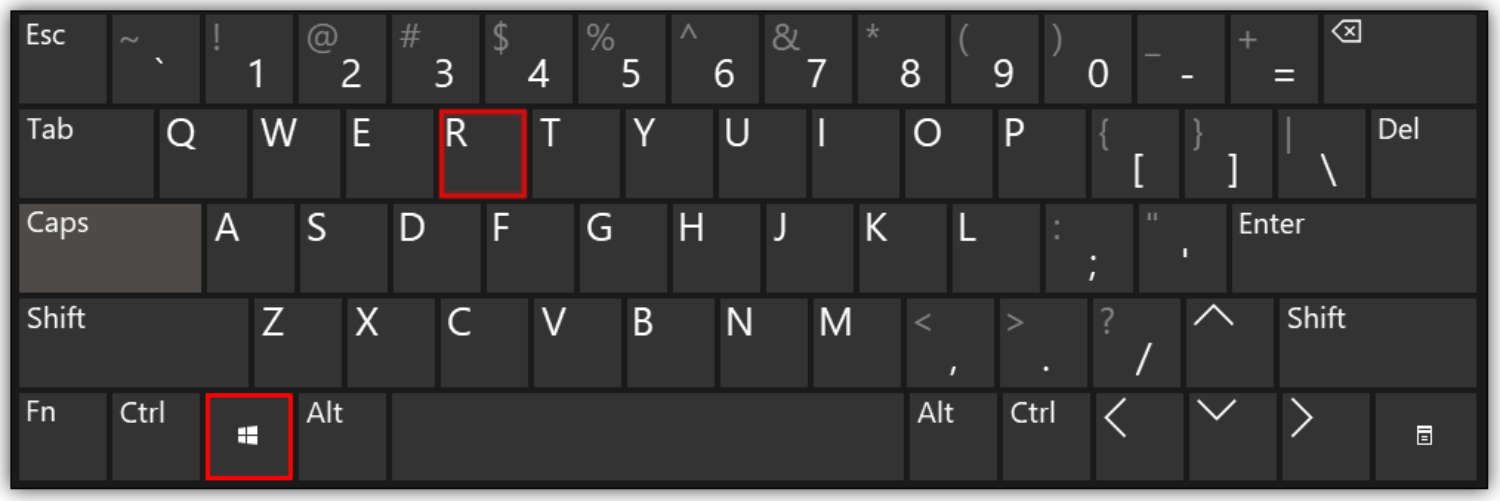
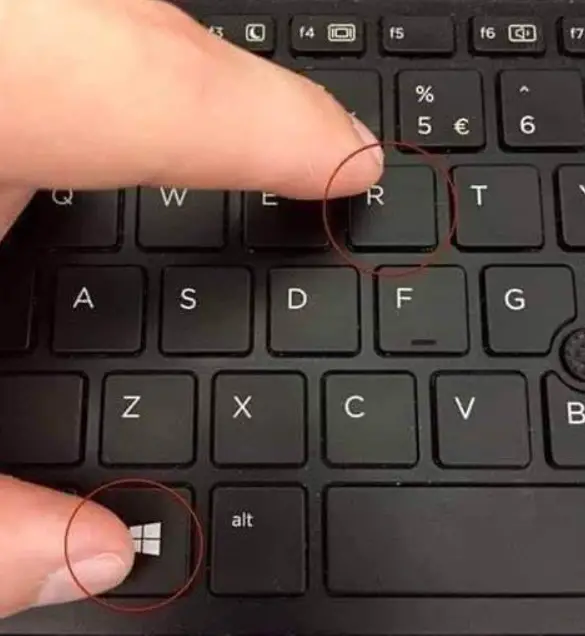
- Press the Windows and ‘R’ keys on your keyboard simultaneously. This will open the ‘Run’ window.
- In the ‘Open’ box, you should type ‘services.msc.’ Click on ‘OK’

- In the ‘Services’ window, scroll and find the ‘Windows Audio’ service.
- Then click on ‘Restart’ on the top toolbar.
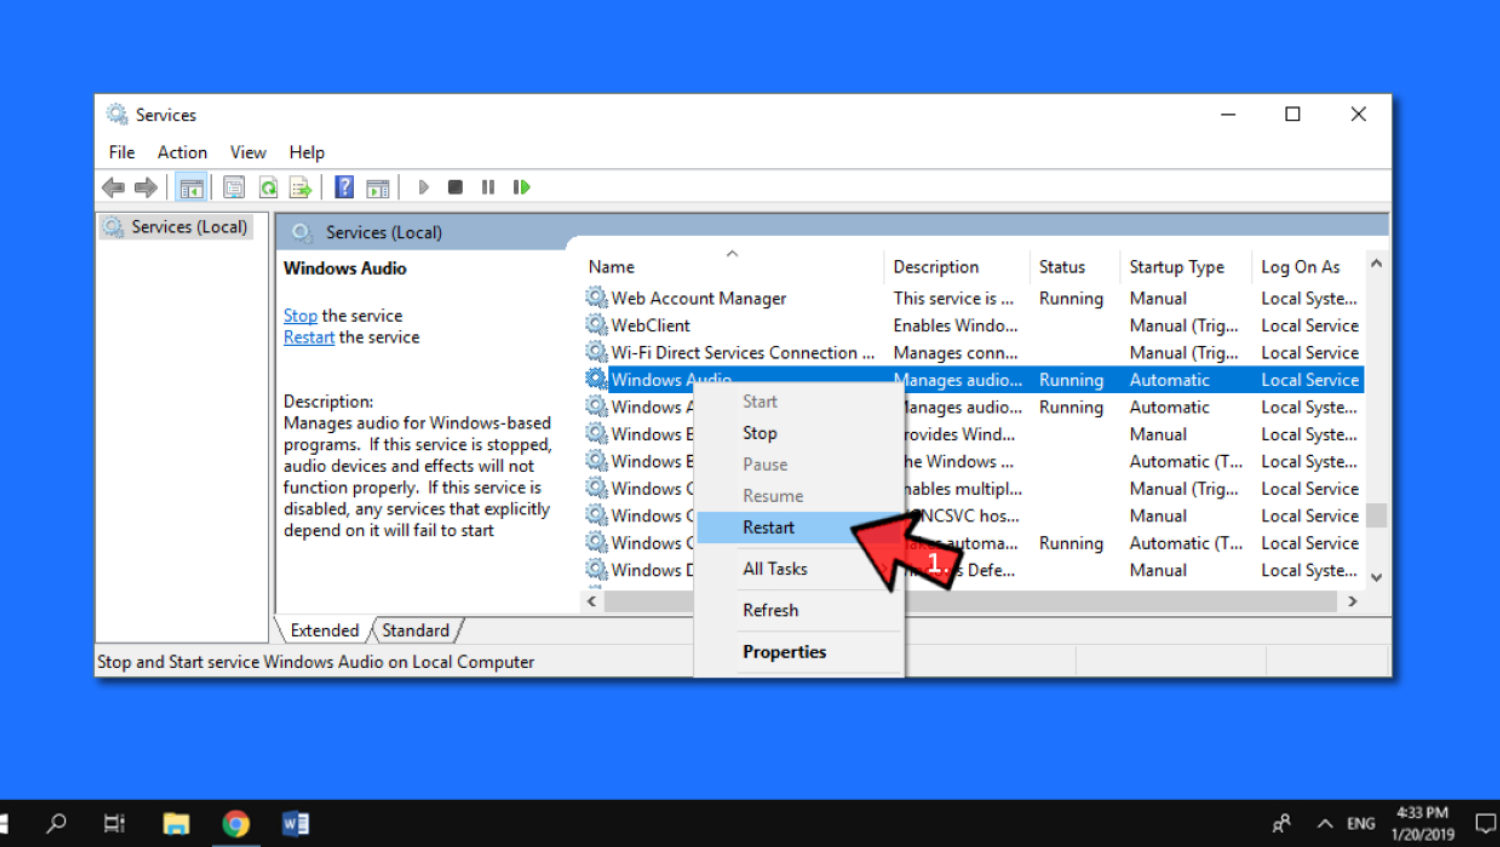
- After this, the sound device should start working again.
Disable all enhancements
This error can be fixed if it is caused due to specific enhancement settings. Here is how you can do it:
- Open the ‘Control Panel’ from the ‘Start’ menu.
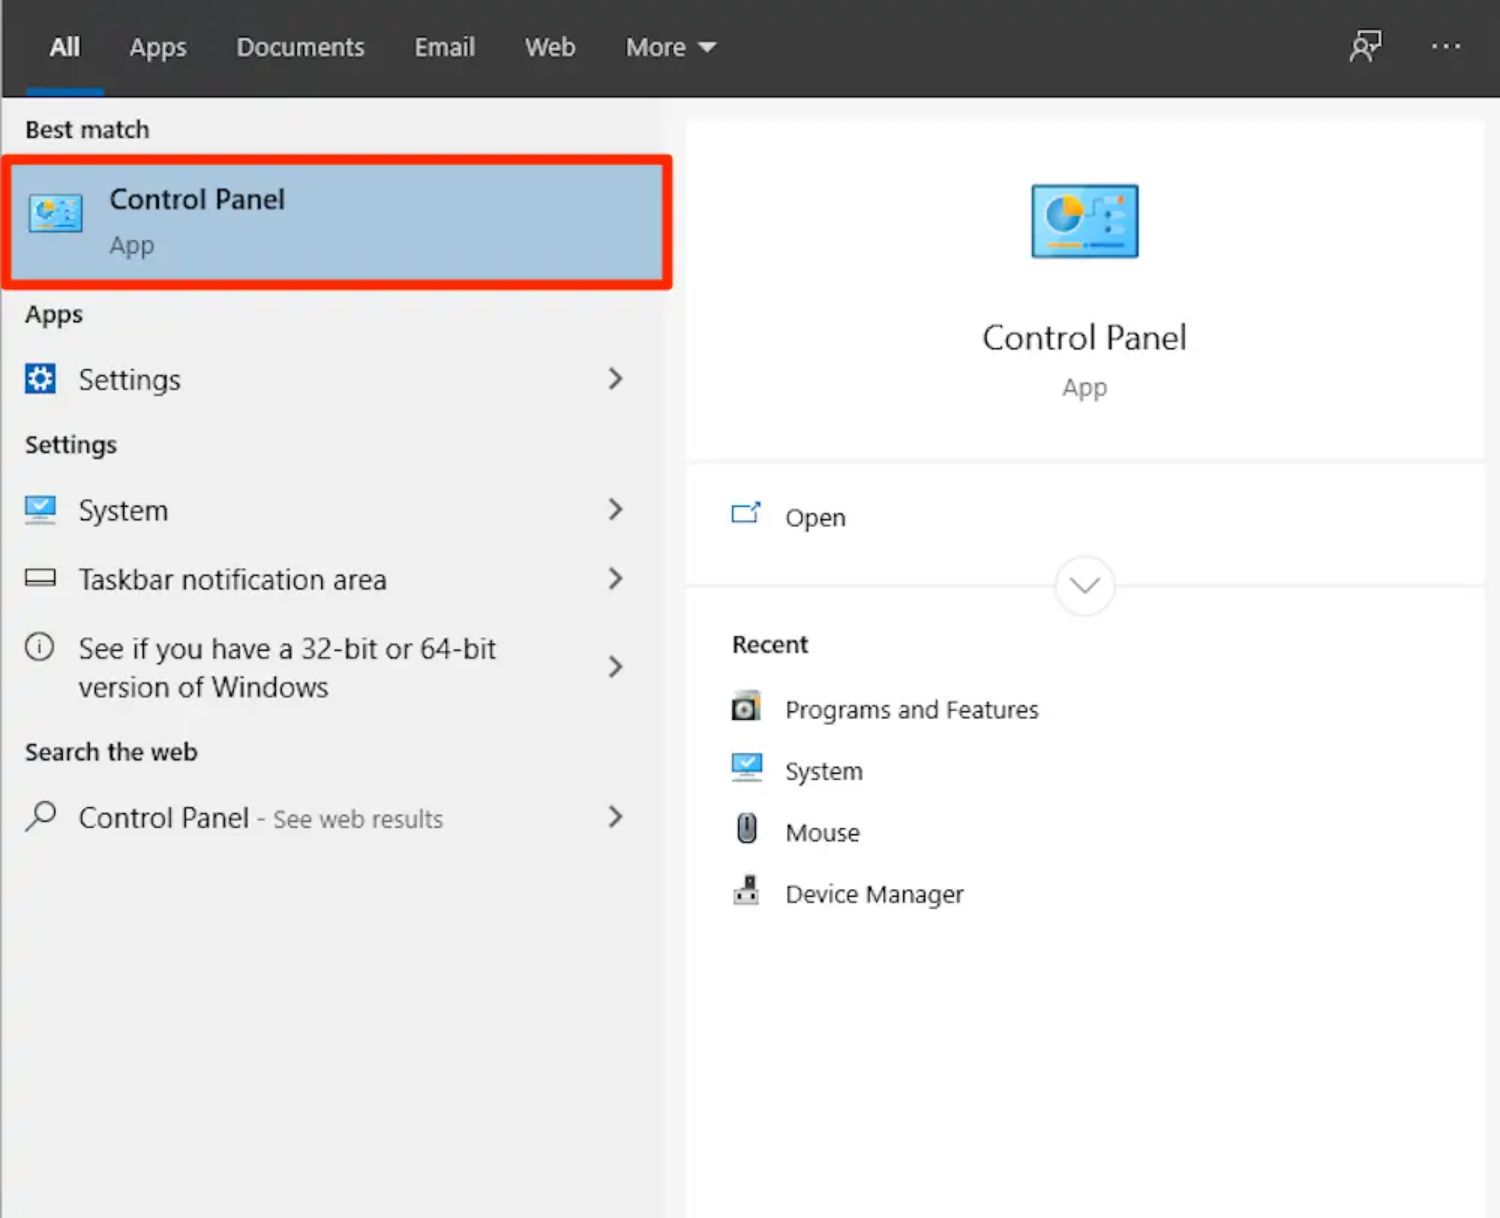
- Search for the ‘Sound’ option and open it.
- Select ‘Speakers’ and click the ‘Properties’ option near the bottom.
- Locate the ‘Enhancements’ tab and then click Disable all enhancements and sound effects.’
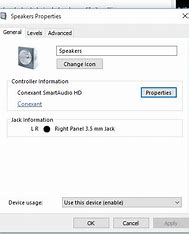
- Click on ‘Apply’ and then click on ‘OK.’
See Also: Realtek HD Audio Manager Missing | How To Fix [Solved]
Repair corrupted Windows files
This will rectify the error if some corrupted Windows files are causing the mistake of playing sounds. This is how you can fix it:
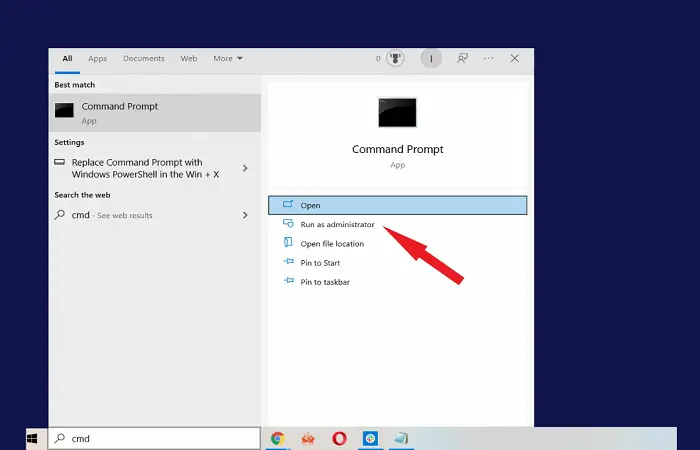
- Click the ‘Windows’ button and the ‘R’ key simultaneously. A run dialogue box will appear.
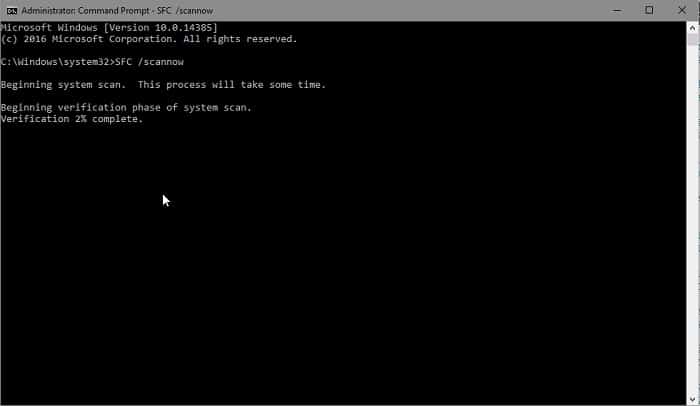
- Type ‘cmd’ in the run box and click ‘OK.’
- The ‘command prompt window will open up. Type sfc/scan now and press Enter.
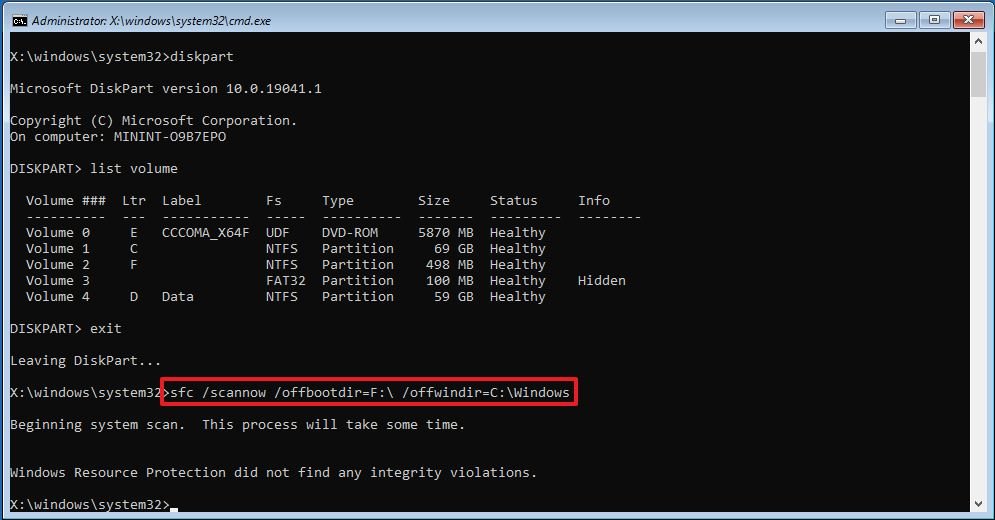
- Wait for the process to complete.
Note: to work, you need to run this as an administrator. In case you are not running as an administrator, follow the below steps:
1. For Windows 7/Vista/ XP
- Click on the ‘Start’ menu.
- Type ‘cmd’ and then press ‘Ctrl+Shift+Enter.’
- Then click on ‘Yes.‘
2. For Windows 8/8.1/10
- Press the ‘Windows’ and ‘X’ buttons simultaneously.
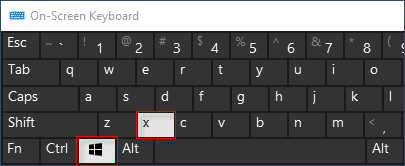
- Click on Command Prompt (Admin).
- Finally, click on ‘Yes.’
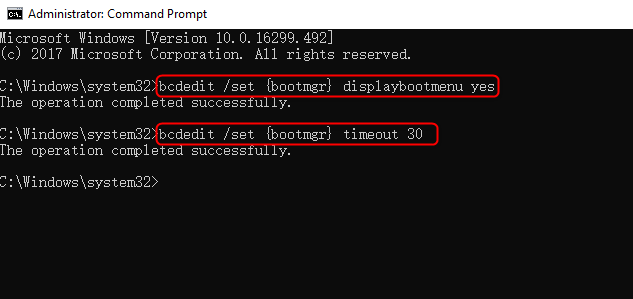
Delete the Windows 7 update
Many Windows 7 users have reported that after updating their computers (specifically the KB974571 update), there was a problem with their sound, and after deleting it manually, it was fixed. Here’s how you can remove your KB974571 update:
- Open the ‘Control Panel’ through the ‘Start’ menu.
- Find the option ‘Programs and Features’ and click on it.
- You can see a ‘View installed updates’ option in the’ Programs and Features window. Click on this.
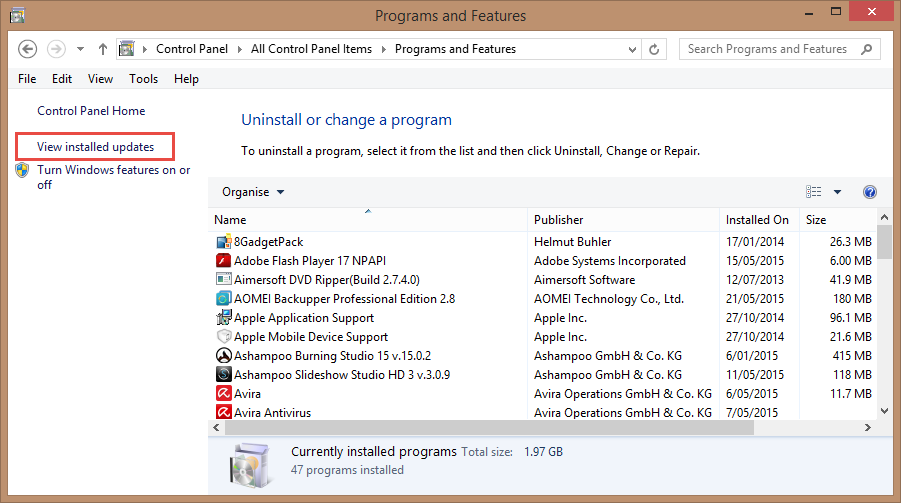
- Find the ‘KB874571’ option and click on it.
- Select the ‘Uninstall’ option.
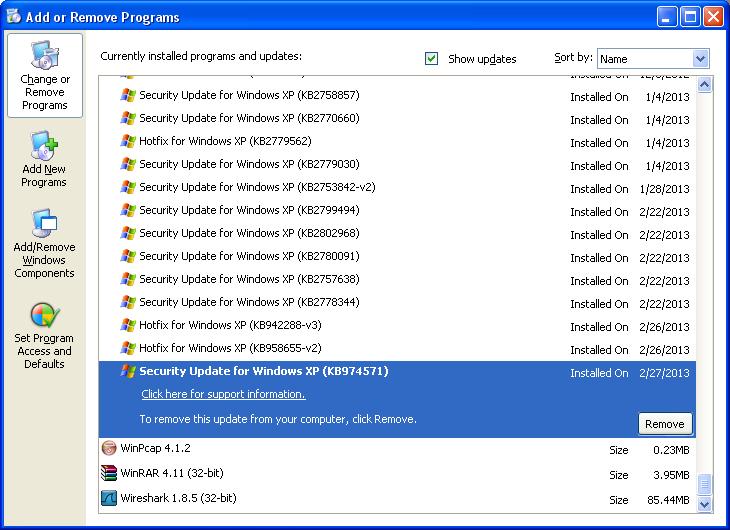
- The computer will have to reinstall to finish the process.
Connect The Audio Device To Your PC
- Users claim they ran into this problem when using a laptop docking station.
- Docking stations for laptops are quite helpful because they provide you with extra ports. However, occasionally, they have problems.
- The Failed to play sound test tone for computer problem message was reportedly brought on by users who attach their headphones to the docking station.
- Users claim you can resolve the issue by attaching the speakers to your laptop’s audio port. That will address the problem, of course.
- Your docking station’s malfunction or lack of compatibility with your hardware or drivers could be the issue’s root.
Installing HD Audio Device driver
Sometimes the audio device driver installed on your computer may be outdated and incompatible with the audio file. To install the HD Audio Device driver, follow the given steps:
- Open the ‘Start’ menu and search for ‘Device Manager’ in the search bar.

- Select and expand the ‘Sound, Video, and Game Controllers’ options.
- Select your current audio driver.
- Under the ‘Action’ tab, select ‘Update Driver Software.’
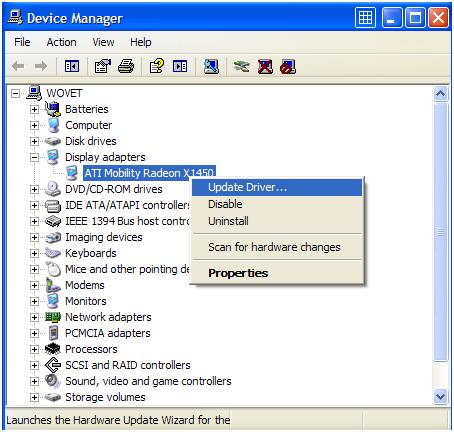
- Select ‘Browse my computer for driver software’ and then click ‘Let me pick from a list of device drivers on my computer.’
- Find the option ‘High Definition Audio Device’ in the list and click next. ( In case there is a prompt for user permission, click on ‘Yes’)
Note: If the required driver is unavailable, go to the manufacturer’s site and download the suitable driver.
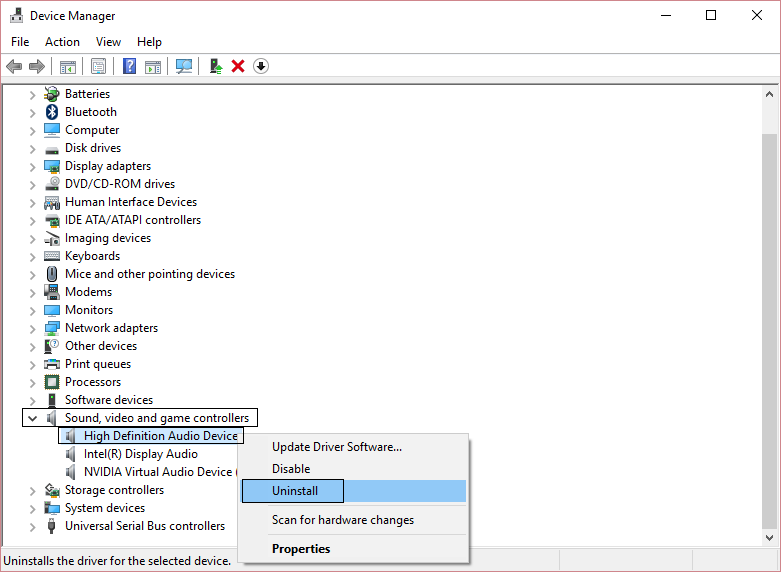
Reinstalling Audio Drivers
Sometimes the audio device driver installed may have become corrupted. In this case, you must reinstall the audio device driver to rectify the problem. Here’s how you can do so:
- Open the ‘Start’ menu and search for ‘Device Manager’ in the search bar.
- Select and expand the ‘Sound, Video, and Game Controllers’ options.
- Select your current audio driver and right-click on it. Then click on ‘Uninstall.’
- After this, restart your computer.
On starting, Windows will install the default driver, and the sound will work.
Check out: 17 Best Ringtone Making Apps For Android & iOS {Latest}
Perform an SFC Scan
- Type cmd into the Windows search box to start and launch the command promoter.
- Enter “sfc /scannow” and press ‘Enter’ to launch it.
- The SFC scan will immediately begin.
- Sometimes The notice “failed to play sound test tone” may appear owing to file corruption. This issue may show up because your system files have become corrupted.
- However, if you only run an SFC scan, you should be able to solve it.
- Users claimed that performing the SFC scan resolved the issue for them. However, the SFC scan occasionally won’t resolve the issue. Try it out.
Changing the Sample Rate
Another solution to the error can be changing the sample rate. Here is how you can change your sample rate:
- Right-click on the sound icon in the bottom-hand right corner of your screen.
- Select ‘Playback Devices,’ which will open the ‘Playback’ tab.
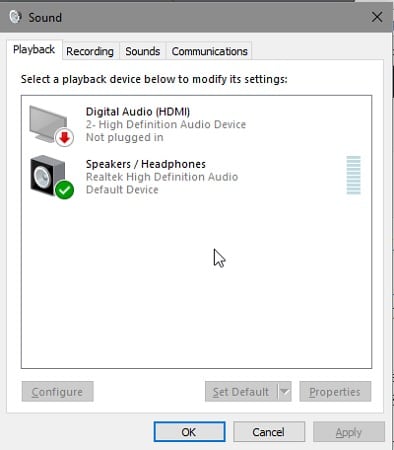
- Select your device and click on ‘Properties.’
- Click on the ‘Advanced’ tab to see the default set as “16 Bit, 44100 MHz”. You can select any other option and choose ‘Apply.’
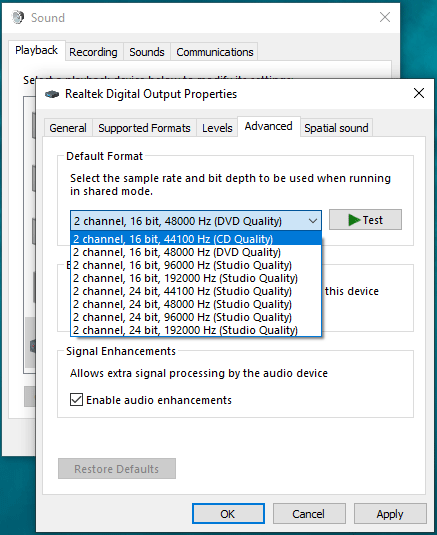
- If the default option is not set on opening the ‘Advanced’ tab, click ‘Restore Defaults’ and then select ‘Apply.’
FAQs
What is Test Tone?
The quality of the test tone is typically closely correlated with the quality of the device (typically some form of the oscillator) used to make it. Theoretically, a test tone is a pure wave of the required waveform that is always present. In actuality, many test tones are not perfectly shaped.
What Does 'Failed to Play Test Tone' Mean?
The error message 'Failed to play test tone' alerts you to a conflict between Windows and the sound card on your computer. If there is no sound and you check to see if your sound device is operating, it appears as an error notice. You will receive this response from Windows.
Why Won't my Laptop's Speaker Work?
Additionally, missing drivers are among the most frequent reason for computer sound issues. You must first determine whether you can automate this procedure before you monitor the status of your audio or speaker drivers and update your audio device speakers.
Why Won't my Audio Service Work?
What Leads to the Error 'Audio Services Are Not Responding'? Your audio drivers are the most typical source for this problem. You could experience audio problems, such as the 'audio services not responding' error, if your driver is out-of-date, damaged, or improperly installed.
Conclusion
As mentioned above, fixing the sound error on your computer is quite simple, and you will not require any professional for it. Depending on the cause of your problem, one of the above methods should help in fixing the error as it has been proven very useful by many users
See also: – How to solve ‘No Audio Output Device is Installed’ Error – TechWhoop