The Xbox has been in high demand for the past decade. Microsoft introduced this game in 2001, and since then, it has become the dream of every child to own the Xbox. After the lockdown, especially, it has been one of the highly purchased online gaming platforms. This article will discuss how to disassemble the xbox one controller.
Here’s a rephrased version of the instructions for disassembling a Microsoft Xbox One Controller:
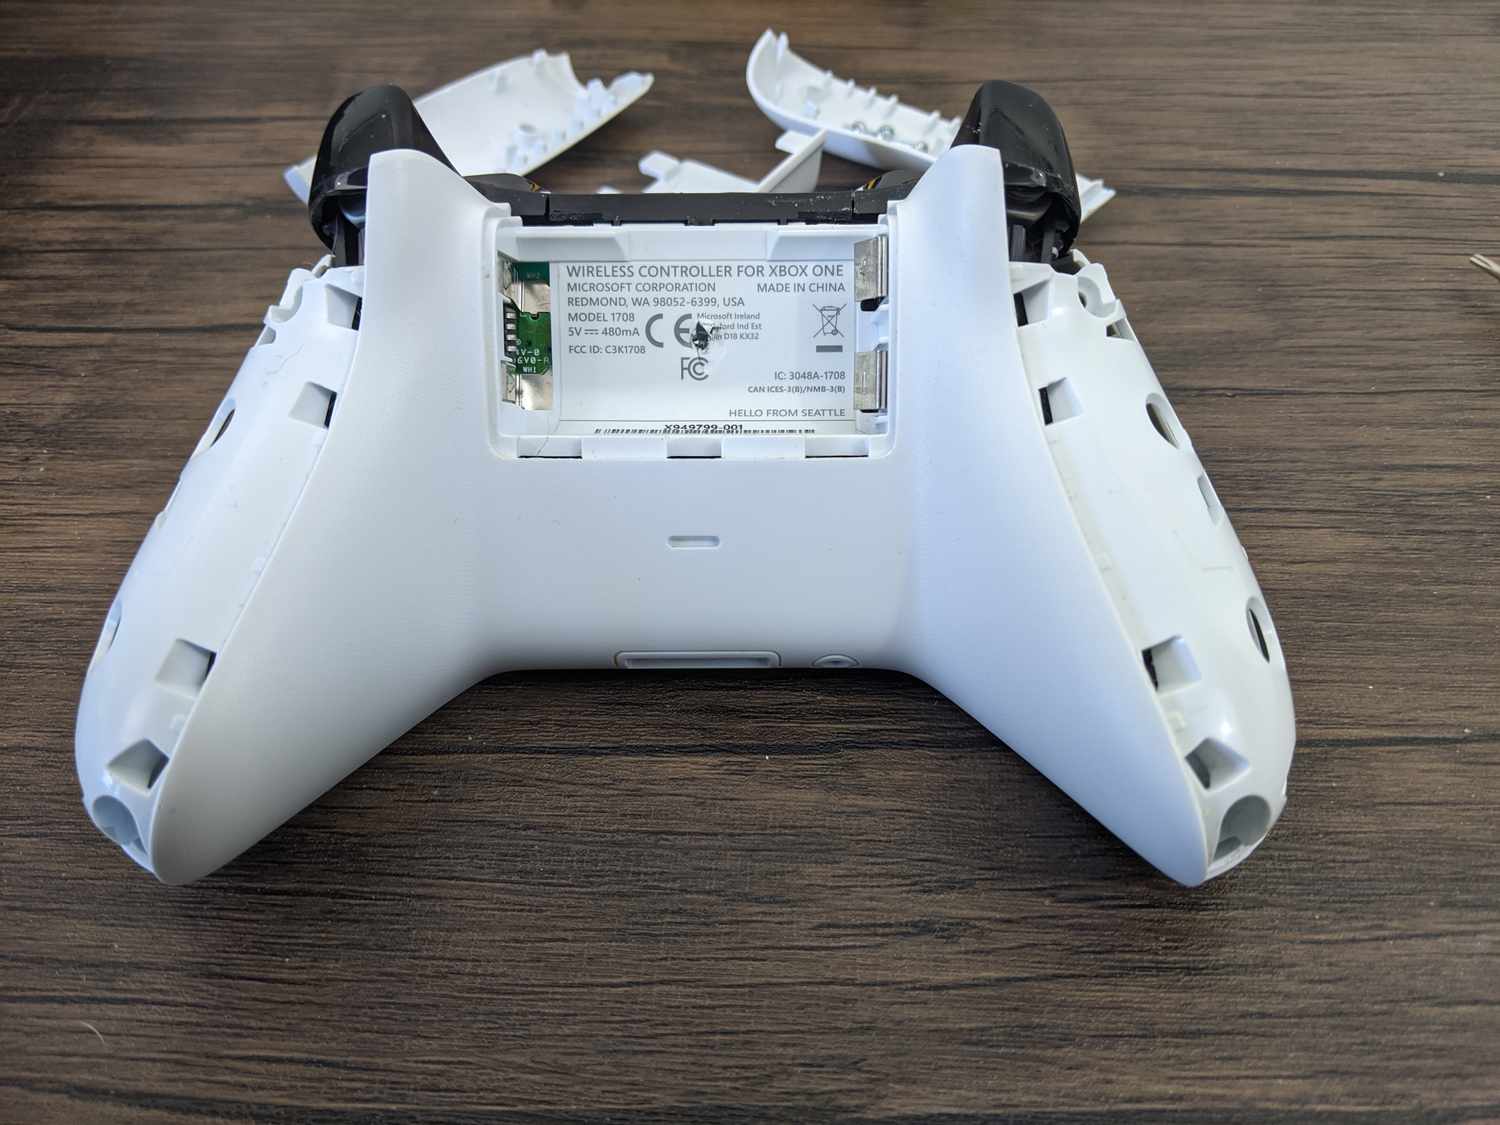
- Begin by detaching the battery cover and taking out any batteries present.
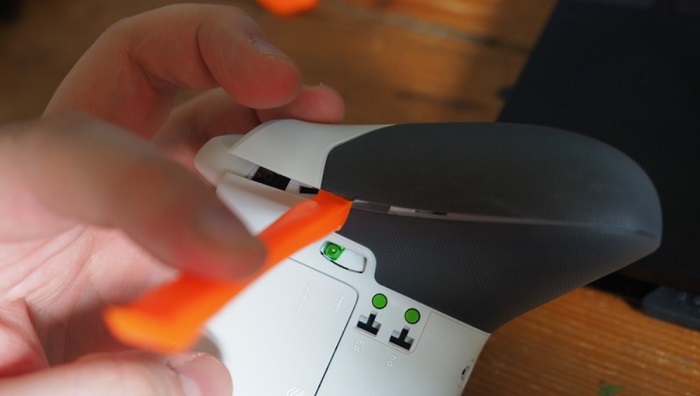
- Eliminate the grip plastic section.
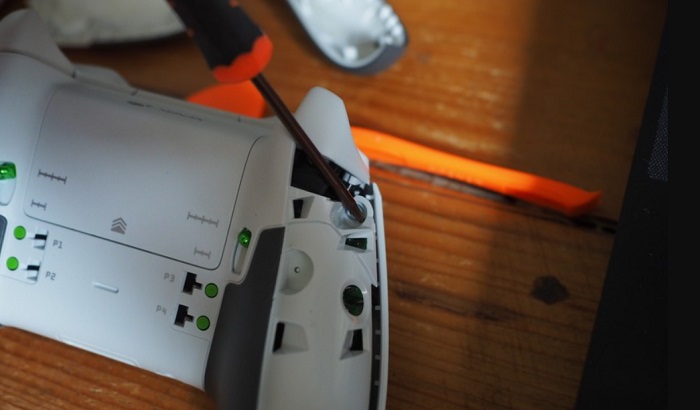
- Use a Torx screwdriver to unscrew the five Torx screws.
- Gently raise the back cover of the controller.
- Carefully separate the internal components from the front fascia of the controller.
There are five versions of Xbox. Each has unique features that make it stand out. You might sometimes face some issues when it comes to taking care of your Xbox. If you use it excessively, there is a chance that it will get spoilt. Apart from that, there is a shell life of electronics, so if you face issues even when you use the controller correctly, you do not have to worry. This issue is always solvable, provided you follow the procedure. This article will help you comprehend how to easily disassemble the xbox one controller. Make sure that you spend enough time understanding the technique. This will help you to perform it in a better way. Also, check out this article on our top picks for durable Xbox One controllers.
See Also: How To Watch Showbox On Xbox One? (Detailed Guide)
Table of Contents
How To Disassemble Xbox One Control Without Tools?
You shouldn’t invest any money to purchase expensive tools that claim to help you resolve how to disassemble the Xbox One controller within minutes. First, you should try the methods to help you resolve this without any investment.
This article will present some easy steps you should follow as they have been set out. It is advised that you understand the steps and then perform them.
The first step to solve how to disassemble the xbox one controller is to take out the console’s battery.
This will be at the back of the controller; ensure you keep the battery correctly. After that is done, you will have to proceed to remove the sides of the controller.
 You must do this first, or else you cannot gain control of the Torx screws. Even a tiny trim tool will work if you want to do this – or any other tool will work just fine. This will not spoil the plastic of the console. Next, you should remove the sides very easily and swiftly.
Some time will have to be spent on finding the perfect edge. After that, you can slowly open the game console. Know about the best xbox one emulator for pc from this article!
You are already closer to resolving how to disassemble the xbox one controller without any technical expertise.
The next thing will be to remove the Torx screw. As mentioned earlier, it will be at the back of the console. In the exact middle, you will see a screw. If you have touched this screw, you will not find Microsoft helping you disassemble xbox one controller at any cost.
 Once you have removed the center screw, remove the remaining screws. There will be adding four removable screws which will be at the corner. Unless you remove these screws, you cannot resolve how to disassemble the xbox one controller straightforwardly. Your tool must be a sturdy little one, or you might damage the console.
You will also find it very challenging to put back the controller. So, you might want to invest in a cheap screwdriver that will not cost more than $10. This will help you resolve how to disassemble the xbox one controller without worry.
So, get the screwdriver and then start turning around the screws. Within minutes, you will witness your console disassembling right before your eyes! Just turn the screws slowly so that the chances of damage are low.
How can it ever get easier than this?
See Also: Xbox One Sync Button Not Working? Stepwise Guide
FAQs
Can I disassemble the Xbox One controller without voiding the warranty?
No, disassembling the Xbox One controller typically voids the warranty. Opening the controller's casing and tampering with its internal components may cause the contract to be canceled. It is essential to consider this before attempting to disassemble the controller.
Can I clean the Xbox One controller while disassembling it?
Yes, disassembling the Xbox One controller allows you to access and clean the individual components more thoroughly. You can clean the buttons, triggers, and other parts using gentle cleaning solutions or isopropyl alcohol and a soft cloth or cotton swab.
Can I replace the Xbox One controller's buttons or thumbsticks?
Yes, by disassembling the Xbox One controller, you can access and replace the buttons, thumbsticks, or other components. This allows for customization or replacement of damaged parts.
Are there any risks involved in disassembling the Xbox One controller?
Disassembling the Xbox One controller carries some risks, such as damaging the internal components, voiding the warranty, or causing the controller to malfunction if not reassembled correctly. It is essential to proceed cautiously and have proper knowledge or guidance before disassembling the controller.
Can I find tutorials or guides on disassembling the Xbox One controller?
Yes, there are various tutorials and guides available online that provide step-by-step instructions and visuals on how to disassemble the Xbox One controller. These resources can be helpful for beginners or those unfamiliar with the process.
Should I disassemble the Xbox One controller if I need to become more experienced with electronics?
Disassembling the Xbox One controller requires a basic understanding of electronics and proper handling of delicate components. If you are not experienced or comfortable working with electronics, it is recommended to seek assistance from a professional or refrain from disassembling the controller to avoid accidental damage.
See Also: How To Change NAT Type On Xbox One? (Best Method)
Conclusion
Here you now have the option to disassemble the Xbox One controller very simply. You only need to follow the steps in the given order. This will help you to avoid any problems that can occur. For example, if you see that your joystick gives you a problem, you can resolve it quickly by following the techniques here. Also, check out the best Xbox One mystery games, Off-Road Games and Truck Games.
If it is a small problem, you might not want to run to the store to resolve it. You have to spend just less than $10 to rectify the issue. The advantage is that you will have this tool for life. So if you encounter this issue ever again, you already know how to disassemble xbox one controller!
You shouldn’t go on buying any tools. The method here will work out in most cases; only when you see it does not work will you buy the tool. Or rather than that, take the help of an expert so that you do not cause any damage to your console.
It implies that you might have to purchase a new one if there is irreparable damage. So always be careful when you are outperforming this. Also, you know how to disassemble the xbox one controller, but once you do this, your free warranty claim is over.
The only solution would be to pay them, or else you might have to give up the console and buy a new one for yourself.
See Also: How To Power Xbox One Without Brick With Troubleshooting Tips (2023)
