Reimage Repair is one of the most annoying redirections that your browser will face. If you see a webpage claiming that you need to download software to clean your Windows system, and the website is reimaged plus, you are probably experiencing this irritating adware that has sneaked into your computer.
Here is one of the methods to Remove Reimage repair pop-up Ads:
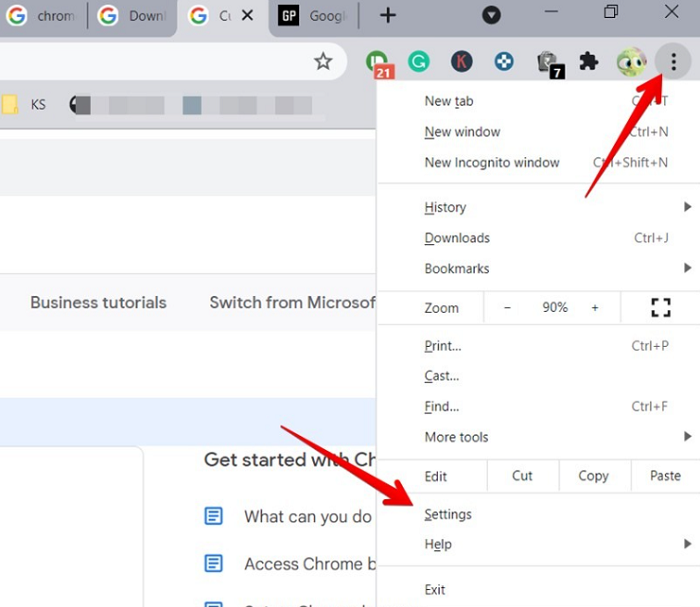
- Open your Chrome browser and click on the More option or three vertical dots, followed by Settings.
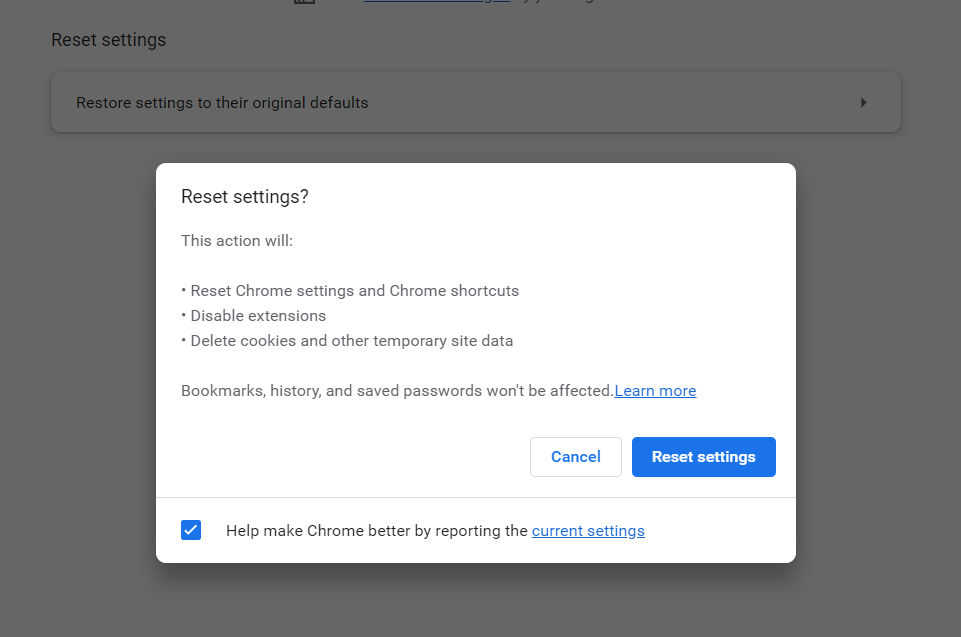
- Scroll down in Settings to click “Show advanced settings…”, then select Reset settings, and click Reset.
- Alternatively, you can reset browser settings via the Advanced settings tab, then select Reset.
Usually, you will have to battle this adware when you download and install software from unknown sources. Such software will conveniently omit to mention that there is going to be adware installed along with your desired unlicensed software.
See Also: How To Bypass Cookie Consent Pop-Ups I A Complete Guide
Table of Contents
3 Methods to Remove Reimage Repair Pop-up Ads
Using Malwarebytes Scanner
-
- Download the Malwarebytes software online. You must keep in mind that it will not get in the way of your usual antivirus program. It is a handy tool when it comes to identifying malicious software or adware, especially ones like Reimage Repair.
- Once you have downloaded the Malwarebytes threat scanner, you must set it up using the Malwarebytes Setup Wizard. Click Next and Finish wherever appropriate.
- You will appreciate the software’s quick action; it is ready to go. You must note that the Malwarebytes premium trial ends in a little less than two weeks, after which you will be asked to pay for a premium license. The trial shows you the various forms of protection, Scan status, and protection history. Also, you must click on Scan Now to begin the process of eliminating malware.
- After a while, the software will finish detecting all harmful files. Malwarebytes will list out the definite malware as well as the potentially unwanted programs in your system. Usually, the potentially unwanted programs could also contain the Reimage repair adware. After making sure you’re not losing any necessary files, you must click on the option that says “Quarantined Selected” at the bottom.
- The Malwarebytes program will get rid of your annoying adware. After the program executes the quarantine, you must exit and restart your computer.
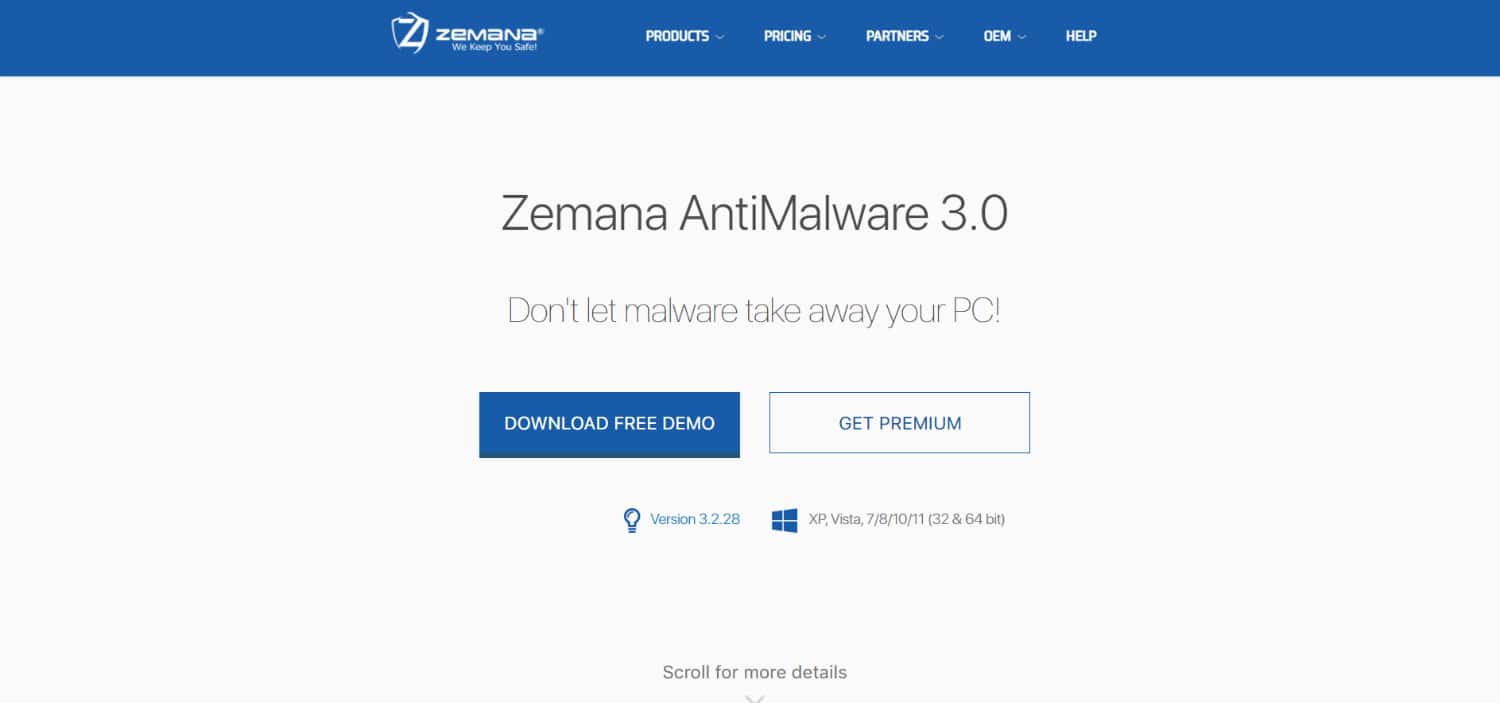
Using Zemana AntiMalware Portable Software
- You can download Zemana AntiMalware Portable from an online source, as it is a free malware scanner.
- Once you download the software, you must install it and set it up. You must allow the software to make changes to your device.
- Once you have let Zemana AntiMalware run on your system, you will see a display showing you the License, Last Scan, and Last Update Check. You must click on the button named Scan to proceed with the malware detection.
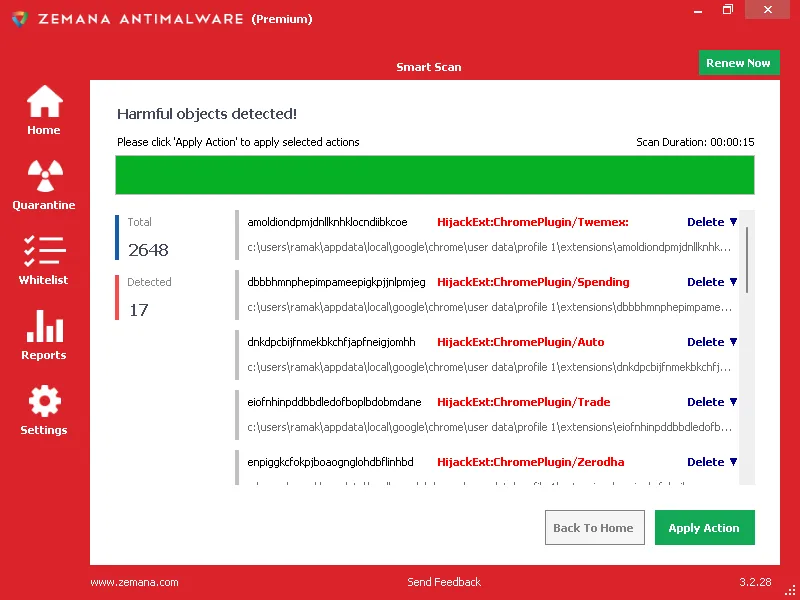
4. Zemana AntiMalware Portable will take about ten minutes to scan your computer for all undesirable programs, including the unpleasant Reimage Repair adware. After scanning, you will see a list of all the malicious files in your system. You must click on Next to eliminate all the threats at once.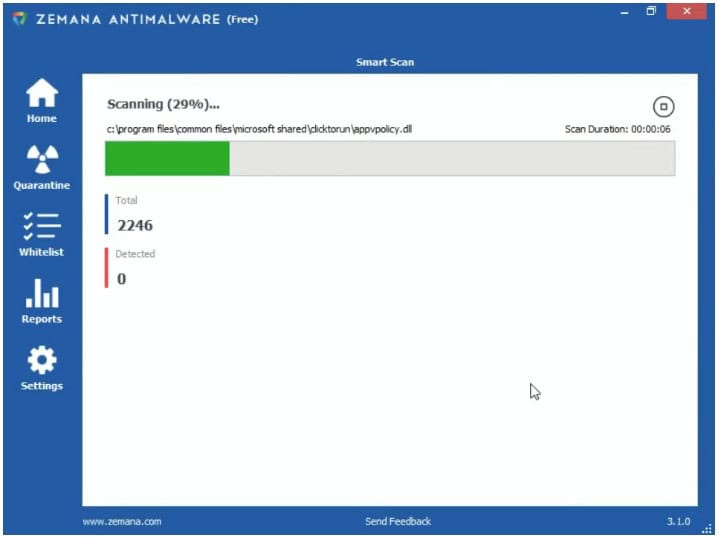
5. Similarly, Zemana AntiMalware Portable completes the task. You are free to exit the software and continue. Suppose you feel that our system is still under threat of adware. Also, you could try to restart the computer right after exiting the software.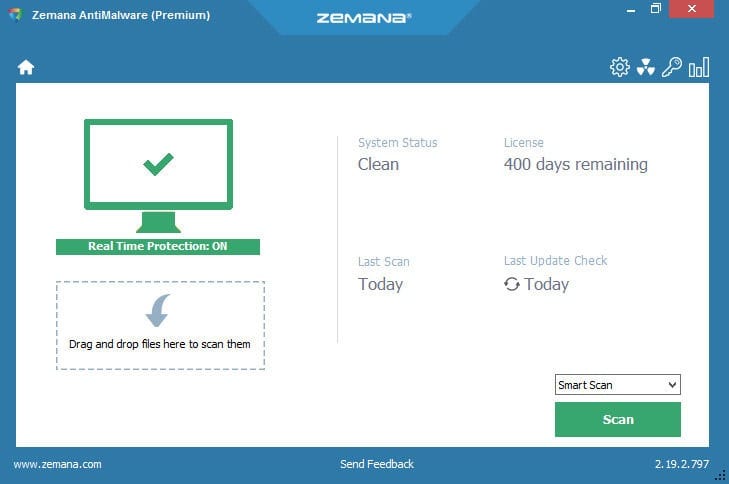
By Resetting Google Chrome Settings
If the Reimage Repair adware has modified your browser settings, you must reset those settings. Rest assured, you will not lose your saved passwords and favorites.
- You must click on your browser icon. You must proceed to choose More or three vertical dots, and then you must select Settings.
- From settings, you must scroll to the bottom and click on “Show advanced settings…” Next, you can select Reset settings and finally click on Reset.
- Also, you can reset the browser settings by finding the Advanced settings tab and clicking on Reset.
In Mozilla Firefox, you will have to seek out a Troubleshooting Information option under the Help menu. From there, you must click Refresh Firefox and wait for your browser to return to the original settings. Finally, you may click on Finish.
FAQs
Are there any specific steps to remove Reimage Repair from Mac?
Reimage Repair is primarily designed for Windows systems and may not have a Mac version. However, if you have inadvertently installed Reimage Repair on your Mac, you can try manually deleting its associated files and folders or using a Mac uninstaller tool to remove it.
Does removing Reimage Repair remove all its traces?
The standard uninstallation process should remove most traces of Reimage Repair. However, some residual files or registry entries may remain. To ensure the complete removal, you can use advanced uninstallation tools or perform a thorough system scan with reputable antivirus or antimalware software.
Can Reimage Repair leave behind browser extensions or add-ons?
Reimage Repair may install browser extensions or add-ons to integrate with web browsers. When uninstalling the program, it's advisable to check your browser's extension or add-on settings and remove any related entries manually. This ensures the complete removal of Reimage Repair from your browser.
Is it necessary to remove Reimage Repair if I no longer use it?
If you no longer use Reimage Repair or find it unnecessary, removing it from your system is generally recommended. Uninstalling unused programs helps declutter your computer, free up storage space, and reduce potential conflicts or system slowdowns.
Can I reinstall Reimage Repair after removing it?
Yes, you can reinstall Reimage Repair if you choose to do so. However, it's essential to consider whether you genuinely need the program and its services. Before reinstalling, carefully evaluate its features, reputation, and compatibility with your system to make an informed decision.
What should I do if I encounter difficulties removing Reimage Repair?
If you encounter difficulties removing Reimage Repair through the standard uninstallation process, you can try the following steps: 1) Restart your computer and attempt the uninstallation again. 2) Use a reputable uninstaller tool or system cleanup utility. 3) Seek assistance from technical support or online forums for specific guidance.
Conclusion
These are the methods by which you can get rid of Reimage Repair. You should not have to put up with adware that affects your system productivity and browsing experience.
If malware scanning software offers a limited free trial, you must remember to uninstall the software after the trial.
See Also: Top 17 Free Internet Blockers To Boost Your Productivity