An Access Point Name or APN is the necessary set of information that we need on our device to route it to the correct server and hence get a mobile data connection. We must include different values to sprint APN settings, including name, APN, APN type, Proxy, etc. Your network service provider can read these settings from your Mobile.
This setting will help them to determine an IP address for your device correctly. And then they can also connect you to the correct secure gateway through which you can connect to the Internet. Thus, you must know about Sprint APN Settings.
These settings also inform the network carrier whether you want them (the service provider) to connect you to a private network such as a VPN. To ensure that the carrier can provide all these services to you, you must have a correctly entered APN setting. Here we are looking at the Sprint APN Settings. If you’re unsure about your device’s compatibility or status, consider checking it with reliable tools like ESN Checkers for Sprint.
See Also: GoSmart APN Settings | Step-by-Step Guide
Table of Contents
About Sprint APN
A telecommunication company, Sprint, was launched on December 21, 1899. Land Park, Kansas, United States, is where there are sprint networks headquarters. Michel Combes is the Business Executive of the Sprint Company. The SoftBank Group and T-Mobile United States are the owning company of this network. Jacob Brown and Clemson Brown are the founders of the Sprint network. The services provided by Sprint access points names- Mobile telecom, Wireless communications, net benefits, and Broadband.
Sprint network provides unlimited speak, data, and text nationwide for purchasers. Users can also go along with basic details and accessible text for worldwide destinations to almost two hundred. This network offers several recharge plans that work for any budget. Sprint network provides purchasers with electronic communication, wireless voice, and broadband services. Sprint Network additionally offers 5G services for purchasers. However, the 5G network is solely compatible with 5G phones. Look at the APN Settings for Windows, iOS, and Sprint on Automaton and Blackberry devices.
See also: 6 Best Free Sprint IMEI Checker Tools
Working On Sprint APN Settings
Sprint is among the top 5 largest telecommunication networks with millions of users. So if you are a Sprint user facing any issues with your mobile data connection, we are here to help you.
The access Point Name or APN connects your network service provider and device. You can only have a working data connection and related services if you have a correctly activated Access Point Name Settings.
See also: AT&T APN Settings | Step-by-Step Guide
Therefore, correctly activating your APN settings is necessary for connecting your mobile device to the Internet. Your smartphone would probably automatically download and install the APN settings from your service provider.
But if it does not work, you can manually enter the APN settings. And we are here with instructions on manually entering the APN settings. Just check this article on Sprint APN Settings, and you will understand how to manually change the APN settings on Android, iPhone, Windows Phone, and Blackberry.
See also: Ultra Mobile APN Settings | Step-by-Step Guide
Sprint APN Settings for Android
There are certainly more Android users these days than any other device. Thus here are the steps for APN settings for Android.
- Open Settings. Read this article to learn about the Tracfone APN Settings.
- Open Wireless and Networks/ Connections/ More. (This Option will have different names according to the version of Android you are using.)
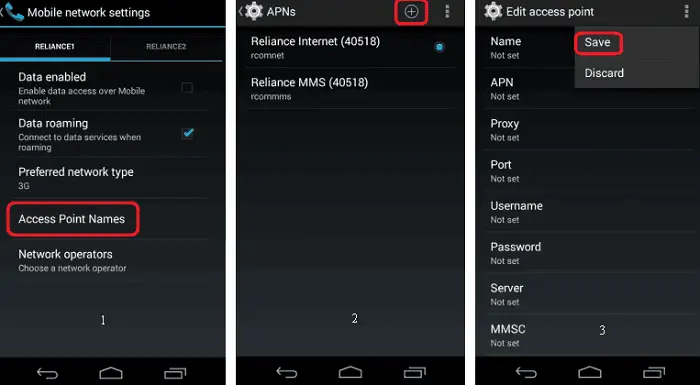
- Tap on Mobile Networks.
- Select Access Point Names.

- Select Add new APN option from the ‘add’ option or the menu(most probably three dots on the top right corner).
Username: <Not Required>
Password: <Not Required>
Server: <Not Required>
MMSC: http://mms.sprintpcs.com/servlets/mms
MMS Proxy: 68.28.31.7
MMS Port: 80
MCC: 310
MNC: 120
Authentication Type : <Not Required>
APN Type: internet + mms
APN Protocol: IPv4
Save the APN settings.
Select the APN setting that you just entered for current use.
Check for a mobile data connection on your device.
See Also: T-Mobile APN Settings | Step-by-Step Guide
See Also: Top 10 Bestseller Sprint Flip Phones In 2023
Sprint APN Settings For iPhone
Sprint APN Settings for iPhone are given here. Follow the steps accurately and get the required details.
- Open Settings
- Select Mobile Data/ Cellular Data. Read this article to learn about Consumer Cellular APN Settings.
- Choose Mobile Data Network/ Cellular Data Network
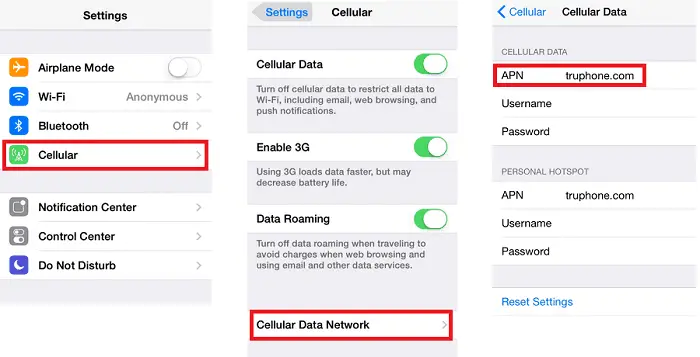
- Select the option to add a new APN from the menu.

- Fill in the new APN using the below information:
Password: <Not Required>
For MMS:
Name: Sprint
APN: cabinet.specs
Username: <Not Required>
Password: <Not Required>
MMSC: http://mms.sprintpcs.com/servlets/mms
MMS Proxy: 68.28.31.7:80
Max Message Size: <Not Required>
MMS UA Prof URL: <Not Required> - After entering these values, press the back arrow three times. These settings will be automatically saved.
See Also: H2O Wireless APN Settings | A Step-by-Step Guide
Sprint APN Settings For Windows Phone
Here’s the setting of APN for Windows Phone. Go through with it thoroughly.
- Swipe the Screen and Open Apps list
- Open settings
- Select Networks and Wireless
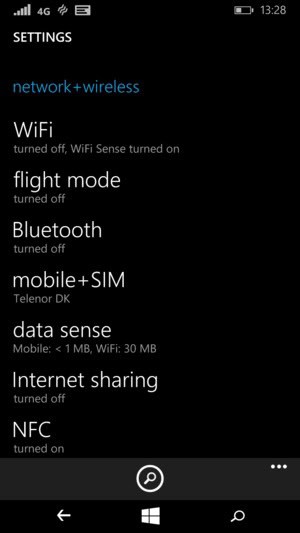
- Choose Mobile + Sim. Read this article to earn about Family Mobile APN Settings.
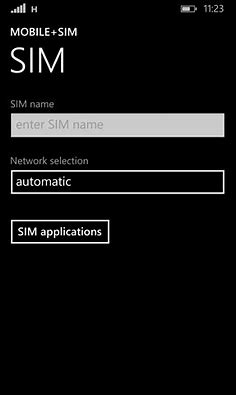
- Select Sim Settings
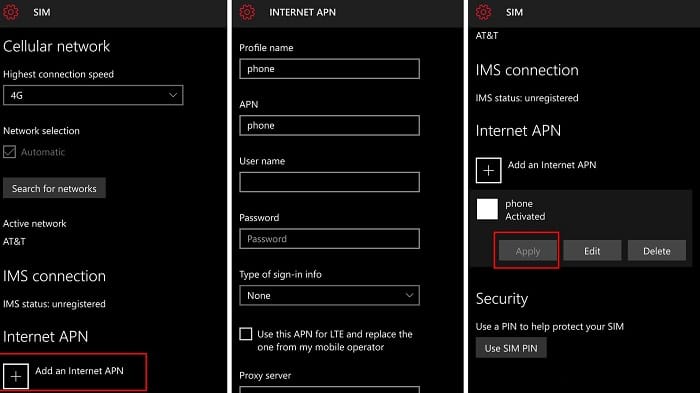
- There will be separate settings options for adding APN for the Internet and MMS.
- Select Add an Internet APN. Read this article for steps on MetroPCS APN Settings | Step by Step Guide.

- Password: <Not Required>
- Proxy Server (URL): <Not Required>
- Proxy Port: <Not Required>
- IP Type: IPv4
- Select the box to use this APN for LTE also.
- Save the APN.
- Select the option to add an MMS APN.
Enter the following information in the boxes:
-
- APN: cabinet.specs
- Username: <Not Required>
- Password: <Not Required>
- WAP Gateway (URL): 68.28.31.7
- WAP Gateway Port: 80
- MMSC: http://mms.sprintpcs.com/servlets/mms
- MMSC Port: <Not Required>
- Maximum MMS Size: 1024
- IP Type: IPv4
- Save the APN.
Also, don’t forget to check out this step-by-step guide on APN settings for LycaMobile!
Sprint APN Settings For Blackberry
Steps on Sprint APN Settings for Blackberry. Follow the steps sequentially to get the solution.
- Go to Settings

- Select Network Connections
- Open Mobile Network.
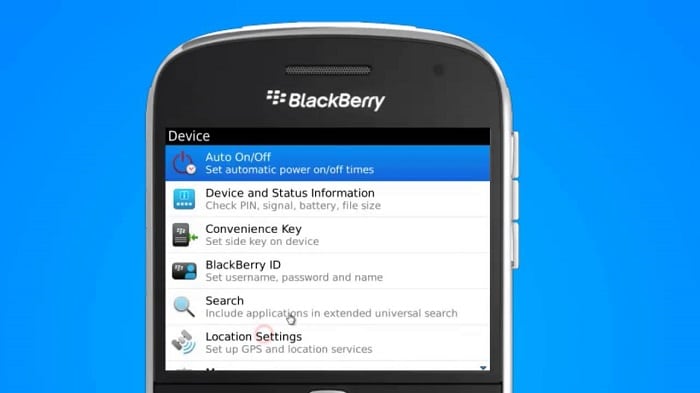
- Select APN. Read the article for details on Verizon APN Settings | Step-by-Step Guide.
- Open Mobile Plan and select from Contract or Prepay

- Password: <Not Required>
- Save the APN settings.
- For adding an MMS APN.
- Go to messages.
- Open Message settings.
- Select Text Messages.
- Select MMS.
- Open Advanced.
- Enter the following information:
The next is the information that will be used as input.- Access Point Name (APN): cinet.specs
- Username: <Not Required>
- Password: <Not Required>
- MMSC Settings:
- MMSC URL: http://mms.sprintpcs.com/servlets/mms
- Proxy URL: 68.28.31.7:80
- Username: <Not Required>
- Proxy Password: <Not Required>
- Save the entered APN Settings.
See Also: Cricket Wireless APN Settings | Step-by-Step Guide
FAQs
How do I set up APN for data services?
Here are some steps to set up APN for data services. Tap Menu Button, which is on the home screen of the device. Go to the APN Settings. Select the Mobile networks. Choose the option of Access Point Names. Then tap on the Menu option. Then go to the APN settings. Choose the Name field option. After choosing Internet, tap OK and unlock APN settings.
What are my APN settings?
To know about the APN settings of your device, follow the below steps: To access the apps for the APN settings go to the home screen. Then directly go to Settings. Select Connections. After that, choose Mobile networks. Select the option of Access Point Names. Select the Access Point that needs to be checked.
What is APN for cellular?
The information of the APN setting that the phone analyses to set up a link is the Access Point Name (APN). APN sets up a link to the gateway. The link is between the public Internet and the carrier's cellular network.
Why are my APN settings locked?
At times, the settings of APN on the device get locked. Aforesaid happens when they show grayed out, which seems to be unmodified. The happening often indicates that your currently connected carrier has set them and that you shouldn't need to modify them.
Which APN type is best?
The best APN settings cant be described as each service provider has different facilities and approaches. The APN settings can be downloaded automatically in the phone condition being the user must have Android 8.0 or the latest version. MMS and data functioning facility will start after this two-tap installation process.
Conclusion
We hope these instructions have helped you solve the problem you are facing regarding your mobile data connection. Enjoy trouble-free internet surfing and MMS services with the correct APN settings.
We request you keep in mind that different smartphones working on different versions of various operating systems will change the naming and placement of particular options.
So if you cannot find a specific option, do not worry. It will surely be available on your smartphone but probably under a different name or option. Check thoroughly to get the correct settings. And enter the above values correctly.