")
Table of Contents
Have thousands of photos on your phone but hesitate to share most of them? You’re not alone. Between blurry selfies, grainy low-light shots, and faded family photos, we all have images that deserve a second chance.
Fortunately, AI photo enhancers can now transform your worst photos into shareable, print-quality images—instantly and for free. Moreover, this comprehensive guide shows you exactly how.
What You’ll Learn
- How AI photo enhancement actually works (in simple terms)
- 3 major photo problems AI can solve for free
- Top 5 free AI photo enhancer tools you can use today
- Pro tips for getting the best results
- Privacy and security considerations
See also: Top 15 Tools to Unblur Photos Online
Understanding AI Photo Enhancement: The Technology Made Simple
Traditional Photo Enhancement vs. AI Enhancement
The Old Way: Stretching and Blurring
Traditional photo editing software used methods like bicubic interpolation. Think of it like stretching a small piece of fabric—you’re just making the existing squares bigger. As a result, you get blurry, pixelated images that look worse than the original.
Additionally, these old tools could only work with the data already in your photo. In other words, they couldn’t add missing details or fix fundamental problems.
The AI Way: Intelligent Reconstruction
In contrast, AI photo enhancers use deep neural networks trained on millions of high-quality photos. Instead of just stretching pixels, they intelligently rebuild your image by:
- Recognizing patterns: The AI identifies what blurry edges should look like based on its training
- Adding realistic details: It reconstructs missing information like skin texture, hair strands, and sharp edges
- Creating new pixels: The AI generates details that weren’t in the original photo
Consequently, the result looks like you retook the photo with a professional camera, not just edited the original.
How AI Photo Enhancement Works: Two Key Technologies
1. Denoising and Deblurring
Initially, AI identifies and removes visual “noise”—that grainy speckling you see in low-light photos. Simultaneously, it sharpens edges blurred by camera shake or poor focus, while preserving important textures and details.
2. Super-Resolution Upscaling
Furthermore, this technology increases your image resolution dramatically (from 480p to 4K, for example) without losing clarity. Specifically, AI adds intelligent details during the upscaling process, making small images print-ready.
3 Major Photo Problems AI Solves (For Free)
1. Restore Old Family Photos: Bring History Back to Life

The Problem
Old photographs suffer from multiple issues:
- Faded, washed-out colors
- Physical scratches and creases
- Blurry faces from old film cameras
- Sepia tone or yellowing
- Deteriorating quality over time
Essentially, your family memories are literally decaying in photo albums and old frames.
The AI Solution
Thankfully, modern AI photo restoration tools offer three powerful capabilities:
Scratch and Tear Removal
First of all, AI identifies physical damage lines and uses surrounding image data (a process called inpainting) to seamlessly fill in missing areas. As a result, scratches and tears simply disappear.
Automatic Colorization
Similarly, the AI analyzes context clues—sky, grass, clothing, skin tones—to apply historically accurate, natural-looking color to black-and-white photos. Therefore, it brings the past to life while maintaining authenticity.
Facial Reconstruction
Most importantly, this is where AI truly shines. Specialized face restoration models like GFP-GAN can rebuild heavily blurred or degraded faces, making eyes sharp and skin smooth with uncanny clarity.
Best Tools for Photo Restoration:
- Remini (mobile app) – Exceptional for face restoration
- Fotor (web/mobile) – Great all-around restoration features
Real-World Impact: Transform faded family albums into vivid memories you can share with younger generations.
See also: How to Add a Smile to a Photo: A Comprehensive Guide
2. Fix Blurry Selfies and Low-Light Photos
The Problem
We’ve all captured the perfect moment only to discover:
- The camera focus was slightly off
- Motion blur from camera shake
- Grainy, noisy texture from dark lighting
- Soft, fuzzy details that ruin the photo
Unfortunately, these “almost perfect” shots often get deleted or buried in your gallery.
The AI Solution
Advanced Noise Reduction
To begin with, low light creates digital noise—that multi-colored speckling across your image. However, AI identifies these noise patterns and removes them while preserving important textures like fabric weave or wall patterns. Unlike traditional filters that just blur everything, AI is selective.
Intelligent Unblurring
Additionally, by analyzing how motion blur affects your image, AI can reverse the blur effect and restore sharpness to your subject. In fact, it’s particularly effective for slight focus issues and minor camera shake.
Best Tools for Fixing Blurry Photos:
- YouCam Enhance – Excellent for general photo improvement
- VanceAI – Powerful denoise and sharpen features
- Remini – Outstanding for blurry selfies and portraits
Real-World Benefits:
- Save restaurant photos taken in dim lighting
- Fix concert photos taken from a distance
- Rescue blurry group selfies
- Improve zoomed-in shots
3. Upscale Photos for Printing and High-Resolution Displays
The Problem
You want to:
- Print a small social media photo on a large canvas
- Display a web image on a 4K or 8K screen
- Create professional marketing materials from phone photos
- Zoom in on product photos without pixelation
Typically, small images look fine on your phone but become pixelated and blurry when enlarged.
The AI Solution: Smart Upscaling
Remarkably, AI upscaling can increase your image resolution 2x, 4x, or even 8x the original size without typical pixelation. Specifically, the technology:
- Maintains sharp edges and fine details
- Adds realistic texture during enlargement
- Creates print-ready files that meet professional DPI requirements
- Makes small images suitable for large displays
Best Tools for Image Upscaling:
- Upscale.media – Fast, specialized upscaling up to 4x
- Upscayl – Free desktop app for serious upscaling
- VanceAI – Comprehensive upscaling with multiple models
Professional Applications:
- E-commerce product photography
- Print design and canvas prints
- Professional presentations
- Digital marketing materials
- Website graphics
Quality Comparison: Indeed, AI upscaling makes budget phone photos look like they came from a $5,000 professional camera setup.
Top 5 Free AI Photo Enhancer Tools in 2025
Here’s your practical guide to the best free tools available today, with realistic expectations about their limitations.
1. Remini – Best for Face Restoration and Portraits
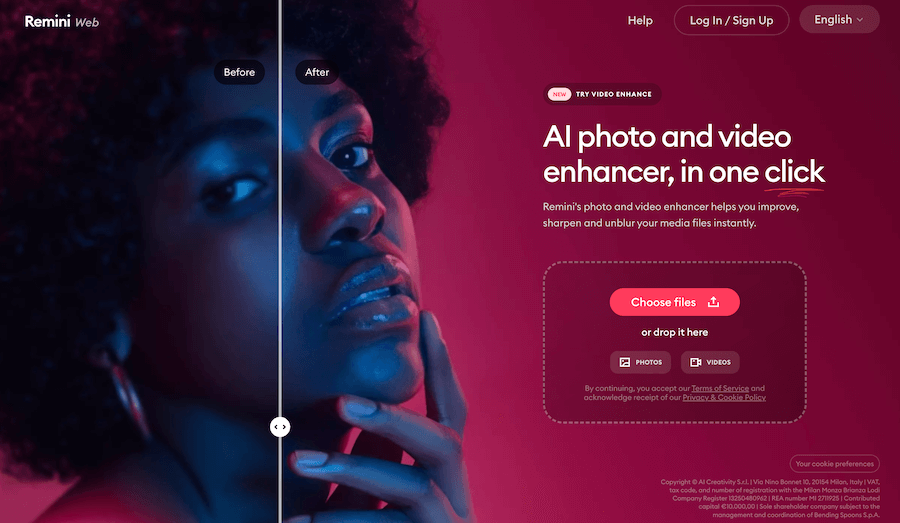
Platform: Mobile app (iOS & Android)
Best For:
- Restoring blurry faces in old photos
- Enhancing portrait selfies
- Bringing clarity to family photos
- Fixing unfocused faces in group shots
Why It Stands Out: Notably, Remini offers unmatched quality for human faces. Its specialized AI model is specifically trained on facial features, producing remarkably sharp and natural-looking results.
Free Tier: 3-5 photo enhancements daily, with occasional video ads or watermarks. Additionally, extra enhancements are available through watching ads.
Download: iOS App Store | Google Play Store
2. Fotor – Best All-in-One Editor with AI Enhancement
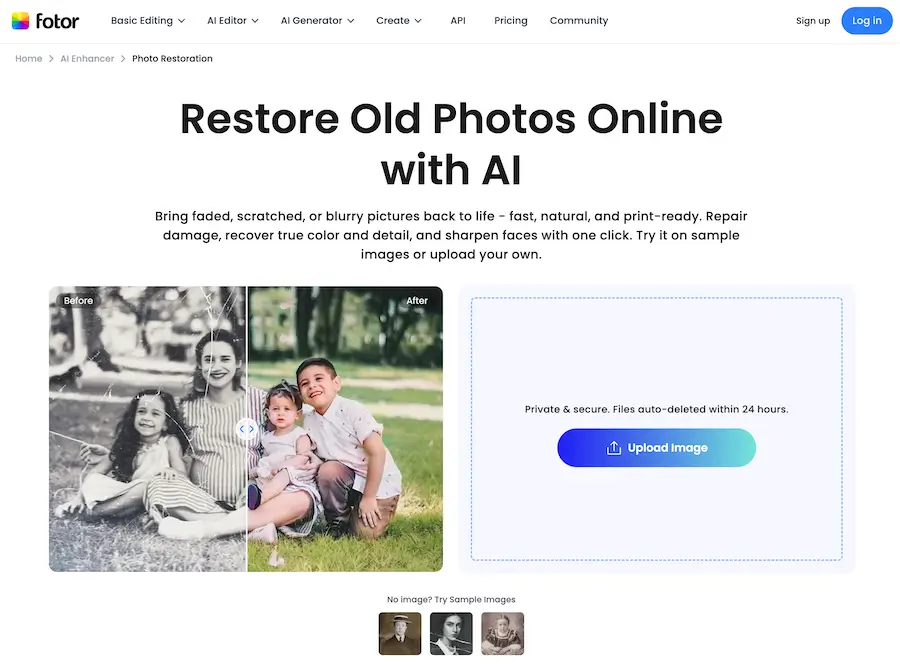
Platform: Website & mobile app
Best For:
- Processing multiple photos at once (batch editing)
- General photo enhancement and color correction
- Combining AI enhancement with traditional editing
- Old photo restoration with colorization
Why It Stands Out: Essentially, Fotor combines powerful AI enhancement with a full suite of editing tools. Therefore, it’s perfect for users who want to do more than just enhance.
Free Tier: Access to basic enhancement tools and many AI features. However, high-resolution (4K) exports and advanced AI models require premium subscription.
Visit: Fotor.com
3. Upscale.media – Best for Quick Image Upscaling
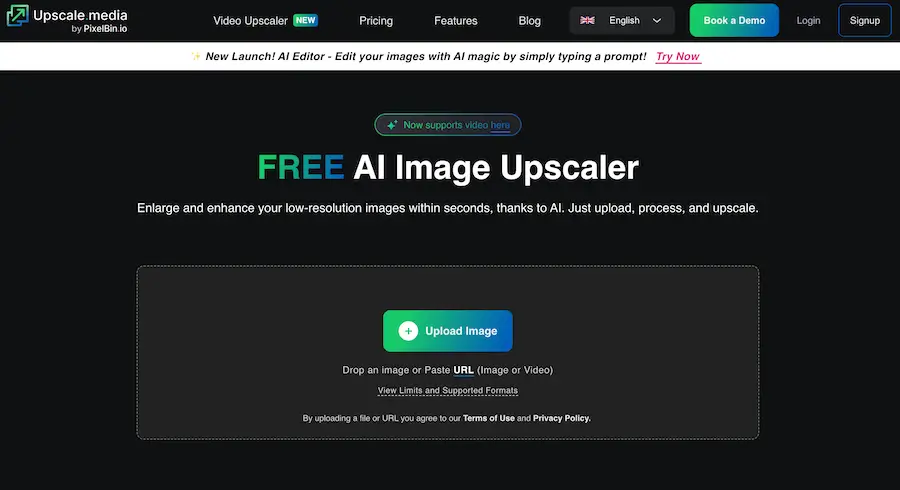
Platform: Website
Best For:
- Instantly increasing image size and resolution
- Preparing images for printing
- Enlarging photos up to 4x original size
- Quick, no-account-needed enhancement
Why It Stands Out: This specialized tool focuses entirely on upscaling, making it fast and simple. Moreover, there are no complicated menus or options—just upload and enhance.
Free Tier: Completely free for standard resolution exports (up to 4x). Nevertheless, premium is required for extreme upscaling (8x+) or batch processing.
Visit: Upscale.media
4. Picsart – Best for Social Media Creators

Platform: Mobile app & website
Best For:
- Enhancing photos and immediately adding creative effects
- Social media content creation
- Combining AI enhancement with filters and stickers
- Quick edits for Instagram, TikTok, and other platforms
Why It Stands Out: Perfect for creators who want to enhance photos and immediately style them for social media. In essence, it’s an all-in-one creative platform.
Free Tier: Access to basic AI enhancement and extensive editing tools. On the other hand, high-resolution exports and advanced AI features are limited to paid plans.
Visit: Picsart
5. Luminar Neo – Best Professional-Grade AI Tools (Trial)
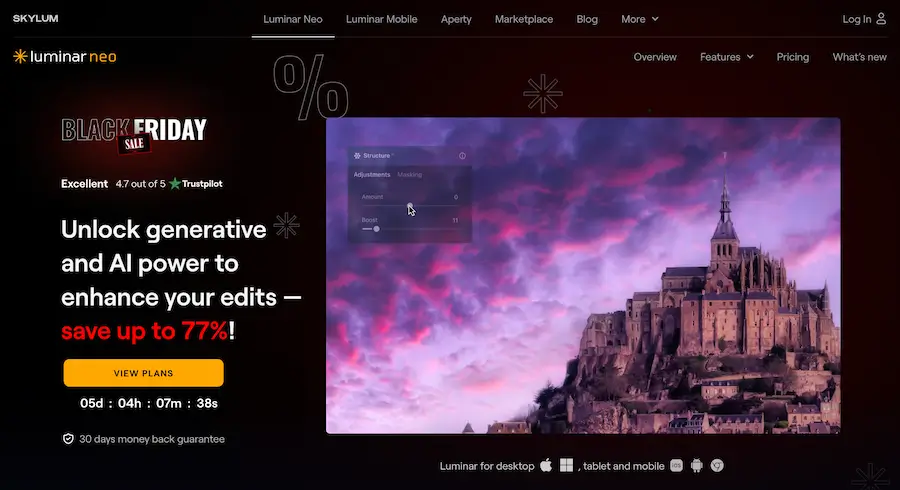
Platform: Desktop software (Mac & Windows)
Best For:
- Professional photographers
- Advanced editing with AI assistance
- High-quality results for important projects
- Testing professional tools before committing
Why It Stands Out: Notably, it offers the most sophisticated AI tools including Sky Replacement, Relight AI, and professional-grade enhancement. While it’s paid software, the free trial gives you full access.
Free Tier: 7-day free trial with complete feature access. Consequently, it’s perfect for one-time projects or testing before purchasing.
Visit: Luminar Neo
Pro Tips: Getting the Best Results from AI Photo Enhancers
✅ Do’s: Maximize Your Results
- Start with the Best Original Possible Even AI has limits. A slightly blurry photo will produce spectacular results, but a photo where your subject is just a few unrecognizable pixels won’t improve much.
- Experiment with Different AI Models If the “General Enhance” result looks unnatural or over-processed, try specialized models like “Denoise Only” or “Face Enhancement” instead.
- Use High-Quality Output Formats Always download your enhanced images in PNG or high-quality JPEG format to preserve all the new details AI created.
- Try Multiple Tools Different AI models excel at different tasks. If one tool doesn’t give you perfect results, try another—they use different approaches.
- Save Your Originals Always keep the original photo. AI enhancement is non-destructive, but you want the option to try different enhancement approaches.
❌ Don’ts: Avoid These Common Mistakes
- Don’t Expect Miracles from Tiny Images Screenshots and images under 100 pixels in any dimension won’t enhance well. The AI needs some information to work with.
- Don’t Use Heavily Compressed Files Low-quality JPEGs with heavy compression artifacts won’t enhance as well as higher-quality originals.
- Don’t Over-Enhance Running photos through multiple AI enhancers or applying enhancement repeatedly can create an unnatural, over-processed look.
- Don’t Ignore the Preview Always check the preview before downloading. Sometimes AI makes incorrect assumptions that need adjustment.
Privacy and Security: Protecting Your Photos
Understanding the Process
To enhance your photo, most AI tools require uploading it to their servers where the AI processing happens. Your image is sent to their “AI brain” for enhancement.
Important Questions to Ask:
- Where is my photo stored?
- How long is it kept?
- Who can access it?
- Is it used for AI training?
Safety Guidelines
✅ Safe Practice: Use Established Companies
Stick to well-known, reputable services:
- Remini (owned by established company)
- Fotor (established since 2012)
- Picsart (major platform with millions of users)
- Adobe products (industry standard)
These companies have:
- Clear, published privacy policies
- Automatic image deletion (usually within 24 hours)
- Secure, encrypted upload processes
- Established reputations to protect
🚨 Red Flags: Avoid These
Be cautious of:
- Brand-new, unknown “free AI tools” with no company information
- Apps requesting full photo library access
- Services with no clear privacy policy
- Unknown developers or websites
For Sensitive Photos:
If you’re enhancing private family photos, professional documents, or confidential images:
- Read the privacy policy first
- Consider using desktop software that processes locally
- Avoid uploading anything you wouldn’t share publicly
- Use paid services that guarantee privacy
Understanding AI Limitations: The Uncanny Valley Effect
When AI Gets “Too Perfect”
Sometimes, especially with heavily degraded old photos or extremely blurry faces, AI reconstruction can look unnaturally smooth or slightly artificial. This is called the “Uncanny Valley” effect.
Why This Happens:
The AI is making its best educated guess based on training data. It’s creating details that weren’t in the original photo, not recovering hidden information. The technology is incredibly advanced but not perfect.
What to Remember:
- AI creates, not discovers: Enhanced details are intelligent reconstructions, not recovered original data
- The goal is improvement: You’re making memories shareable, not achieving absolute photographic accuracy
- Technology is improving: Each year, AI models become more sophisticated and natural-looking
- Some photos have limits: Extremely damaged or tiny images may always show some reconstruction artifacts
When to Accept “Good Enough”:
For old family photos, a slightly smoothed face that’s clear and recognizable is infinitely better than a blurry, faded original. The goal is preserving and sharing memories, not forensic accuracy.
See also: Best AI Subscriptions & Bundles Worth Paying For in 2025
FAQs
Are AI photo enhancers really free?
Many tools offer free tiers with limitations on daily enhancements, resolution, or features. They’re sufficient for casual use, but serious users may need paid plans.
Can AI fix extremely damaged photos?
AI works best on photos with moderate issues. Severely damaged photos (mostly missing, heavily torn, or just a few pixels) have limited improvement potential.
How long does AI photo enhancement take?
Most enhancements complete in 5-30 seconds depending on image size and the tool used. Desktop software may be faster than web tools.
Will enhanced photos look fake or artificial?
Modern AI aims for natural results, but heavily damaged photos may show some reconstruction artifacts. Most moderate enhancements look completely natural.
Can I use enhanced photos commercially?
This depends on the tool’s terms of service. Most allow commercial use of enhanced versions of your own photos, but always check the specific tool’s policies.
Does AI photo enhancement work on videos?
Some advanced tools offer video enhancement, but it’s more resource-intensive and often requires paid subscriptions. Photo enhancement is much more accessible.
Conclusion: Rescue Your Memories Today
AI technology has democratized professional-level photo restoration and enhancement. What once required expensive software and expert skills is now free, instant, and available to everyone.
You No Longer Need To:
- Throw away photos taken in bad lighting
- Leave blurry selfies buried in your gallery
- Watch family history fade in dusty albums
- Accept pixelated images when you need them large
The Technology Is Here: AI photo enhancers can transform your worst photos into images you’re proud to share, print, and preserve for future generations.
Take Action: Try It Right Now
Here’s your challenge:
- Find the worst photo in your gallery—the most blurry, faded, or grainy image you have
- Choose one free tool from this guide (start with Remini for faces or Upscale.media for general photos)
- Upload your photo and click the enhancement button
- Watch AI work its magic in seconds
You’ll be amazed at what modern AI can bring back to life. Your memories deserve a second chance—give them one today.
Information current as of November 2025. Free tier limitations and features may vary. Always review privacy policies before uploading sensitive photos.
See also: 3 Simple Ways to Fix Grainy Photos