“Windows has detected an IP Address conflict”. Has this message ever flashed onto your screen? Don’t worry, you’re at the right place. Here we will solve what to do when you see “Windows has detected an IP Address conflict” on your PC/laptop screen. Be it a student or a professional. Everyone deals with the internet for basic needs. Some love to watch movies or TV shows online, whereas some are fan of music and download songs. Some use internet to spend time on social media and what not.
See Also: Top 10 Best & Fastest Free Public DNS Servers (Updated)
Connecting to the network source is a common fact in everyday life. Notwithstanding the various benefits of technology, there are technical glitches that are often in an encounter. One of the most common error is Windows has detected an IP Address conflict. Here are some solutions to this problem.
Table of Contents
What is an IP Address?
IP Address (Internet Protocol Address) or IP number is a temporary unique numerical address assigned to each device when it connects to a computer network which uses the Internet Protocol for communication. It is the address of a computer and identity which is used to identify it among all the other computers and network devices.
See Also: How to Stay Safe on the Internet: Online Safety Guide
Problem:
If an error message Windows has detected an IP Address conflict displayed on the computer, then it means that there is/are another device which has the same IP Address/Number as that of the PC. Such a problem arises when the router to which several devices are connected provides the same address to each connected device.
Having a similar IP address in more than one device is not feasible as it is a unique address that has a significant role in recognizing and pinpointing a device. It is same as the postal address that different houses have to differentiate to any post.
Windows has detected an IP Address conflict:
Such an error message displays on the screen, but this issue can quickly get a solution without much struggle.
Here are some easy solutions to get over this technical error. You just need to follow these steps carefully. If any troubleshooting method does not work then, repeating the process will surely solve the issue.
Methods of fixing the issue
Try out these methods for fixing “Windows has detected an IP Address conflict” issue:
Release and refresh IP Address
Command prompt can be used to refresh the IP Address provided to the system connected.
Step 1: Go to Start Menu, search for ‘cmd’. The command prompt window appears. Or follow the shortcut key ‘Windows Key+X’ and select command prompt admin from the menu.

Step 2: Type the following commands and press ‘Enter’ after each.
Step 3: Now have a check whether the issue is solved.
Restarting the router
One of the cases could be that the router is unable to assign proper IP Address to the computer and devices which connect to it. It might be a short-lived technical issue but can be easily solved by going through each step strictly.
Step 1: Look for the power/restart button on the router.
Step 2: Press the power button of the router. This will disconnect the devices which were previously connected to it. Wait for a duration of 2-3 minutes.
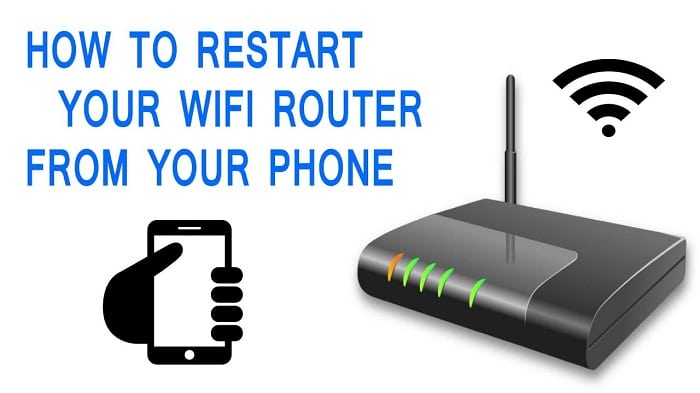
Step 3: Now, start the router once again by pressing the start button on it. Re-establish the connection on the various devices. This will provide new IP Address to the devices.
See Also: [Solved] This Site Can’t be Reached in Google Chrome – TechWhoop
Disable IPv6
IPv6 (Internet Protocol version 6) is the latest version of the Internet Protocol. IPv4 is a lower version of IP. Many devices do not support newer IPv6, so, many administrators advise that it is better to disable this protocol until it is fully phased out. The main reason behind making this address covering the shortage of IPv4 addresses eventually, the Internet will run out of IPv4 address. Moreover, Microsoft recommends not to enable the IPv6.
The IPv6 address can be disabled by following these steps:
Step 1: Go to ‘Start Menu’ search for run and click on it or hold the Windows Key and press R (Windows+R: shortcut). A new run window will appear on the computer screen.
Step 2: Type “ncpa.cpl” to open and press the Enter key. A window named ‘Network Connections’ will open.
Step 3: Then right click on Network Adapter and select Properties from the dropdown list.

Step 4: In the Properties window, deselect the Internet Protocol Version 6 (TCP/IPv6) and click OK.
Removing the static IP
A static Internet Protocol (IP) is a permanent number, Internet Service providers assign it to every computer. Sometimes there is an error due to the static IP. So, which one can modify by strictly following these mentioned steps.
Step 1: Go to ‘Start Menu’ search for run and click on it or hold the Windows Key and press R (Windows+R: shortcut). A new run window will appear on the computer screen. Another step of reaching the location is Control Panel>Network and Internet>Network and Sharing Center.
Step 2: If the connection is a wired internet connection, then right click on Local Area Connection else if the device is in connection with Wi-Fi, right click on Wireless Network Connection. A drop-down menu will appear. Click on the Properties option.

Step 3: Double-click on the Internet Protocol Version 4 (TCP/IPv4). Choose the choice Obtain an IP address automatically.
Select the option Obtain DNS server address automatically. Click OK on the (TCP/IPv4) windows > OK on the previous window and close all windows.
Step 4: Restart the system and check if there’s still that technical glitch.
Disable and Enable the Network Adapter
Step 1: Go to ‘Start Menu’ search for run and click on it or hold the Windows Key and press R (Windows+R: shortcut). A new run window will appear on the computer screen.
Step 2: It should be made sure that the PC is not facing any error that says Network Adapter Missing. Just put in “ncpa.cpl” in the textual box and press the Enter button.
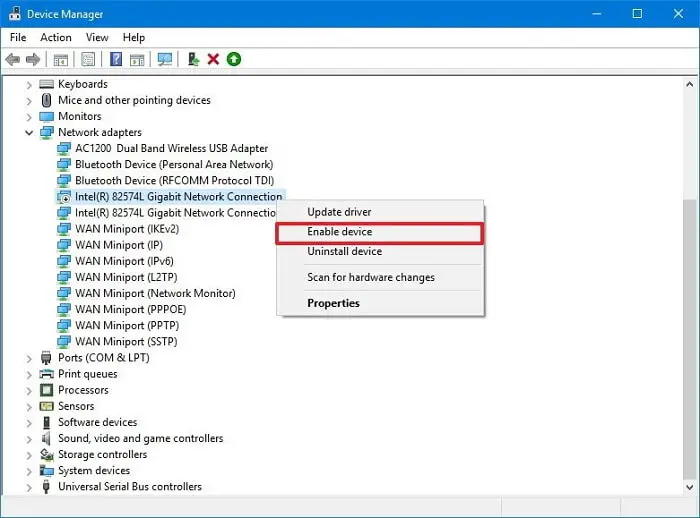
Step 3: Right click on the Wireless Adapter option and select Disable from the list that appears. It will result in stopping the network adapter on the computer.
Step 4: Again Right click on the option Wireless adapter and select Enable from the list. Finally, this will result in restarting the network adapter on the computer.
Still getting the message: “Windows has detected an IP Address conflict”? Don’t worry we have some more steps remaining for you to follow, before you proceed with surfing your internet.
See Also: [Solved] Fix “Ethernet doesn’t have a Valid IP Configuration” Error
Flush DNS and Reset TCP/IP
Step 1: Go to Start Menu, search for ‘cmd’. The command prompt window appears. Or follow the shortcut key ‘Windows Key+X’ and select command prompt admin from the menu.
Step 2: Type the following commands and press enter after each one:

Step 3: Follow Step 1 to open the command prompt again and type these:
Step 4: Reboot to apply the respective changes to the system. Flushing DNS fixes Windows has detected an IP address conflict error.
And we are done! Now the problem of “Windows has detected an IP Address conflict” is totally under control and you are free to surf your internet.
Conclusion
These were some of the methods to sort out the errors often encountered while connecting several devices to a network. These steps are efficient, time-saving and one can do at a low cost. After performing these steps, We are sure you won’t see “Windows has detected an IP Address conflict” anymore.
See Also: How to fix “ERR_SPDY_PROTOCOL_ERROR” in Google Chrome