Have you ever encountered issues using your iPhone to create a PDF? If the answer is yes, there’s no need to panic since this post will demonstrate 5 ways to make a PDF on iPhone. How to make a PDF on iPhone? Use the built-in “Print to PDF” feature, a third-party app, iCloud Drive, the Markup feature, or the Dropbox app to create a PDF on an iPhone.
- To access it, open the file and then select the Share option. From there, choose the Print function.
- Access the top Share menu on the screen and proceed to tap the second option.
- You have successfully converted the document into a PDF file. Please choose the destination where you want to send it.
These ways allow you to convert documents, photos, and other things to PDF format and save or share them on your iPhone. This in-depth article provides a thorough tutorial on creating PDFs on an iPhone using various techniques. The article offers detailed instructions on organizing, sharing, deleting, and converting PDF files on an iPhone, if you wish to set a default PDF opener in your Windows 10.
Buy: iPhone
See Also: How To Recognize Text In PDF? 4 Proven Methods You Can Use
Table of Contents
Top 5 Ways To Create PDFs On An IPhone
The procedures to create a pdf on iphone are listed below.
Make use of the integrated “Print to PDF” feature
Using your iPhone’s built-in “Print to PDF” feature is one of the easiest ways to make a PDF on an iPhone. Most iPhone printing-compatible apps have this feature, including native Apple programs like Pages, Numbers, and Keynote.

To use this feature, open the file or document you wish to convert to a PDF and tap the “share” icon. Choose “Print” and “PDF” from the sharing menu as the printer. By default, your document will convert into a PDF, which you can store on your phone.
Use an outside app
If the built-in “Print to PDF” capability is not accessible in your app, or if you want more advanced PDF creation choices, you can use third-party software for creating a PDF on your iPhone. You can simply convert documents, photographs, and other items to PDF format using one of the numerous fantastic apps on the App Store.
Adobe Acrobat, PDF Expert, and PDF Converter are well-liked choices. PDF applications can combine files, add notes and comments, and offer various other capabilities. Also, when it comes adding pictures or signatures in PDFs, review of WonderShare’s PDFelement is quiet positive.
In addition to popular third-party apps, another excellent option for your business PDF editing needs is Lumin PDF. Lumin PDF offers comprehensive features, making it a versatile business PDF editor.
See Also: How To Recognize Text In PDF? 4 Proven Methods You Can Use
Employ iCloud Drive
How to save as pdf on iphone? You can make PDFs on your iPhone using iCloud Drive to store and sync your files.
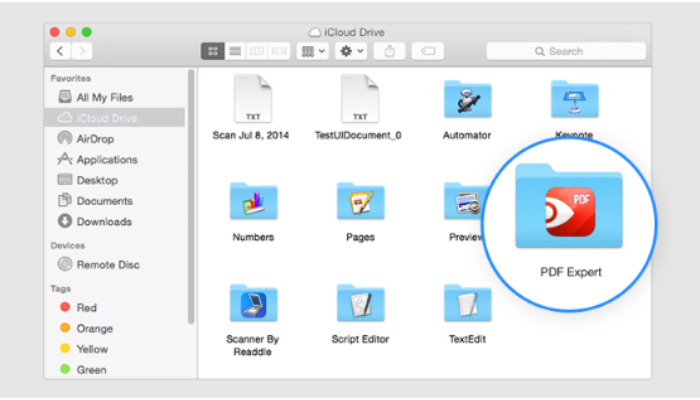
To achieve this, open the file in the iCloud Drive app, hit the “share” icon, and the file will be converted to a PDF. To create a PDF version of your document and save it to iCloud Drive automatically, choose “Save PDF to Files” from the share menu.
See Also: Why Can’t I Open PDF Files On My Android Phone?
Use the marking tool
You can annotate and edit documents and images using the built-in Markup function in many iPhone apps, including the native Apple apps. With this function, you can add annotations and comments to a document or image before saving it as a PDF.
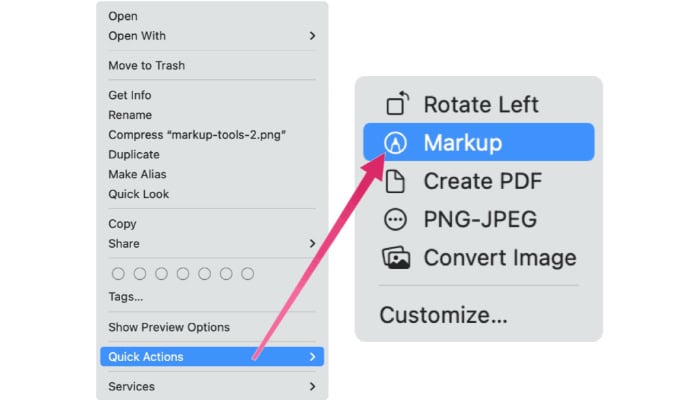
To utilize this method, open the document or image you want to convert to a PDF and touch on the “markup” icon. By doing so, the Markup editor will open, allowing you to make changes to your document, such as annotating it or adding comments. Press “Done,” then choose “Save as PDF” to create a PDF of your annotated document on your iPhone.
Use the Dropbox app
You can make PDFs on your iPhone if you use Dropbox to sync and save your data. Open the file in the Dropbox app that you wish to convert to a PDF, then tap the “share” icon.
Choose “Export” and “PDF” as the file format from the sharing menu. Your file will be instantly converted to a PDF and stored in Dropbox. 
Creating PDFs on an iPhone is helpful for sharing standardized documents and media. With so many options available, you’ll most likely find one.
In conclusion, the built-in “Print to PDF” function plus a selection of third-party apps offered on the App Store make making a PDF on an iPhone simple and practical.
Numerous choices are available to assist you in doing the task quickly and easily, whether you wish to convert a document, image, or other material to PDF format.
Delete a PDF file from an iPhone
To erase a PDF from your iPhone, utilize one of the following methods:
- Use your iPhone’s “Files” app to find the PDF’s storage location. Tap on a PDF to select it and then delete it. Next, tap the icon for the trash can.
- If the PDF is stored in a third-party app, such as Dropbox or Adobe Acrobat, open the app and navigate to the PDF. Tap on the PDF to open it and then look for a delete or trash can icon within the app. Tap on this icon to delete the PDF.

- A PDF can also be deleted using the built-in “swipe to erase” iOS capability. To do this, swipe left on the PDF in the “Files” app or within a third-party app to reveal the delete button. To erase the PDF, tap the delete button.
- A thing to keep in mind is that you might not be able to erase PDFs from within some third-party apps. Refer to the app’s documentation for instructions on deleting a PDF from the “Files” or “Documents” area or adjusting app settings as needed.
See also: How To Fix iPhone Making High-Pitched Noise During Calls?
FAQs
Steps on How to make a PDF on iPhone Using photo?
Use the built-in Print to PDF option on your iPhone to convert a photo into a PDF. Select Print from the share menu after opening the image in the Photos app and tapping the share icon. Select PDF as your printer next to create a PDF out of your shot. Utilizing a third-party coder to convert an iPhone photo into a PDF is an additional choice.
Which app is best for making PDFs on iPhone?
Adobe Acrobat, PDF Expert, and PDF Converter are just a few of the top iPhone apps for making PDFs. Making professional-quality PDFs on your iPhone is simple thanks to the numerous features and possibilities offered by these apps.
How Do I Scan A Screenshot As A PDF On IPhone?
Observe these methods to scan a screenshot as a PDF on your iPhone: You can take a screenshot by clicking on the Home and Power buttons on your iPhone. Click the Edit button after opening the screenshot in the Photos app. To use the markup editor, tap the Markup button. Use the markup tools to make further changes or annotations to your screenshot. To save your annotated screenshot as a PDF, click the Done button and then Save as PDF. Your iPhone's Photos app will store the PDF of your annotated screenshot, which you can access or distribute to others.
Conclusion
In conclusion, Creating and managing PDFs on an iPhone is easy and convenient with the built-in “Print to PDF” feature and third-party apps. How to make a PDF on iPhone? PDFs can be created from documents, images, or other files, saved to the iPhone, or shared.
To delete a PDF on an iPhone, use the “Files” app, a third-party app, or the swipe-to-delete feature. Check this out if you want to add a signature to the pdf.
The “Files” app or a third-party program can manage and organize PDFs. Creating, managing, and deleting PDF files on an iPhone is now effortless and valuable for anyone in need.
See Also: SwifDoo PDF Review | Your Ultimate Document Workflow Solution
