A dreaded error screen in Windows 8.1 and especially in the Windows 10 update is the Blue Screen of Death or BSOD errors, which will restart your computer and restart it automatically. Video Scheduler Internal Error is one of these BSOD errors, and Windows users have frequently complained about this. So, How to delete hiberfil.sys file?
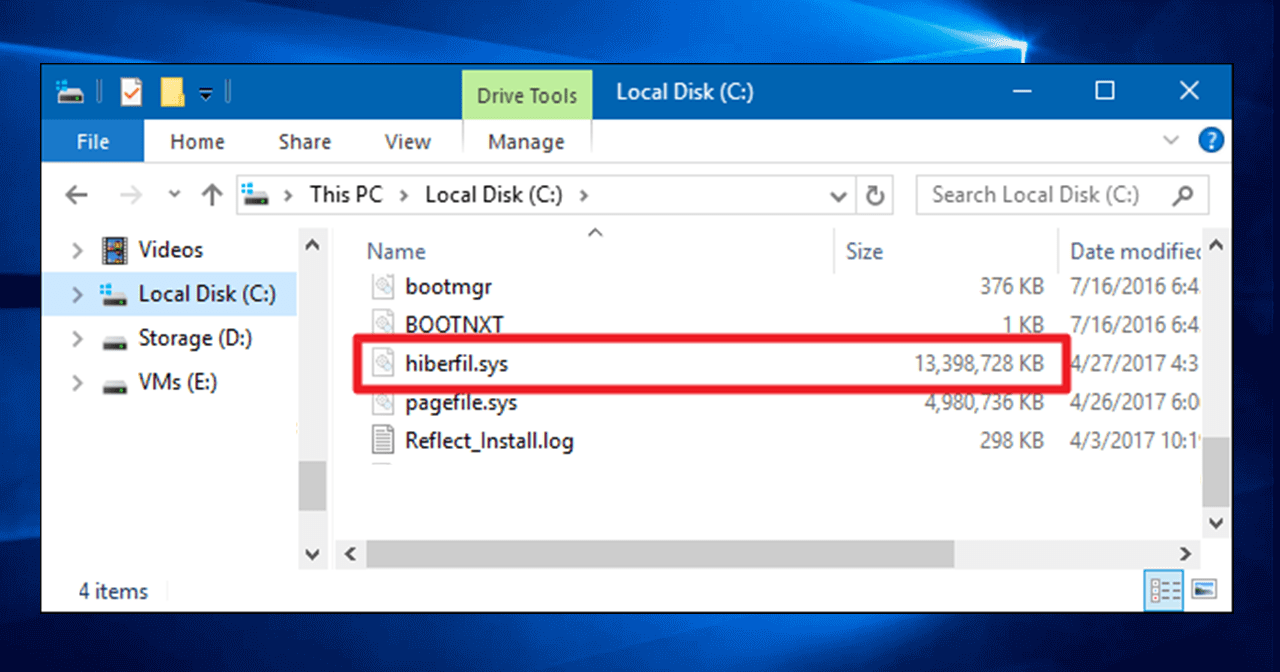
Deleting the computer’s hiberfil. sys file
- Click on the Search option.
- Enter the required command.
- Choose the Command Prompt and perform a right-click, then select ‘Run as Administrator‘.
- If a User Account Control window pops up seeking permission to proceed, click on Yes.
- Type ‘powercfg.exe /hibernate off‘ in the Command Prompt window and hit Enter.
The biggest problem with this error is the random occurrence, and since the computer freezes immediately afterward and then restarts, you will lose all your unsaved work. Like other BSODs, this occurs most often when the PC is put into sleep mode or when you are just starting up your computer. Another scenario where this problem occurs recurrently is while you are installing new software or when the installation is complete. If you are on any other website, you might want to check this article on opening a VCE file on Windows.
Table of Contents
How To Delete hiberfil.sys File in 6 Ways
During installation, there is a high chance of overloading the Windows drivers. Hence the frequency of this problem increases. The other causes for this Video Scheduler Internal Error are:
- Issues with the hardware
- Corrupt Windows registry
- Virus or Malware
- Corrupt system files in Windows
- Windows driver issue (main reason)
Luckily there are several fixes to this error. In this article, we show you some possible solutions you can employ to Delete Hiberfil.sys file. Since there are several solutions, you may have to try a few before coming to the solution that works for your computer.
Run CHKDSK
CHKDSK stands for Check Disk, a built-in function in your Windows that checks the hard disk for corrupt segments. For this, go to the Start menu of your Windows and search for ‘cmd,’ which is the Command prompt. Right-click the ‘Command prompt’ icon and select ‘Run as administrator.’
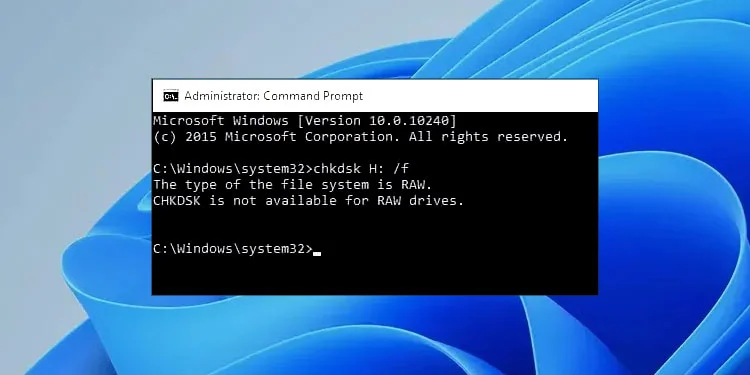
In the Command prompt, precisely type ‘chkdsk /f /r’ as written here and press ‘Enter.’ You will be prompted by a message, where you type ‘Y’ and enter. After the disk checking, you must restart your computer and check if the problem persists.
Run SFC
SFC stands for System File Checker. Like CHKDSK, this will check the system for corrupt files and help you to delete hiberfil.sys file. For this, open ‘Command prompt’ with administrative rights (same as mentioned in the previous solution). Type- ‘sfc /scannow‘ precisely as written here and press ‘Enter.’
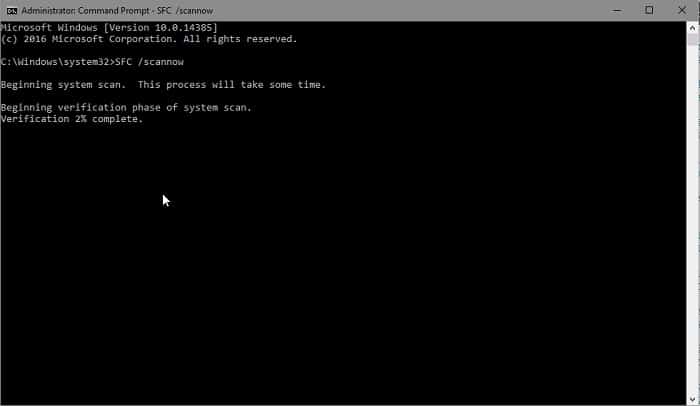
This command will begin the system file checking on your computer and detect corrupt files. It may take a few minutes to complete the scan, but if any corrupt file is identified, Windows will give you subsequent instructions on how to get rid of them.
See also: – [Solved] How to Fix GWXUX Has Stopped Working – TechWhoop
Update Video Driver
An outdated video driver may cause this BSOD error. Hence updating might solve the issue. However, this Video_Scheduler_Internal_Error often occurs after your computer has been updated, and it might be that the driver was not correctly installed while updating. In this case, it will be best to roll back the update. To update or roll back and delete hiberfil.sys file, follow these steps:
- Open the Windows ‘Run’ dialogue box by pressing the Windows button and ‘R’ simultaneously.
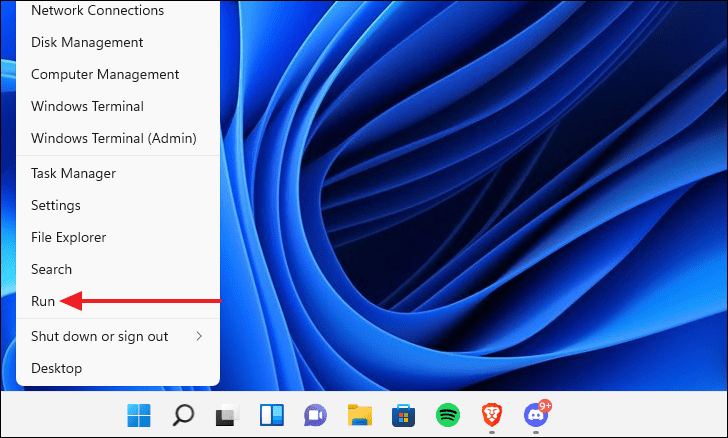
- Type ‘devmgmt. msc’ in the Run dialogue box and press enter to open the Device Manager window of your computer.
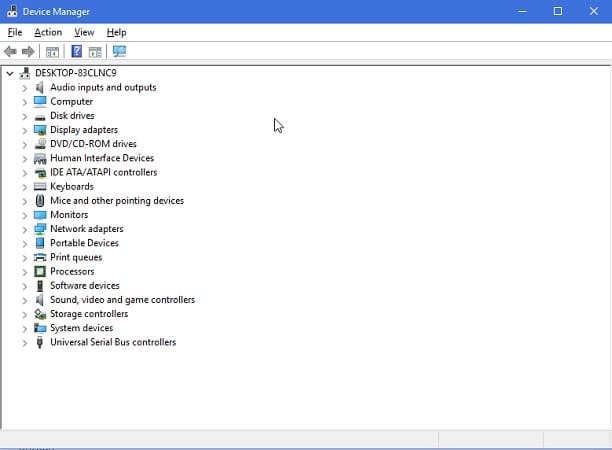
3. Browse the list of devices on your computer and find the ‘Display Adapters’ option.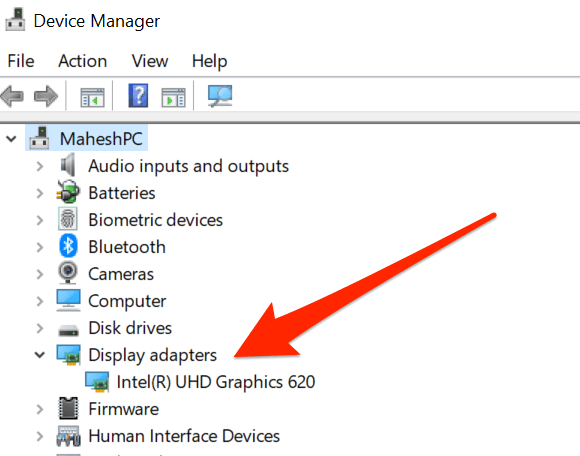
4. Expand the ‘Display adapter,’ right-click on the video driver you see, and select the ‘Update Driver software’ option.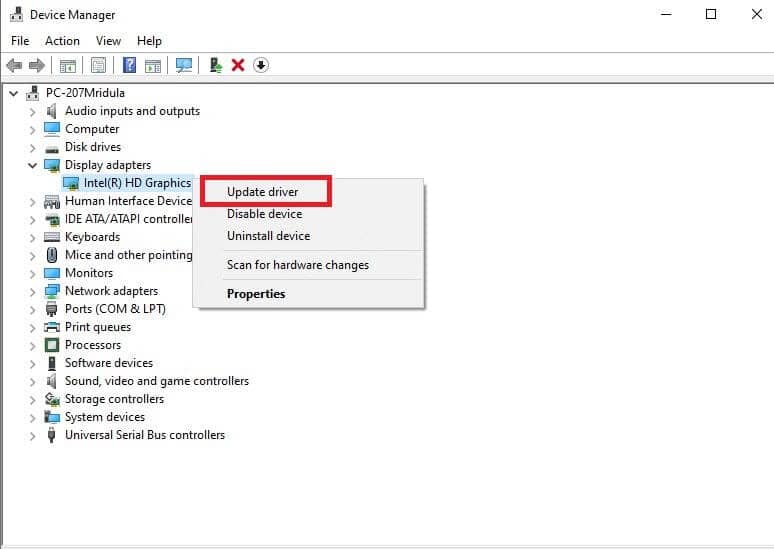
5. Select the option ‘Search automatically for updated driver software.’ Your computer will search and update the driver, after which you should restart your computer.
6. If you want to roll back on a faulty update, double-click on the video driver to open the driver window.
7. The top pane of this window will have several tabs; select the ‘Driver tab’ and the ‘Roll Back Driver’ option. If the previous update works successfully, this option will not be enabled.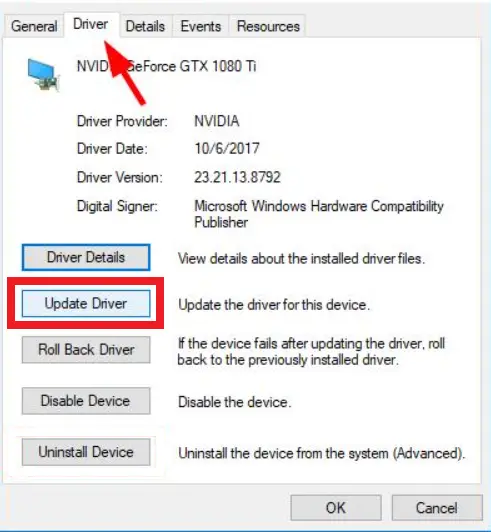
Run DSIM
DSIM stands for Deployment Image Service and Management, which you can run using the Command prompt following these instructions:
- Open the Command prompt as administrator (as explained in the first two solutions) and type in the following commands (write these exact commands and press enter after each):
Dism /Online /Cleanup-Image /StartComponentCleanup
Dism /Online /Cleanup-Image /RestoreHealth
- The above commands might not work in all instances. If it doesn’t, use these commands instead:
Dism /Image:C:\offline /Cleanup-Image /RestoreHealth /Source:c:\test\mount\windows
Dism /Online /Cleanup-Image /RestoreHealth /Source:c:\test\mount\windows /LimitAccess
- You must replace ‘C:\RepairSource\Windows’ with the disk source of your recovery disc or Windows installation disc.
- Finally, give this command- ‘Dism /Online /Cleanup-Image /CheckHealth’ and restart your computer afterward.
See also: – How to fix “ERR_SPDY_PROTOCOL_ERROR” in Google Chrome
Update Windows
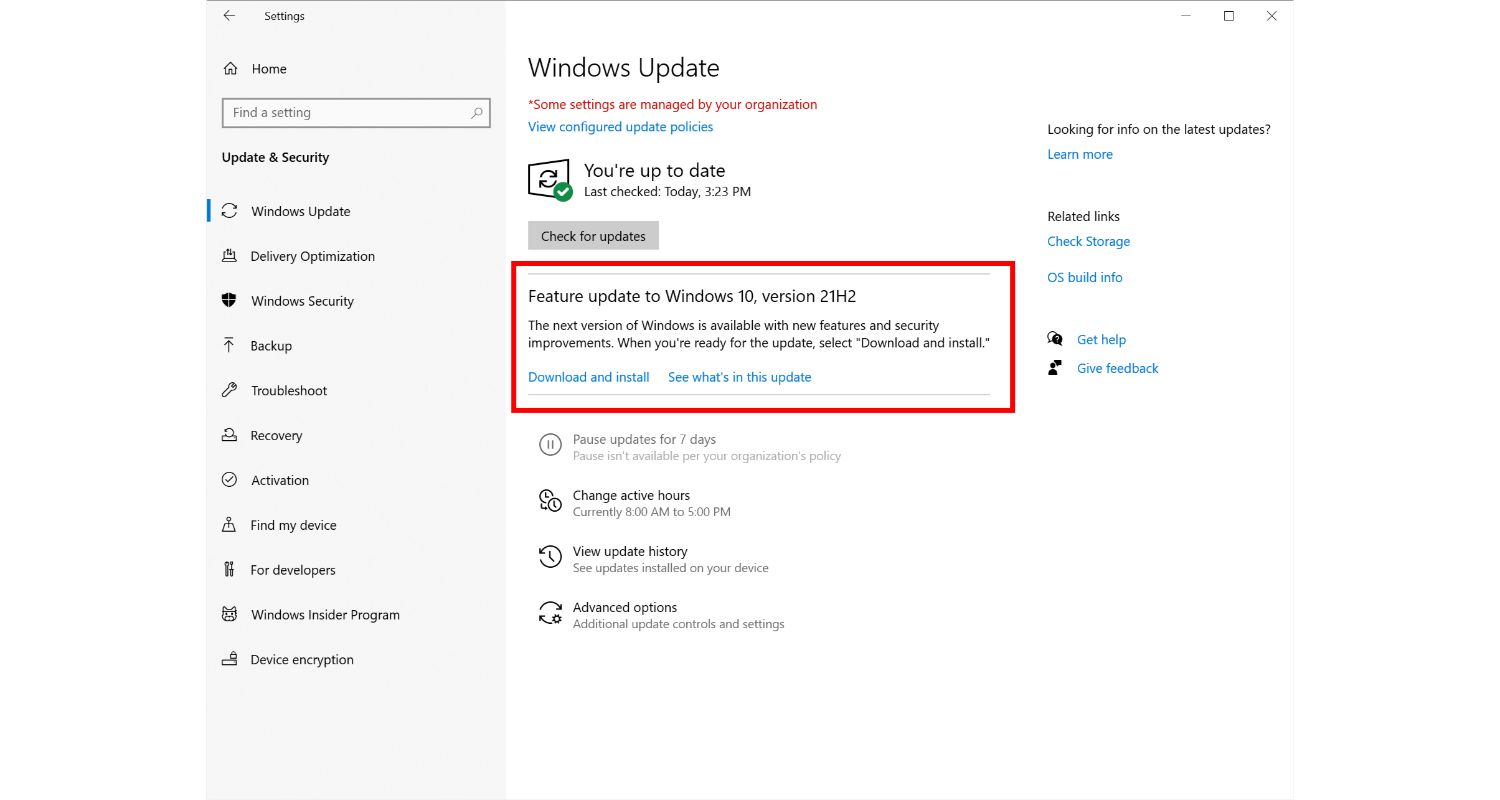
A standard solution to all BSOD problems on Windows 10 and 8.1 has been updating the Windows. Thus check your PC for new updates online and install them if there are any. To update Windows 10 and delete hiberfil.sys file, follow these steps:
- Go to the ‘Systems’ window of the ‘Control panel.‘
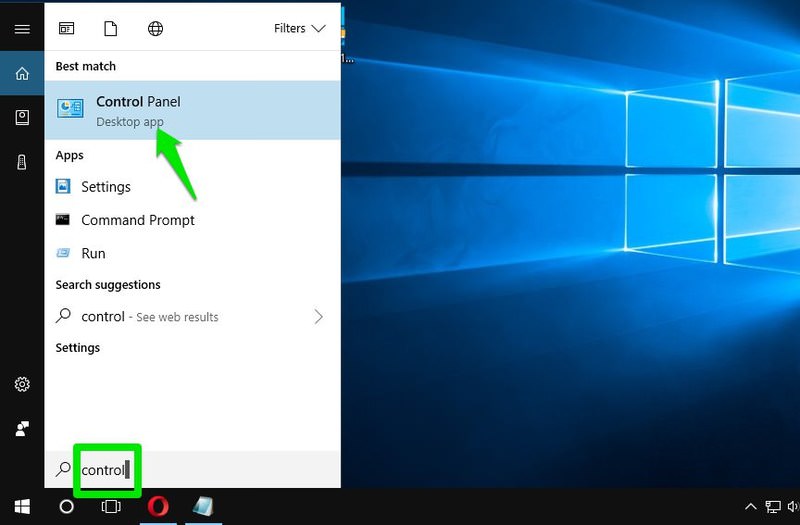
- In the ‘Settings’ section, find ‘Update and Security’ and select the ‘Check for updates’ option.
Disable third-party Security Software
Windows 10 comes with a built-in antivirus application called Windows Defender. So there is no requirement for third-party software like McAfee or AVG Internet Security. This article discusses how to delete hiberfil.sys file. Instead, it has been seen that this software interferes with the proper running of Windows 10 and causes many BSOD errors. Thus, it is best that you uninstall all of the security software and see if it solves the Video_Scheduler_Internal_Error.
These solutions have solved the Video Scheduler Internal Error in most cases. If you find yourself in the minority with the problem persisting, try solutions like- Analyzing the Dump file, fixing damaged or corrupted Windows registry, or performing a clean boot to disable all third-party services.
FAQs
Can I delete the Hiberfil sys file Windows 10?
Answer- Deleting the hiberfil.sys file in Windows 10 is not recommended. It's essential for hibernation, a power-saving feature. Deleting it can turn off hibernation and may lead to issues. If you need to free up space, consider reducing the hibernation file's size using the powercfg command or turning off hibernation via the Command Prompt.
How do I manually delete Hiberfil sys?
Answer- To manually delete hiberfil. sys in Windows 10, open Command Prompt as an administrator run powercfg /h off to end hibernation. Then, you can delete the file from the root directory (usually C:). Rebooting is advisable after these steps.
How do I free up Hiberfil?
Answer- You can free up space used by the hiberfil.sys file by reducing its size. Open Command Prompt as an admin and use powercfg /h /type reduced to set a smaller hibernation file. It saves space while still allowing hibernation. To turn off hibernation entirely, use powercfg /h off.
Why is my Hiberfil system so large?
Answer- A large hiberfil.sys file typically results from having a lot of RAM. Windows reserves space equal to your RAM's capacity for hibernation, ensuring it can save the system state. Reducing its size with powercfg may help free up space, but be cautious not to turn off hibernation if you use it.
Conclusion
This is all on how to delete hiberfil.sys files. Hope this article can help you solve the problems you are facing because of the hiberfil.sys files.