Nvidia is not an unheard name among the people. Nvidia is associated with premium graphics rendering hardware and software products, not just for gamers but also for the general public. Those with the beastly GeForce GTX graphics card will know it uses a companion app called GeForce Experience. But recently, some users who have installed an update for the GeForce experience have faced an issue. They have noticed an application service running at a startup named NVIDIA Capture Server Proxy.
In a world where malware and other harmful apps come bundled alongside innocent files. And portray themselves as part of the system while running; naturally, a guy would suspect this service to be dangerous and malicious. So, what is the Nvidia capture server proxy? But rest assured, it is not a wrong file to execute. It is standard across the board, not just with your computer. There is a way to deal with this, which is precisely what we will discuss in this article.
See Also: How To Turn Off NVIDIA Overlay | Explained With Pictures
Table of Contents
Overview: Nvidia Capture Server Proxy
If you have been using Nvidia products and services for long enough, you will know they are incredibly clingy about their driver integrity and other techy things. So they always keep several background check services that constantly monitor and maintain critical elements of that otherwise flawless hardware. So while it is not unnatural for them to keep a dozen services running in the background for their own products’ sake, we can still clear out some of them and make some room in the active memory for other stuff, like the game that you will be launching with the help of that “over-secured but powerful” GTX series graphics card.

It would be okay if the processes were pretty minimal in operation. Still, no! These services, like the NVIDIA Capture Server Proxy services, consume absurd amounts of CPU and have high Disk usage. If your system is on the brink of slowing down, these services can drastically increase your boot-up times, which is not cool on a (supposedly fast) gaming machine.
If you have had enough of the NVIDIA Capture Server Proxy service constantly eating up your disk usage and active memory space, here is how to verify the process and keep it in check.
Method to Verify the Running Nvidia Capture Server Proxy Process
- Just head over to the task manager by entering the run menu. To do that, press the Win+R keys and then type taskmgr. You can also join the same by pressing Ctrl+Shift+Esc keys or by pressing Ctrl+Alt+Delete and then selecting ‘Task Manager‘ among the options.
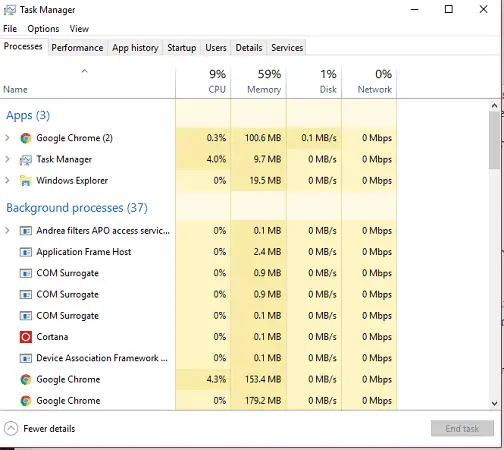
- Look for the NVIDIA Capture Server Proxy process through the list under the task manager’s processes tab.

- Note how much the Proxy and related services will consume the system resource. There is no absolute requirement to have these services running at all times when the graphics card is in use. So it is wise to kill some of those processes to free additional RAM.
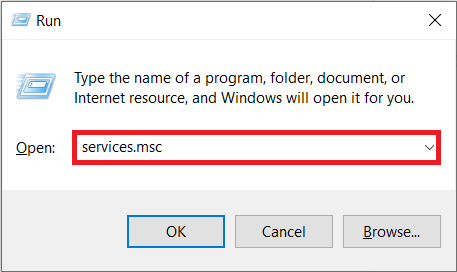
- To do that, go back to the Run menu again, and this time, type services. msc and hit OK.
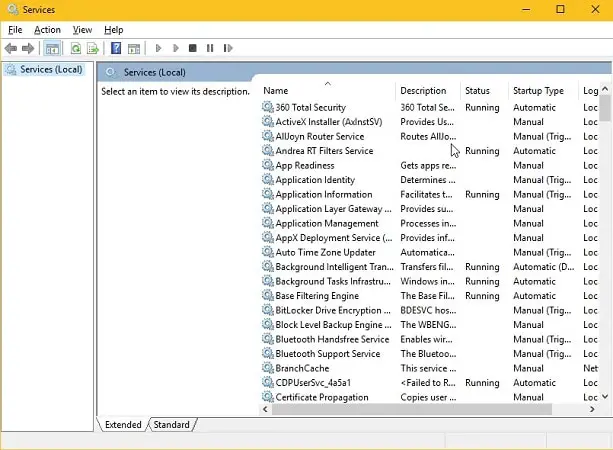
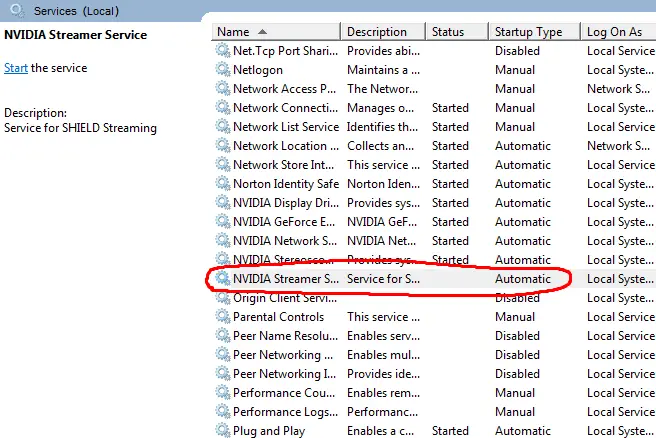
- Search for the NVIDIA Capture Server Proxy service. Double-click on it, and you will see a pop-up window.

- The service status will say ‘Running.’ Click the Stop button to ensure the service status is ‘Stopped.’
- In the same window, select the box that says “Startup Type.” Choose the Disabled option under the drop-down menu.

- And then click OK to exit the window.
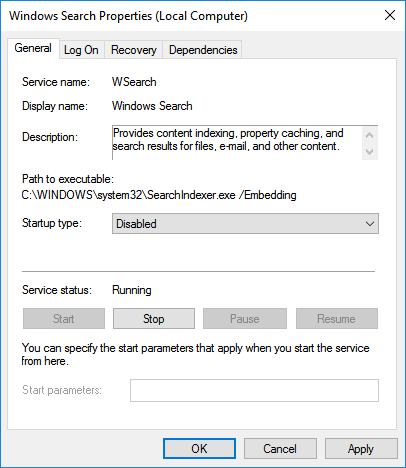
This will turn off the rundll32.exe NVIDIA Capture Server Proxy server. And stop it from activating as soon as your system begins to boot. The service is seemingly related to an add-on feature called ShadowPlay. It was included with the update for the existing driver package/GFE. If you still see Nvidia services cause high CPU usage, disable the Nvidia Streamer Service.
Also see: How to Fix NVIDIA Driver Crashing in Windows 10
What is NVIDIA Streamer Network Service?
As the name suggests, it is a streaming service with an update package by default. It is meant to stream your games and other graphics from your PC to your other Nvidia Shield devices. The problem with this service is that it will still run even if you don’t own any shield devices. Or don’t use this streaming service at all!
This process will run in the background and during startup by default, regardless of whether or not you have Shield devices. That is not a very wise move by Nvidia, in my opinion. They should always ask such things from the user.
It is not that hard, you know. Just include a phase in the setup wizard which asks the user whether or not they have any Nvidia shield devices and whether they would prefer to use the NVIDIA Streamer Network Service and are okay with it running in the background all the time.
They have not done that, so assume you have no NVIDIA shield devices. Here is how you can disable the NVIDIA Streamer Network Service.
See Also: How To Turn Off NVIDIA Overlay | Explained With Pictures
How to disable Nvidia Streamer Service?
- Same drill! Head over to the Run window and type services.msc, click OK.
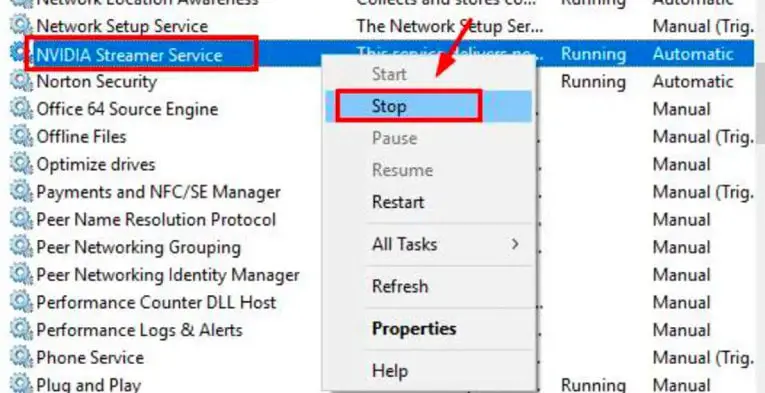
- Search for Nvidia Streamer Service in the Services window. When you find it, double-click on it to open the service details.
- Click on the button that reads ‘stop.’ It will suspend that service for the current boot session.
- Suppose you get a prompt warning that the NVIDIA Streamer Network Service will stop if you turn off this service. Agree with it and close the window.
- Also, to prevent the process from waking back up during startups in the future. Change the startup type from the automatic option to the disabled option.
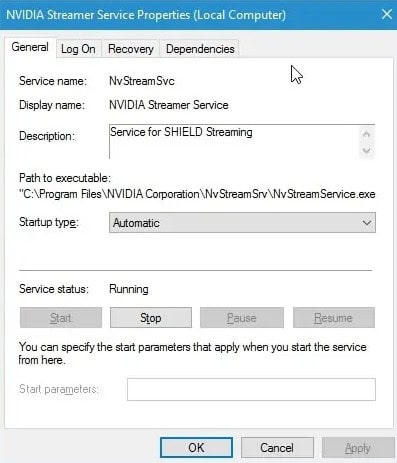
Once done, click on Apply and then click OK. This will stop the NVIDIA Streamer Network Service from running at the system’s startup. Do a fresh reboot and enjoy your system, which should return to normal.
FAQ’s
What is the Nvidia capture server proxy?
The NVIDIA streamer service and streamer user agent connect to the server proxy. If you wish to broadcast games you play on your PC to NVIDIA Shield devices, you'll need both services. One of the services you might never use on your computer is this one.
What does a gaming proxy server do?
A proxy is a tool in computer networking that acts as a go-between for you and the service you require. Although load balancing, privacy, and security are the main reasons for using it, there are other advantages in many areas.
Does Nvidia overlay impact frame rate?
Any overlay can reduce FPS because it consumes resources to function. However, if a software fault results in malfunctions, compatibility issues could significantly impact your frame rate.
Should you turn off the Nvidia overlay?
You may access the primary functions of the GeForce Experience app through the overlay. However, there are situations when overlays provide consumers with a negative experience rather than a positive one. They use bandwidth and cause problems for some programs' compatibility. Hence, you can turn off the overlays.
What occurs if I turn off the NVIDIA driver?
If the primary graphics processor on your computer turns off, your screen will abruptly go dark. So this occurs because the hardware is not in use but sends visual data to your screen.
What is the Nvidia GeForce experience?
It is the accompanying software for the GeForce graphics card. Hence, it provides the quickest way to share your favorite gaming experiences with others, keeps your drivers current, and automatically adjusts your game settings.
What does the NVIDIA graphics driver do?
The program communicates between the operating system, video games, and applications. Hence, the graphics card is a graphics or video driver.
Conclusion
These methods help you deal with the Nvidia Capture Server Proxy process and services. We hope this information was helpful to you. Do visit us for more guides and articles.
