Xbox One is a trendy gaming console with players connected worldwide and having fun. To make the experience even more real, one can download an xbox 360 emulator. Chatting with friends, participating in multiplayer games, and much more depends on the NAT type setup. Thus, you must know how to Change NAT Type on Xbox One.
Press the Xbox button on your control and navigate to “Profile & System” by repeatedly tapping the right bumper. Select “Settings”, followed by “General”, and then “Network Settings”. You’ll see your current network status and the NAT type on the right side. Select “Test Network connection” to check for any issues.
NAT affects only peer-to-peer gaming, so if you are using dedicated servers, it will not cause any issues. To make the best of it, let’s explore how to Change NAT Type on Xbox One. Moreover, to make it the best experience, you can also operate gameshare on the Xbox One.
See Also: 4 Ways to Fix Malwarebytes Won’t Open Error {Latest}
Table of Contents
What is NAT?
NAT stands for Network Address Translation. This helps your router connect your device to the Internet by using IP addresses, specifically IPv4 addresses. About 4.3 billion IP addresses are available, but it still isn’t enough for each device to hold one.
So your internet provider takes all the separate IPv4 addresses of your household stuff and uses only one for all of them. This solves the issue, but devices outside your network will see only one IP address for each connected device. 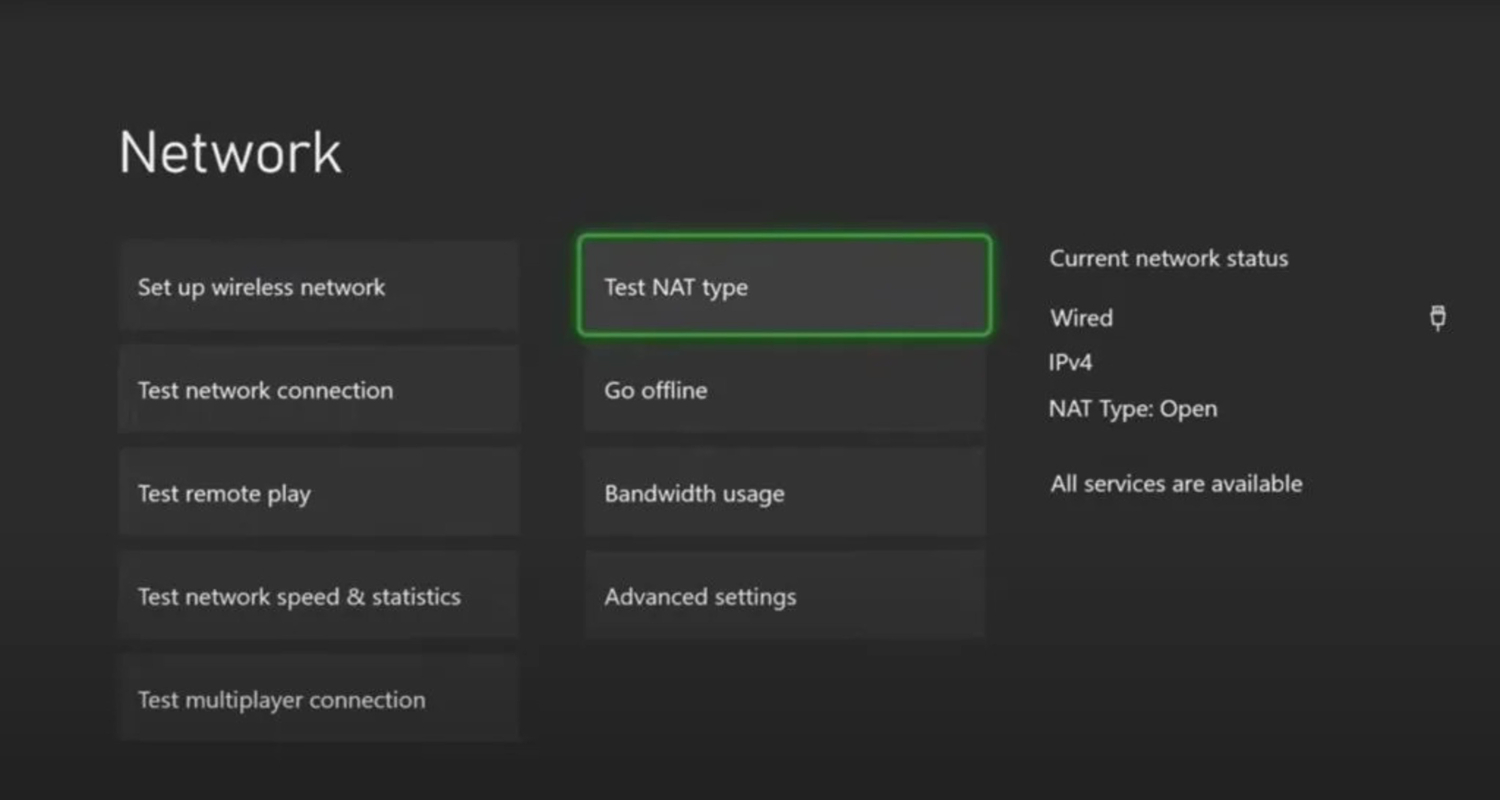
In this case, NAT comes to the rescue. When any individual device requests the router, NAT keeps a log of it. When the response arrives, NAT makes sure it reaches the correct device.
Most often, Xbox uses a UPnP to process an open NAT type.
UPnP stands for Universal Plug and Play. This is very useful as it allows your console to communicate easily with your router using automatic port forwarding. You can play on an Open NAT type without doing manual configuration.
But, UPnP on Xbox One has a flawed implementation, so connecting with many other users online will not be easy. Now that we know What NAT is, let’s dig deep to understand different types of NAT and see how to Change NAT Type on Xbox One.
Types of NAT
- Open NAT: This is the optimum type, allowing you to chat and party with players freely. You can also host multiplayer games with people of any kind.
- Moderate NAT: It is better than strict type, but the connection will still be slower, with certain lags, and also, you won’t host the games in most cases.
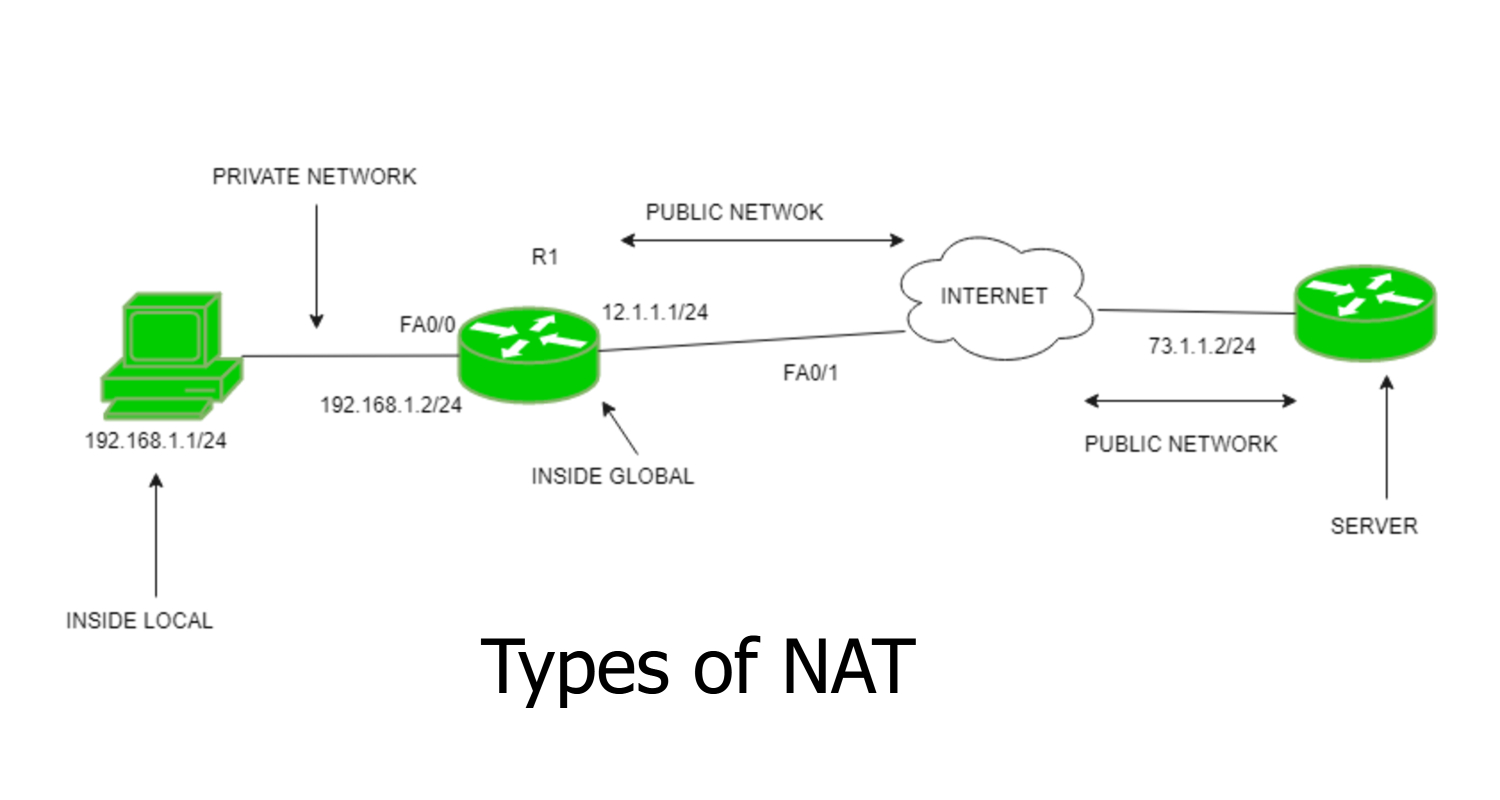
- Strict NAT: This is the worst type. Allows you to connect to players who have an Open type only. There are many disconnects in-game, as well as lags and slow connections.
Checking your NAT type
This is pretty easy to do. Some games like Call of Duty show your NAT type in the pre-game lobby. If not available, you can find it under network settings.
Go to Home->Settings->Network Settings-> Advance Settings
You can see your NAT type under the Current Network Status. Now that we are done checking the NAT type let’s move ahead and see how to Change the NAT Type on Xbox One.
Change NAT Type on Xbox One
When you check your NAT type, if it is already set up as Open, it is all good, and nothing else needs to be done. But if it isn’t, you can follow the given steps to Change NAT Type on Xbox One:
- In the Network Settings screen itself, go to the Advanced Settings option. Click on it. This will show more new opportunities.
- Choose IP Settings from these options, then set it to Manual.
- Setting it as manual will enable you to change it yourself, anytime.
- After you have done this, you need to type a few things: the IP address, subnet mask, and gateway address.
- If you don’t remember your IP address, you can go to your computer and Google it or use the Command Prompt.
- Open Command Prompt and enter “ipconfig” (without the quotation marks).
- Press Enter. The IP address, subnet mask, and gateway will be displayed there.
- Take these numbers and put them into the Xbox One settings. Press Save.
- It would be best if you changed the DNS as well.
- Take information from the Command Prompt and type it into the DNS settings.
- When all of it is done, save the changes.
See Also: Xbox One Sync Button Not Working? A Step-by-Step Guide to Fix
This was the first step. The second step requires changing your router settings.
- In your router settings, input the gateway address.
- You can find information on accessing your router’s interface on the Internet. Specifically, you need the model number to get the gateway address.
- Again, in your router settings, go to the Port Forwarding option.
- Type in the IP address that you’re using in your console.
- Now, in the Start Port and End Port fields, for each line, type in these numbers in respective order: 3074, 88, 80, 53.
- Save the changes done, and close it.
See also: How To Cancel CBS All Access Account
FAQs
How do I change my NAT type to open on Xbox?
1. Check Router Settings: Look for the NAT settings or UPnP options. 2. If UPnP is disabled, enable it. 3. If UPnP doesn't work, manually configure port forwarding. 4. Assign a static IP address to your Xbox in your router settings. 5. Power cycle your Xbox and restart your router. 6. Check your network settings on Xbox to ensure the NAT type is open.
How do I fix my NAT type unavailable on Xbox one?
1. Power off your router for 10 seconds, then turn it back on. 2. Hold the Xbox power button for 10 seconds to power off fully, then turn it back on. 3. Use an Ethernet cable for a stable connection. 4. Manually configure port forwarding in your router settings. 5. Enable UPnP. 6. Check for Firmware Update. 7. If issues persist, contact your Internet Service Provider.
Does Xbox have a NAT type?
Yes, Xbox has a NAT Network Address Translation type, which determines your console's connection to online services and other players. There are three main NAT types: Open best for gaming, Moderate some limitations, and Strict most limited. NAT type affects your online gaming experience, so it's important to have an 'Open' NAT if possible.
Is open or moderate NAT better?
An Open NAT is generally better for online gaming. It provides the least restricted connection, allowing you to connect easily with other players and game servers. A Moderate NAT may have some limitations, while a Strict NAT can significantly impede your online gaming experience, causing connectivity issues.
See Also: Fix “Network Settings Blocking Party Chat” Error
Conclusion
You can change the NAT Type on Xbox One if you have done it correctly. All of these might seem a bit complex, but follow the order given, and you will have your desired result.
See Also: 4 Best Free VPNs for Chrome to Ensure Complete Safety
