Are you a Kodi user looking to expand your streaming options? Then, consider adding the popular Navi-X add-on. In just a few simple steps on how to add Navi X to Kodi, you can access a huge library of live TV, movies, shows, and more right through your Kodi device.
To add Navi-X to Kodi for Krypton Version 17.6 or lower, follow the steps:
- Open Kodi
- Enable unknown sources
- Add the repo URL as the source
- Install the repo zip file
- Select repo in Addons
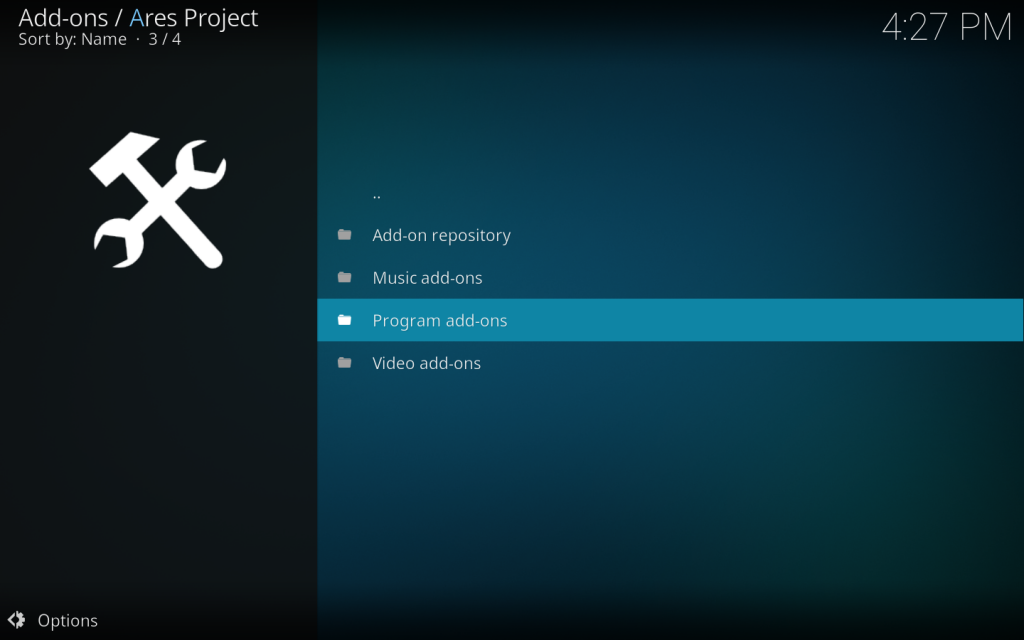
- Find Navi-X in Program Addons
- Click install
Navi X Kodi addon is one of the most downloaded and highly rated. It provides extensive content from various sources to browse, search, and watch. With Navi-X, you’ll find everything from recent blockbuster movies to live sports and events streaming in high quality. Best of all, adding Navi-X is a breeze. This short guide will walk you through the quick and easy process. Follow the steps, and you’ll stream with the best Kodi addon. Let’s get started with how to install Navi-X on Kodi..
See Also: How To Install Mad Titan On Kodi? Complete Guide (2024)
Table of Contents
Is Navi-X safe for Kodi?
Navi-X is generally considered a safe addon for Kodi use. As one of the most popular Kodi addons, Navi-X provides an extensive library of movies, TV shows, live TV, and more for users to stream.
However, since Navi-X is offering this content without licenses, there are always legal risks to consider. The streams themselves do not pose security or malware risks. 
However, users should only install Navi-X from trusted sources like those mentioned in the article to avoid potential issues. Overall, Navi-X can safely access a wide range of free entertainment through Kodi if used responsibly and with precautions.
See Also: How To Install Stream Engine On Kodi? Complete Guide
How to Add Navi-X to Kodi: Installation Guide
Installing Navi-X on Kodi is simple. It allows you to access a vast library of free online media content.
Follow the step-by-step installation guide below to seamlessly integrate Navi-X into your Kodi setup and enhance your streaming experience.
For Kodi Krypton Version 17.6 or Lower
Here are the step-by-step instructions on how to add Navi X to Kodi for Kodi Krypton Version 17.6 or lower:
Navigating to Addons
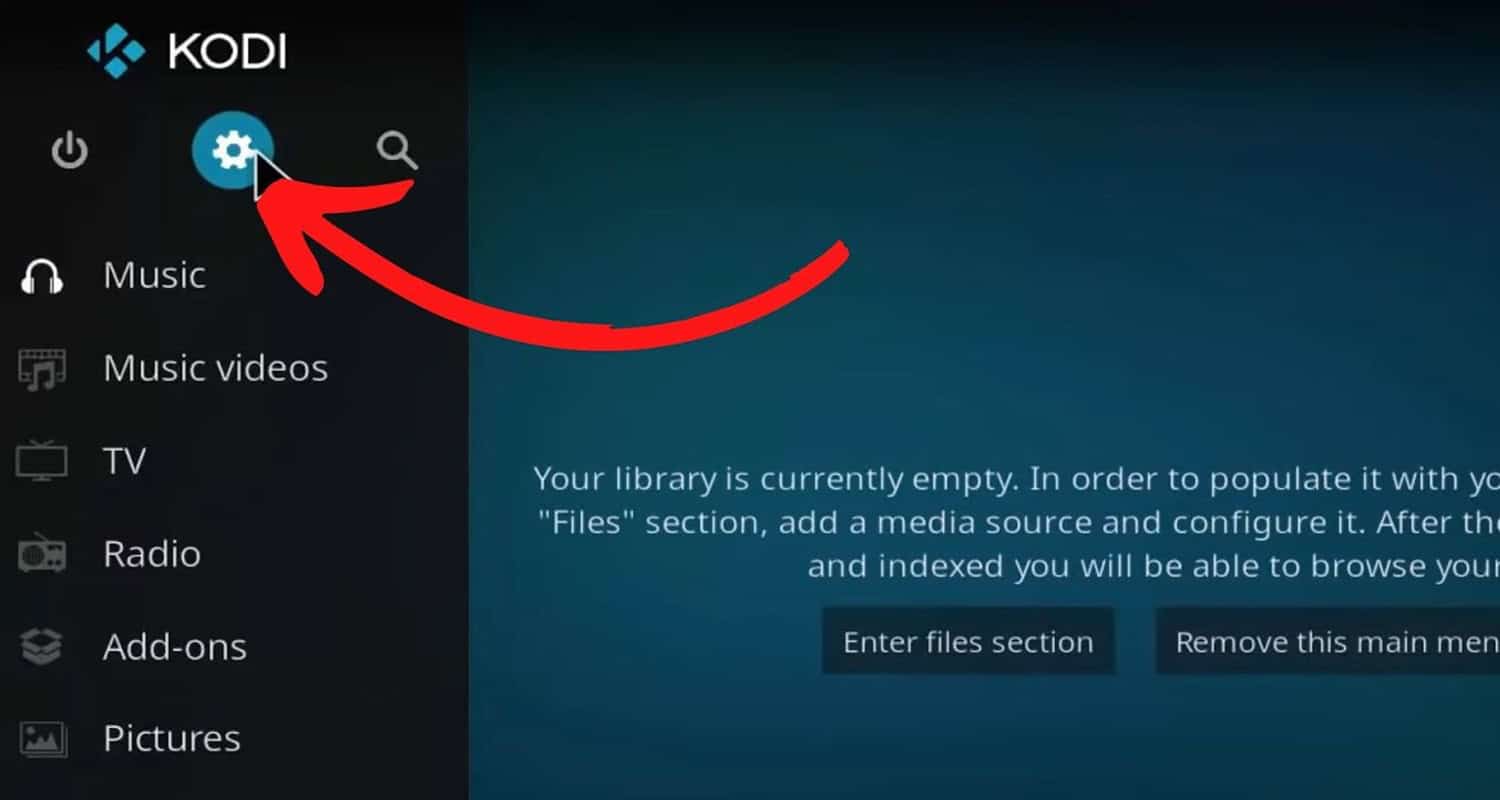
- Open Kodi on your device and click on the settings icon (it looks like a gear or cog) in the top left corner of the Kodi home screen.
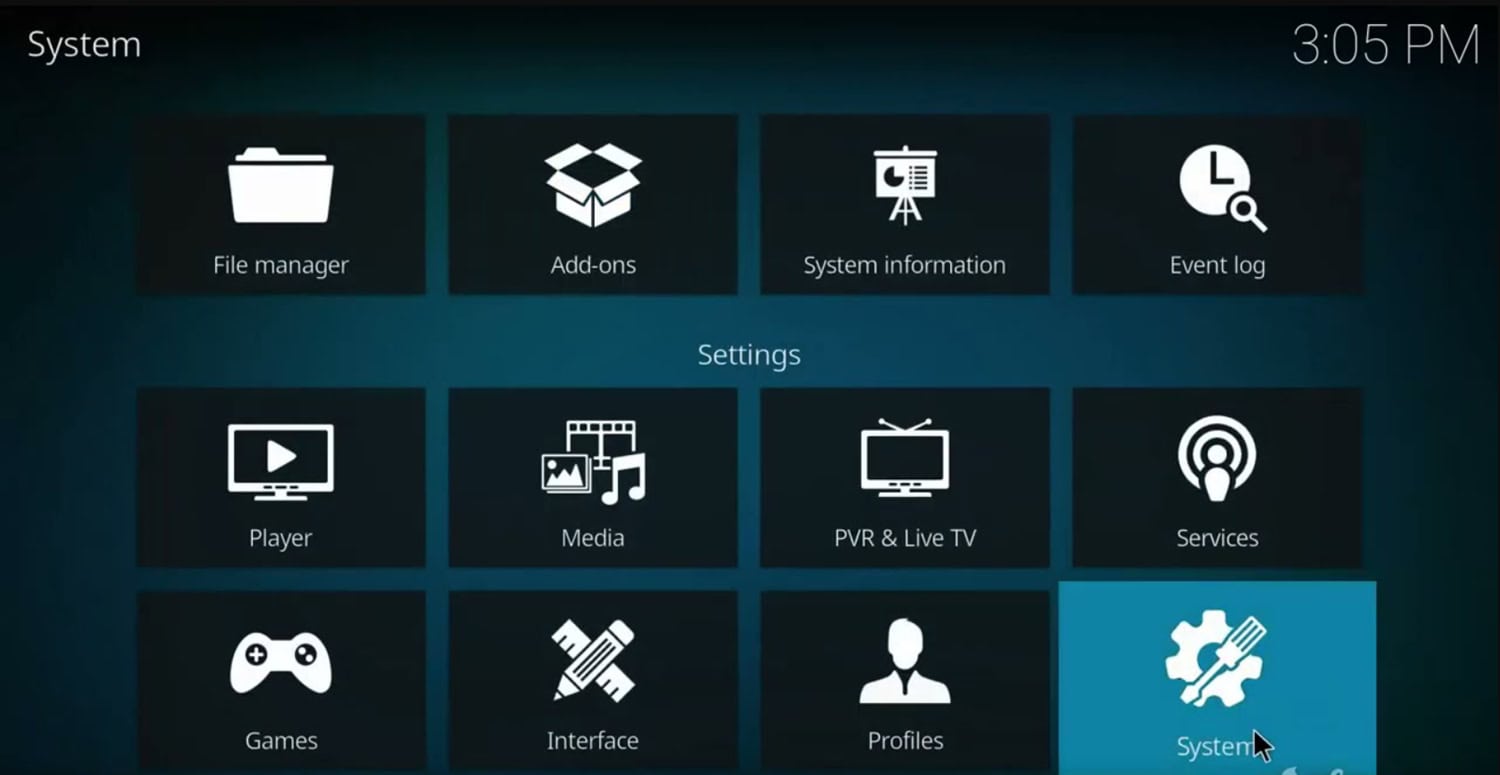
- In the Settings menu, select “System Settings”.
- Within System Settings, navigate to “Addons” and toggle on the “Unknown Sources” option. This will allow you to install addons from unknown sources.

- A warning message will appear, but you can safely proceed by clicking “Yes.”
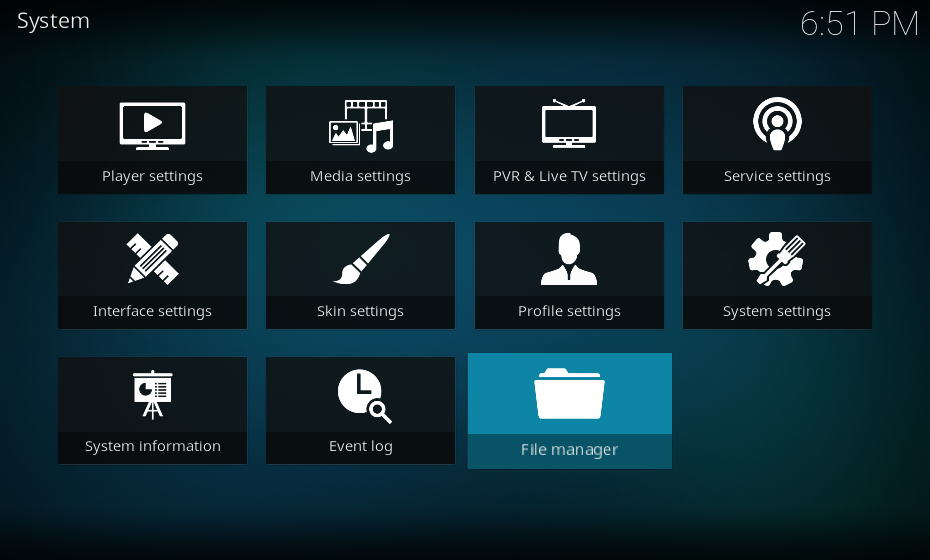
- Go back to the Settings menu and select “File Manager.”
- Then, in File Manager, choose “Add Source.” A dialog box will appear. Click the “<None>” option to enter a custom URL.

- Enter the URL for either the Kodil Repo or Fusion repository. Here are the URLs you can use:
For Kodil Repo: http://kdil.co/repo/
For Fusion: http://fusion.tvaddons.ag
- After entering the URL, click “OK”. You will be prompted to enter a name for the media source. Name it according to your preference, such as “Kodil Repo” or “Fusion.”

- You can return to the Kodi main menu by pressing the back button on your device or clicking the home icon.
Installing the Addon
- Select “Addons.” from the main menu and click on the open box-shape icon at the Addonstop left corner of the Addons screen. This is the “Package Installer” button.

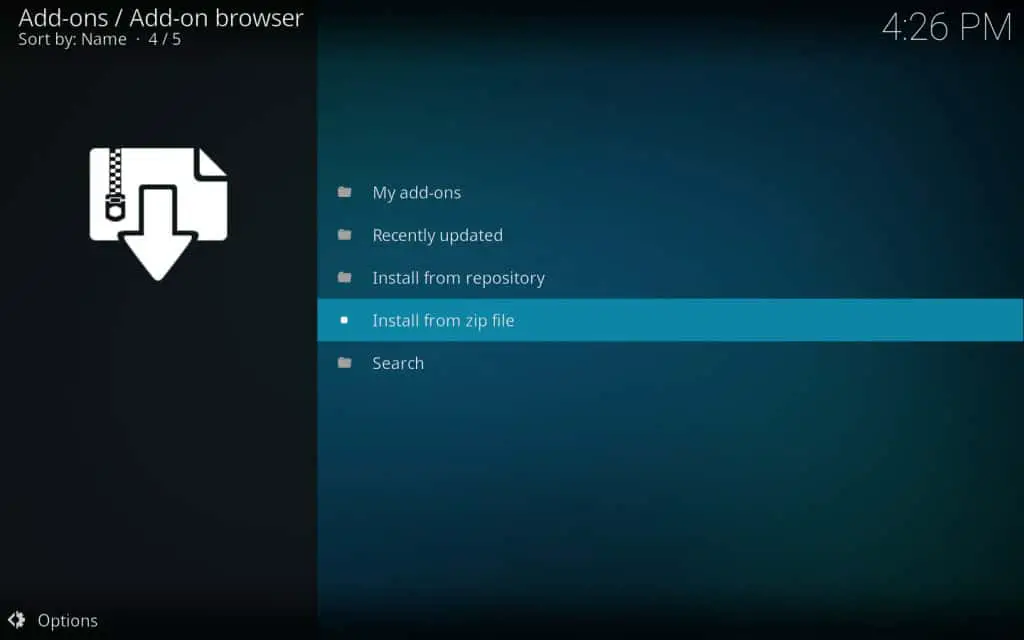
- Choose “Install from Zip File”. A list of available sources will appear. Find and select the source you added in step 5.
- Inside the source, you will see a list of files. Look for the repository file, which will have a .zip extension. You can name it something like “repository.kodil-x.x.zip” or “repository.xbmchub-x.x.zip.” Select the repository file.

- Wait for the repository to install. You will see a notification in the top right corner of the screen once it’s done.
- After completing the repository installation, go to the Addons menu and select “Install from Repository.”

- You will see a list of available repositories. Select the Kodil or Fusion repository, depending on the source you added.
- Inside the repository, navigate to “Program Addons”.
- Then, look for “Navi-X” in the list of program addons and click on it.
- A window will appear with information about Navi-X. Click on the “Install” button to install Navi-X.
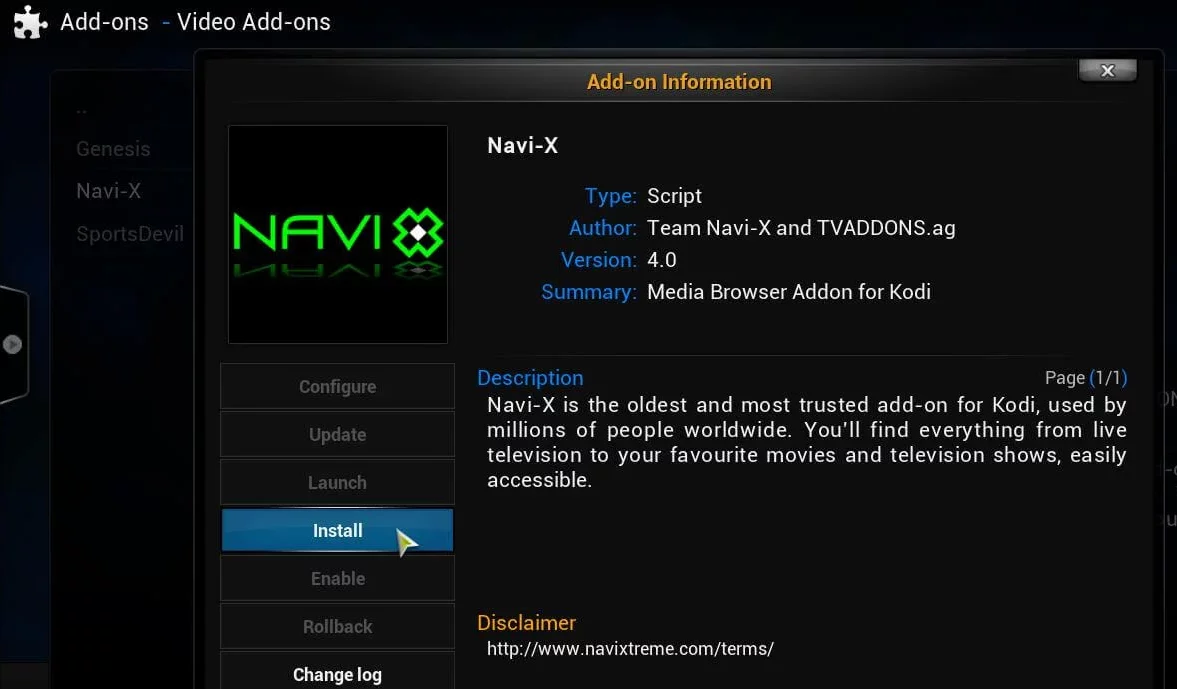
- Wait for the installation to complete. Once it’s done, you will see a notification in the top right corner of the screen saying, “Addon enable.”

Congratulations on being done with how to add Navi X to Kodi! You have successfully added Navi-X to Kodi on Kodi Krypton Version 17.6 or lower.
To expand your entertainment options, consider installing Stream Hub on Kodi. This additional addon will enhance your streaming experience by providing access to various media content.
For Kodi Jarvis Version 16 or Higher
The main difference in How to add Navi X to Kodi for Jarvis and Krypton is the placement of the main menu. In Jarvis, the main menu is located at the bottom of the screen instead of on the left side.
Other than that, the process of downloading and using Navi-X remains the same for both versions.
Troubleshooting Common Issues
Here are the common issues faced with Navi-X and how to troubleshoot them:
When Navi X is not working on Kodi
Sometimes, the Navi-X addon may stop loading streams or showing content. This can happen if an older version of Kodi or Navi-X is installed. The easiest fix is removing both programs and fully reinstalling the latest versions.
Addon Not Found
Navi-X may show as “addon not installed” even after installing. This usually means a previous version still needs to be entirely removed. 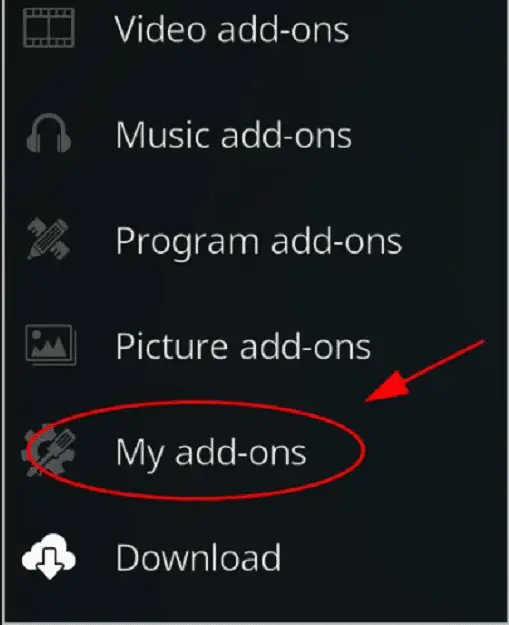 Go to Settings > Addons> My Addons and delete any Navi-X files listed. Then, reinstall the latest version.
Streams Taking Too Long
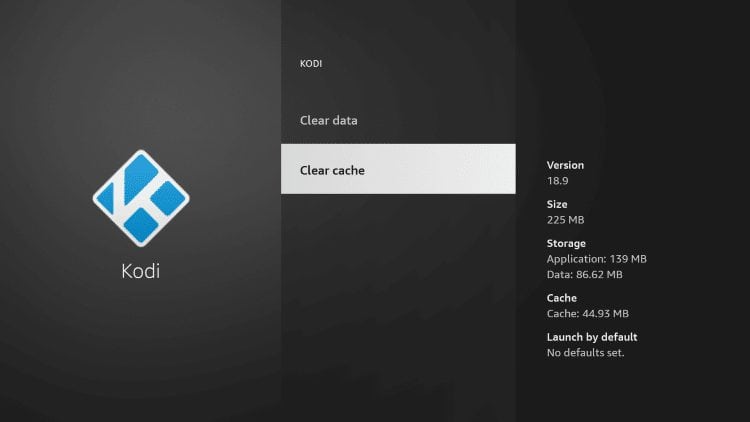
An overloaded server or a weak internet connection could cause slow streams. Try accessing content from Navi-X at non-peak hours or switching to a faster WiFi/mobile data connection. Clearing Kodi’s cache may also help.
Error Message After Install
Errors after installation typically mean the source used needed to be more reliable. Uninstall Navi X for Kodi and install only from reliable sources mentioned in the guide, like Kodil or TVAddons repositories. This will avoid potential issues.

FAQs
Does Navi X still work?
Yes, Navi-X continues to be one of Kodi's most popular and working add-ons. While some content sources may come and go, Navi-X generally keeps working with regular updates from developers.
What version of Kodi should I use?
You should use the latest stable version of Kodi, currently 19.4. It has the most support and is less likely to cause issues with add-ons like Navi-X. Older versions may be partially compatible.
Which VPN is best for Kodi?
A paid VPN with a no-logs policy, like ExpressVPN or NordVPN, provides maximum security and privacy. It effectively hides your online activity from your ISP and allows access to geo-restrict streaming libraries.
Can one install an older version of Kodi?
You can install older Kodi versions, but they may have known security flaws or incompatibilities. Stick with the latest stable version for the best experience and safety. Only install older Kodi if you need specific addons that don't support recent versions.
See Also: How To Install Vidtime On Kodi? Everything To Know
Summing Up
After completing the steps on how to add Navi X to Kodi, enhance your streaming experience further by installing The Crew. By following the simple steps for installing The Crew on Kodi, you’ll gain access to a vast array of live TV, movies, shows, and more.
With Navi-X and The Crew combined, you can effortlessly explore and enjoy various entertainment options within the Kodi platform. Make the most of your Kodi setup by integrating these top-rated add-ons and elevate your entertainment choices.