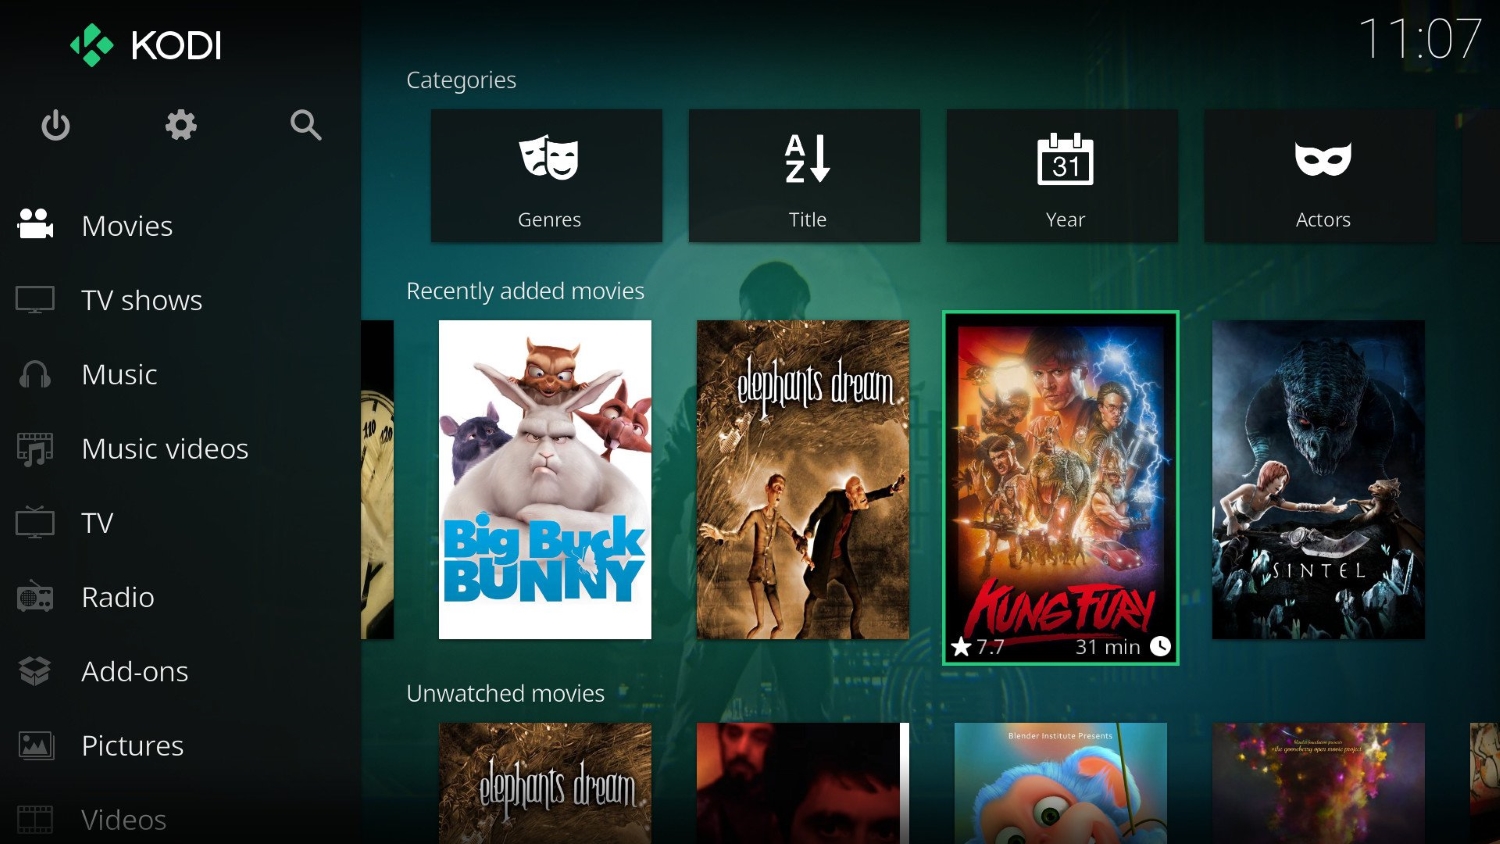
After you have installed Kodi, the Fusion Installer is your bridge into the realm of Kodi add-ons. It’s one of the first things you’ll need in order to get started with any Kodi add-ons. The Fusion Installer links you to its repositories server, which contains pretty much every Kodi add-on repository being maintained in existence. Kodi will surely surprise you in unexpected places, but first, you need the Fusion installed on your Kodi.
Begin from the main screen of Kodi and select Addons. Next, tap the Package Installer, represented by a box icon at the screen’s upper left. Choose ‘Install from zip file‘ and select the ‘fusion source‘ from the displayed list.
Since this is a third-party add-on, any issues you face with it should be redirected to their forums so you can find help.
See Also: How To Set Up Kodi? Complete Step-By-Step Guide
Table of Contents
How to Install Fusion on Kodi Jarvis
Follow the steps given below in order to install Fusion on Kodi Jarvis with ease.
- Open your Kodi.
- Click SYSTEM. (or settings depending on the skin you are using)
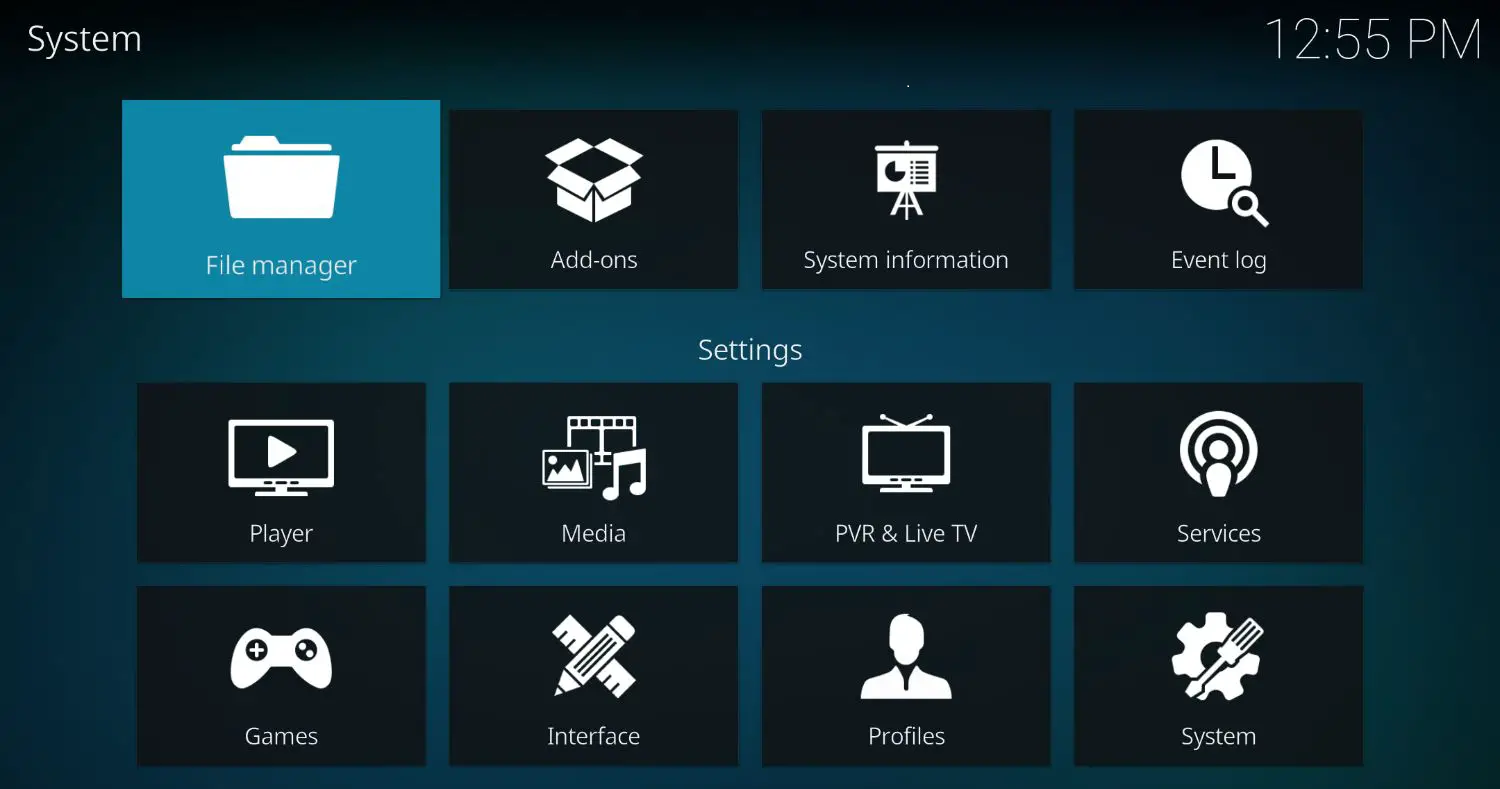
- Click on File Manager.
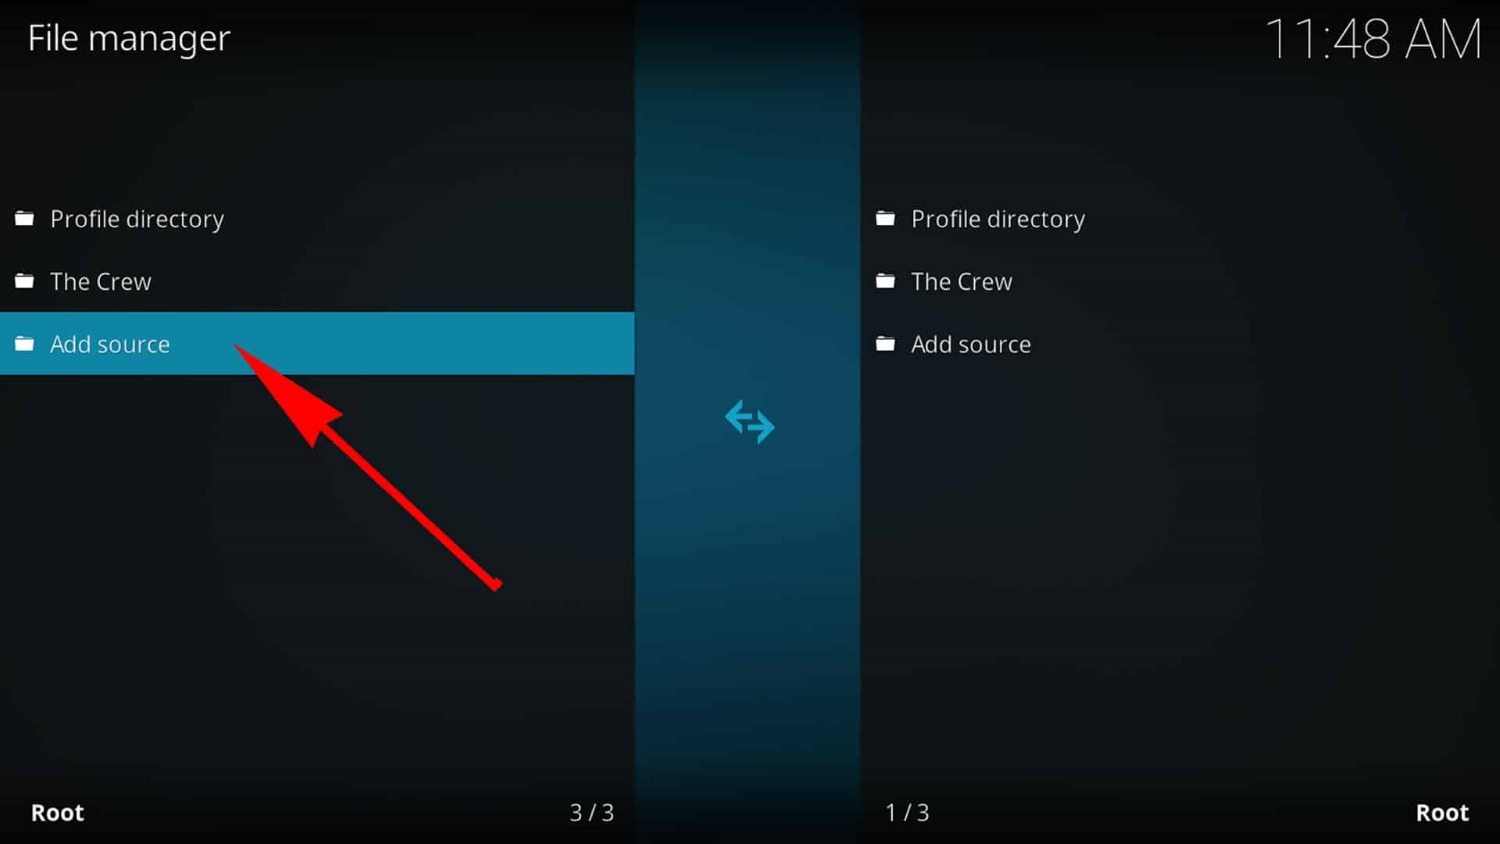
- Go and click on “Add Source.” and Select None.
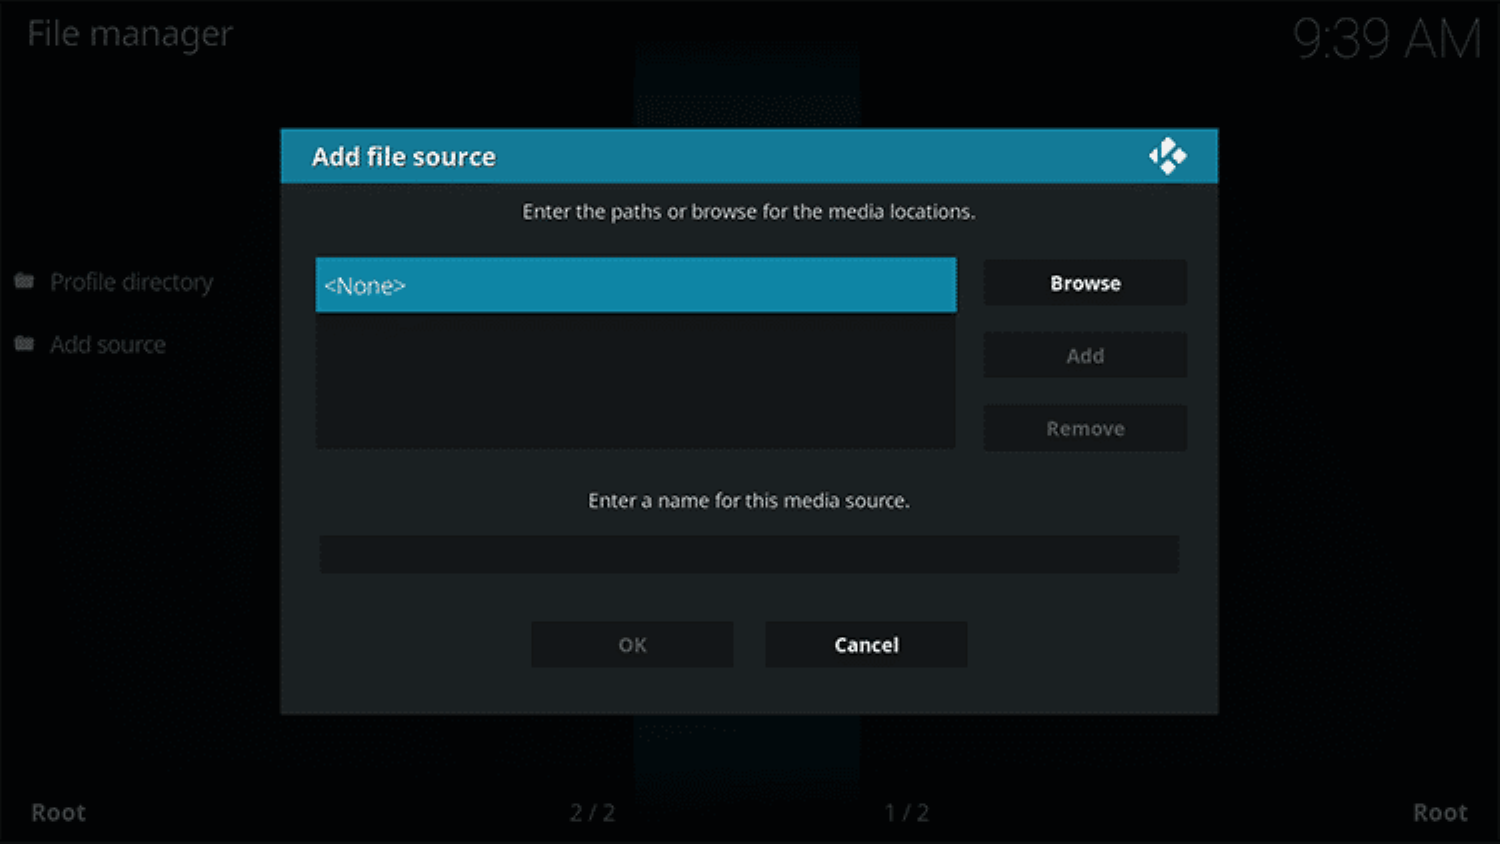
5. Type the following EXACTLY as depicted http://fusion.tvaddons.co and click on Done. Highlight the box underneath marked enter a name for this media source & type fusion and click OK
Your Fusion is now ‘installed’ (Yeah, that’s it). Fusion is only a name for the group of repos now available to you from there. If you are overwhelmed with the choice, we have made a list of the top Kodi Krypton addons that can elevate your streaming experience!
How to Install Add-ons/Repos from Fusion
To install add-ons/repos from Fusion, you can now do the following:
- Navigate back to your home screen.
- On your home screen, select SYSTEM. (or settings depending on the skin you’ve been using)
- Click on Add-ons.
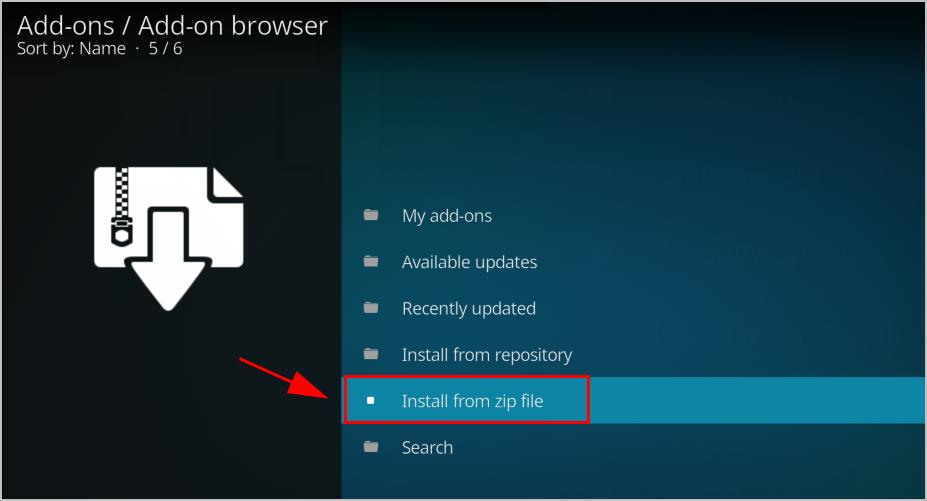
- Find and select “Install from Zip File.”
5. Here, click on Fusion. Find “kodi-repos.” Choose English as your primary language.
How to Install Fusion on Kodi Krypton
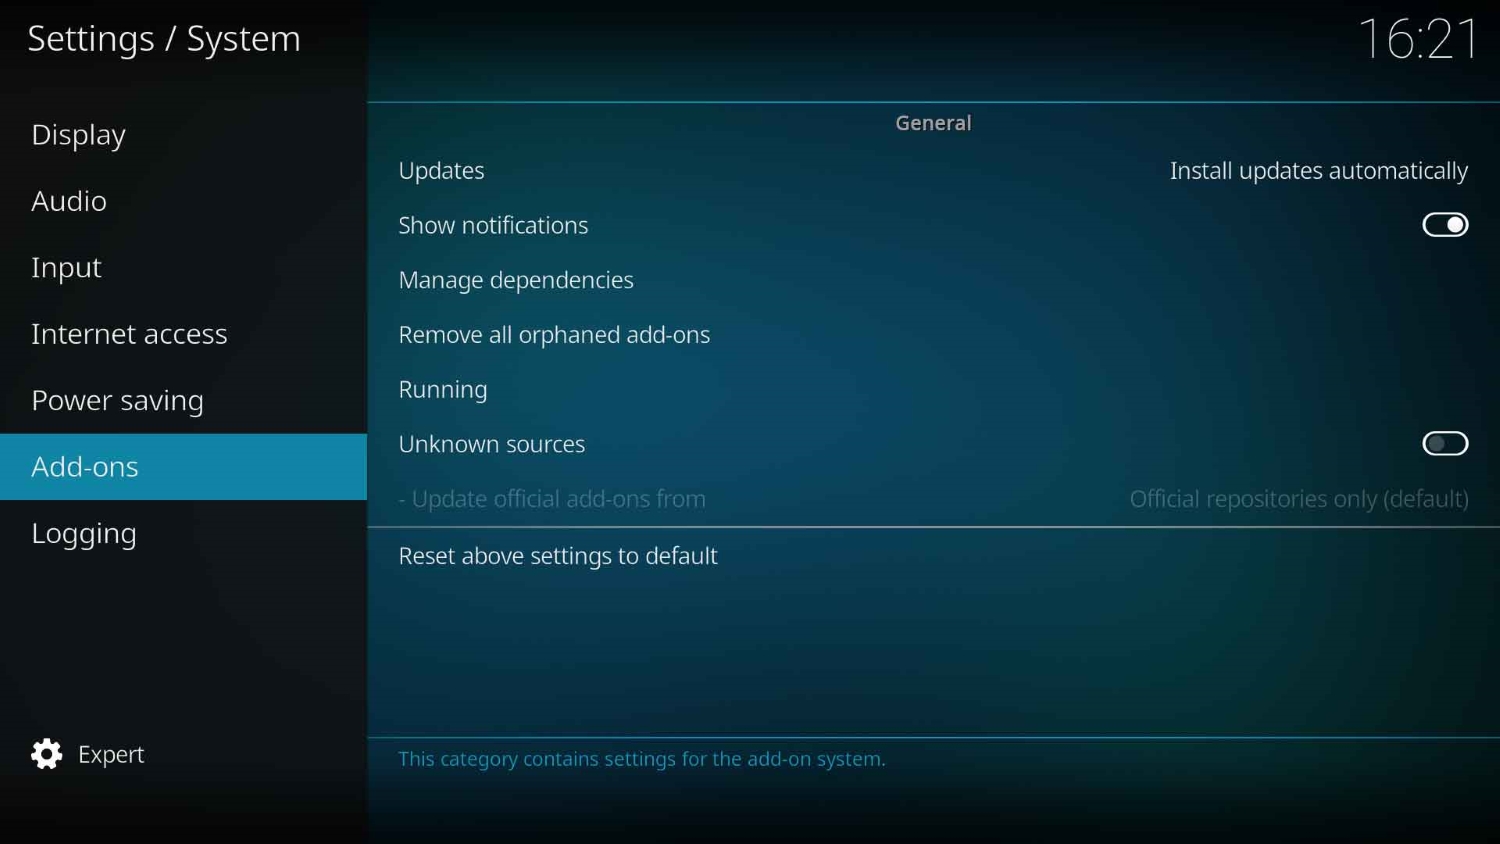
Some things to note before you install Fusion on Kodi – Default settings in Kodi 17 have Unknown Sources disabled. So we must enable this first before doing anything else. If you have already finished this step, scroll down a few steps to the section marked “Now to install the Add-on”.
- Open your Kodi.
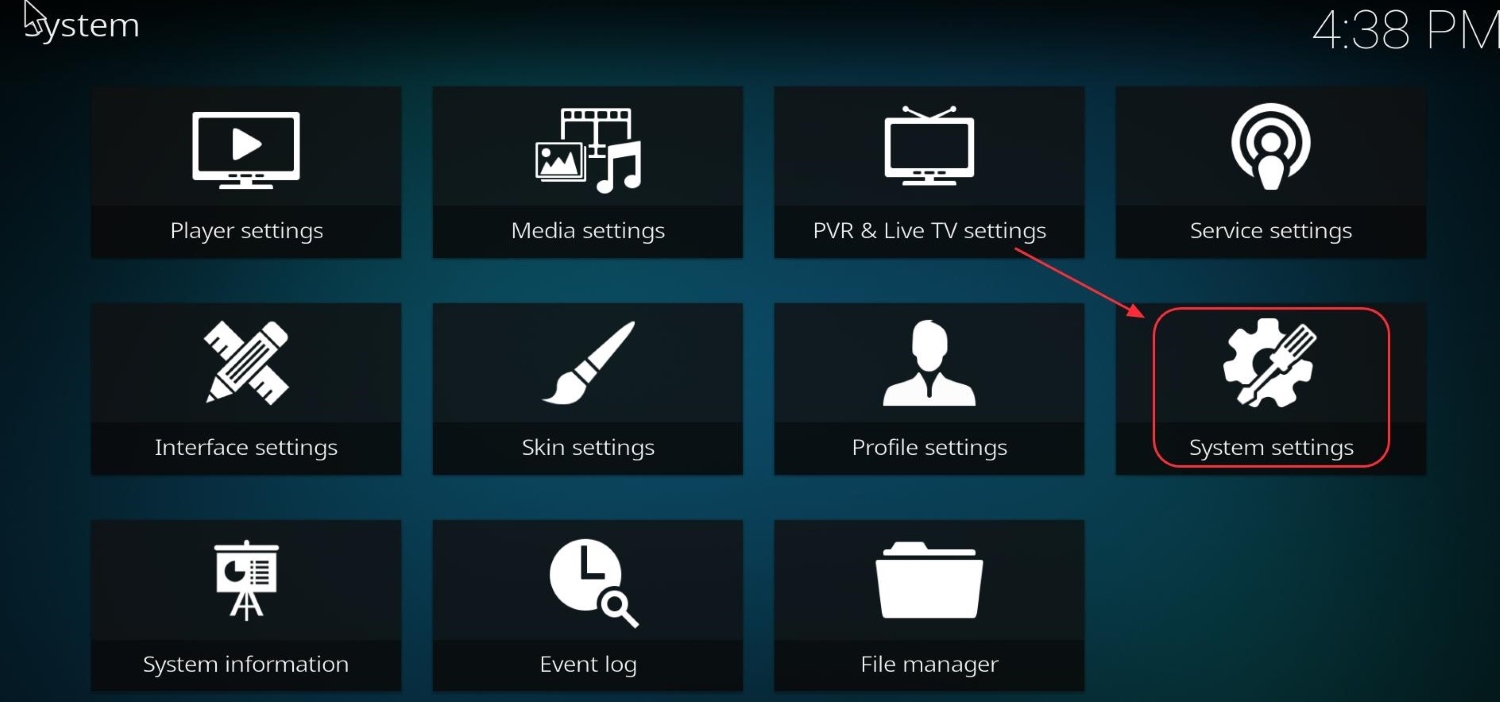
- Select Settings, then click on System Settings.
- In the System Settings, select “Add-ons.”
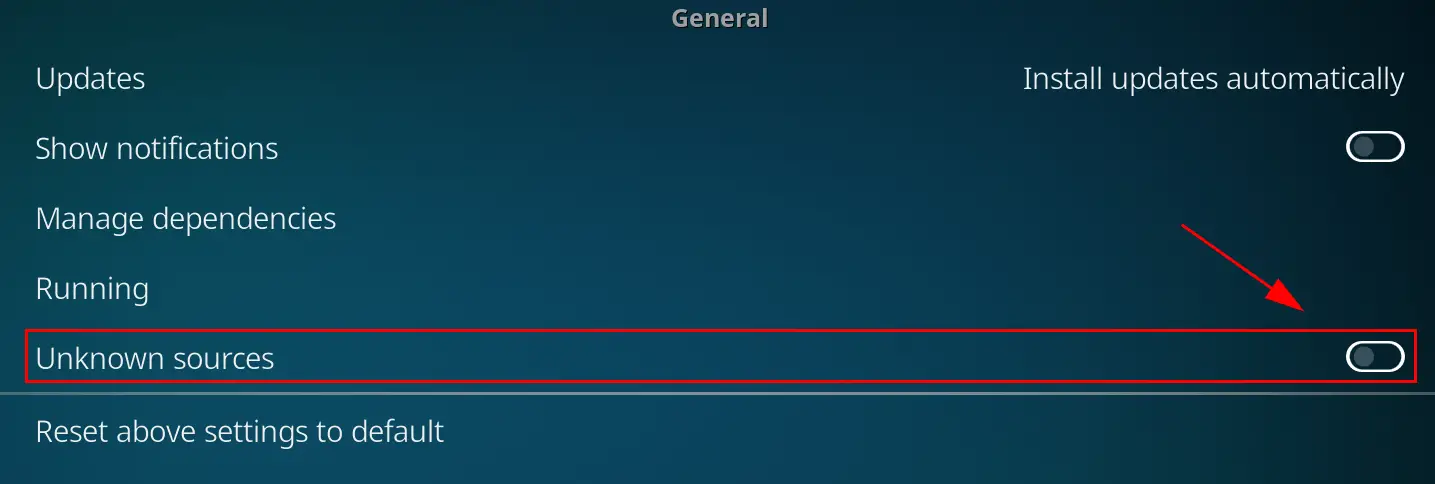
- Toggle and turn on “Unknown Sources.“
A warning message will now appear asking if you agree that you are responsible for any damage to the device, data loss, etc. As long as you stay careful about your trace on the internet and know about your device to some extent, this shouldn’t be an issue.
Install the Add-on Now
- Open your Kodi. Select the Settings. (cog) (located your top left)
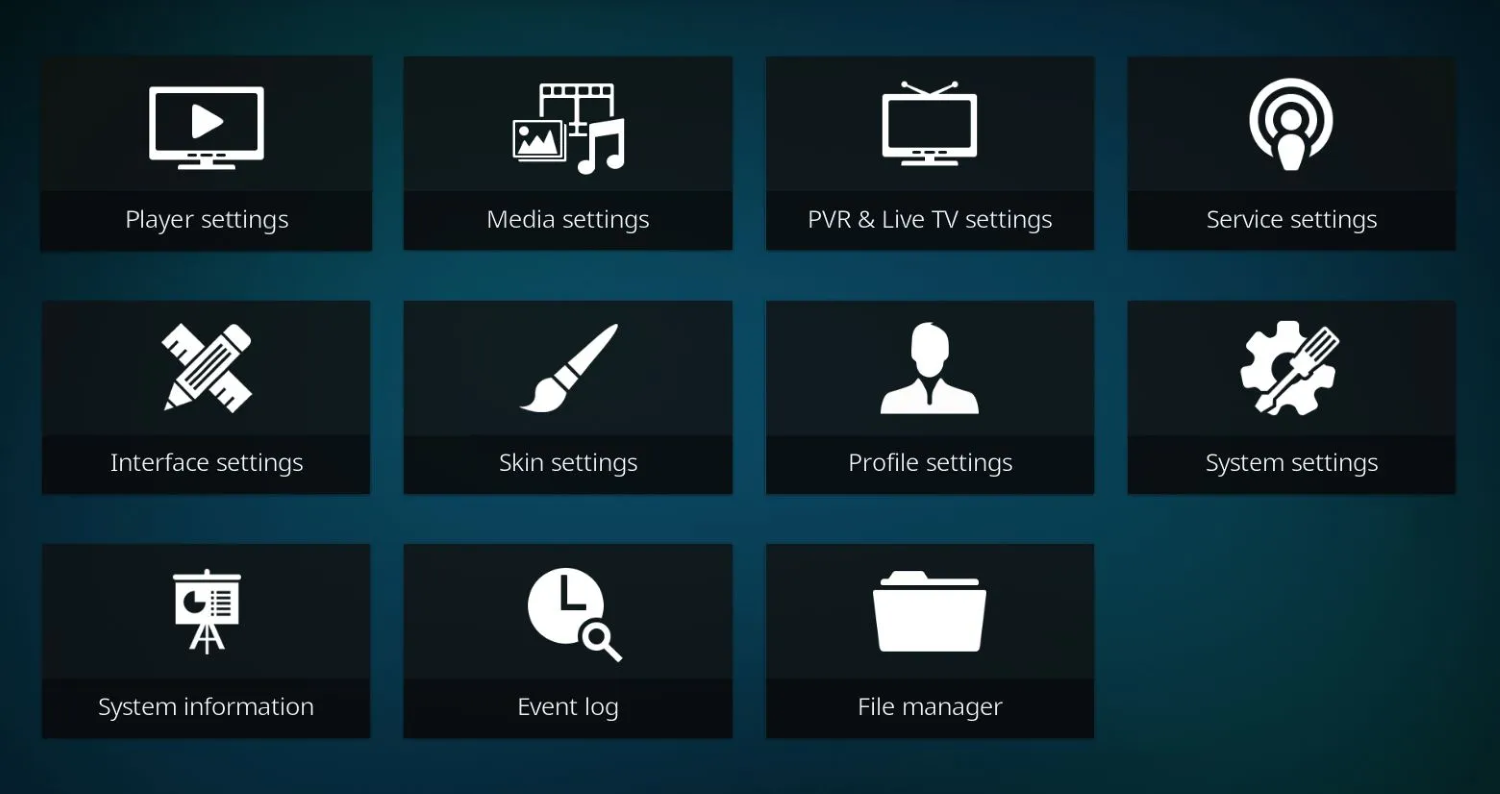
- Click on “File Manager.”
- Go down and click on “Add Source.”
- Over here, select “None” and type the following EXACTLY as depicted http://fusion.tvaddons.co and select OK.
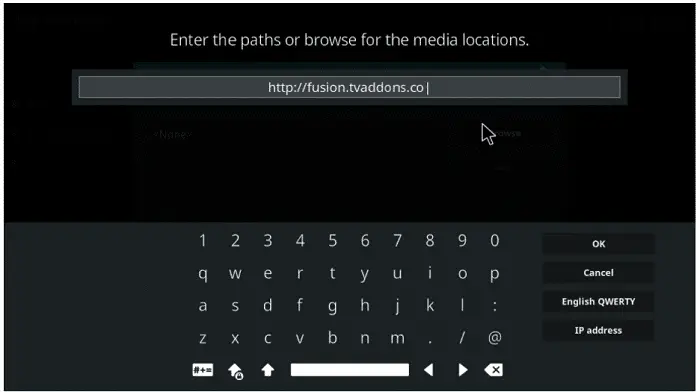
- Highlight the box underneath marked enter a name for this media Source and type fusion, then click on OK. Navigate back to your home screen.
- On your home screen, select SYSTEM. (or settings depending on the skin you’ve been using)
- Click on Add-ons.
- Find and select “Install from Zip File.”
- Here, click on fusion and find “kodi-repos.” Choose English as your primary language.
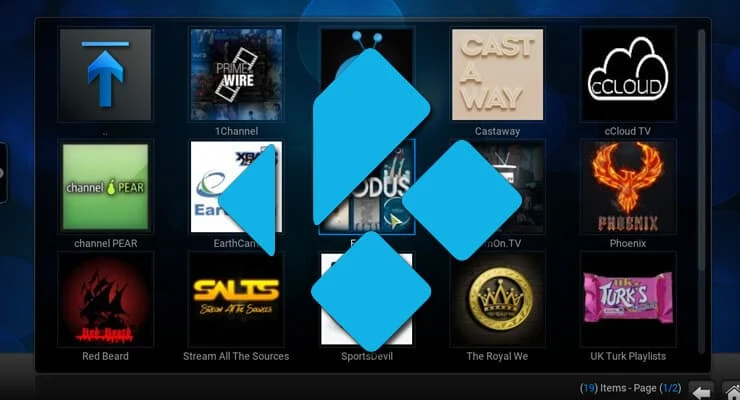
From the Fusion installer inside Kodi, you can now select any of the available repos to install as and when you would like.
Features of Fusion
After you have followed all the steps in this “How to Install Fusion on Kodi” guide of the installer, the central concept behind the use of such installers remains a bit vague. We will brief you shortly about the features of Fusion as an installer.

The main features of the Fusion Kodi are as follows:
- This installer helps third-party application developers with a significant opportunity to extend their options and features by acting as an extension of the original Kodi application.
- It is possible to reduce the overall size of the Kodi application by making use of a Fusion installer.
- The Fusion installer provides the right support if you wish to add any new feature to the Kodi system software. Fusion essentially helps you customize your Kodi with great ease.
- Kodi Fusion Installer provides you with the right kind of repositories which means that all the updating work and link finding for the installation of add-ons just got a lot faster for you.
Benefits of the Fusion Installer on Kodi
Following are some of the benefits you will get after you install Fusion on Kodi:
- A lot of time is saved by installing Fusion since it helps set up the add-ons by using repositories already provided by the Fusion installer for each corresponding add-on.
- After you install Fusion on Kodi, you are given the facility to alter Kodi’s graphics system, which also supports customizing it with different formats of images.
- Fusion helps you to maintain the Kodi add-ons in an organized manner and updates your add-ons automatically from time to time.
Kodi is known to support numerous third-party add-ons. We always advise you to use a Kodi VPN when using such add-ons to ensure complete online privacy, and security and thereby access restricted content without any inconvenience.
Were you able to install Fusion on Kodi? Did you like the Fusion add-on? Did it help you in any way? Do you have any suggestions about similar add-ons that act as add-on managers, like the Fusion installer? Let us know about it in the comments section, and share this page with others if you found the information useful.
FAQs
How does installing Fusion on Kodi work?
take a look at these steps: 1. open Kodi's main menu. 2. Then, click on the 'File Manager' option. 3. Then, in the following window, select the option of 'Add source.' 4. When the 'Add a file source' box appears, select the option of 'None>.’ 5. Click and go to the link of http://fusion.tvaddons.co.uk and there, type it out.
What is meant by Fusion TV add-ons?
Fusion, created by TVAddons.co, provides multiple fusion add-on addresses to watch your favorite programs. Fusion even gives you Indigo, a one-stop solution for finding or managing unapproved Kodi add-ons.
Kodi is reporting that my network is not running. What has happened?
Try using another application. In the meantime, put Kodi to test whether your internet is stable or not. Else, use some different Kodi add-on, or it's better to download a new add-on from the official Kodi source. If your Kodi still does not work, try to disable the firewall or any antivirus software on the computer.
How can one use the internet via Kodi?
Check the option of Addons first and the Program add-ons next. Then go for the LibreELEC setup. Next, connect yourself to the wireless connections. Next, in the Select option and put in your Wi-Fi network password. That's it.
How to do a Kodi Fusion setup that can connect to my home network?
consider these steps: 1. Select Videos from the main menu. 2. Files are selected when you click on them. 3. Video should then be added. 4. Next, select the browse button and then the UPnP device. If everything is correctly done, it will show that 'Kodi-(your name’s PC)' is the name of your PC.
Procedure to attach a shared folder on Kodi?
Go to the Browse and a list of new shares. Choosing the Windows network (SMB) is what you have to do next. After that, go to the Source folder. Image 1: Choose Windows network (SMB) in the new shares list. Image 2: Look for the needed Source folder, then select OK.
How do I make Kodi on my Xbox work?
1. Go to the Xbox One's main menu and click on Search. 2. Look for Kodi and then click on the Kodi icon. 3. then, click on Get and launch
Can a VPN be used when using Kodi on Xbox One?
You have to have an Xbox One or, later, a stable network and an Xbox Live account if you want to use Kodi on your Xbox. But just like Roku and Fire TV Stick, Xbox also does not allow VPNs. In that case, you'll have to use a router, a Mac, or a PC to connect.
Does Kodi act as a server?
Yes, it can be used as a UPnP Server and a UPnP Client to receive music and videos from a UPnP Server.