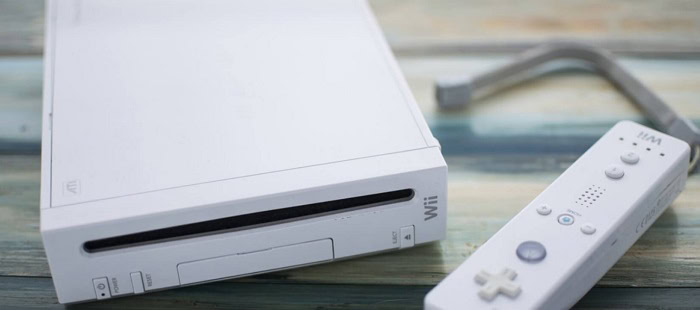
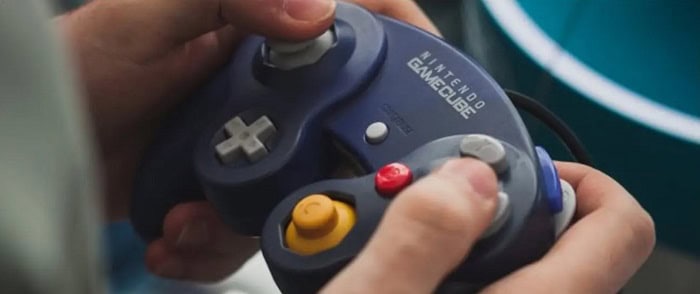
The backward compatibility of the Nintendo Wii is one of its best features. The Wii recognizes and plays micro discs. A GameCube controller must be connected to the Wii. How to use a GameCube controller on Wii is reflected in this post.
To connect the controllers, plug them into the Nintendo GameCube controller sockets on the Wii console’s sides. The socket closest to the front of the system is designated for Player One.
With some tweaking, playing GameCube games on the Wii U. Initially is now possible. You’ll need a Nintendo GameCube controller for Wii and a memory card. To connect the controller, use either the front-facing USB ports on the Wii or the controller’s USB port. Before a system can be loaded, a memory card must be placed into one of the two slots on the front. You can play games with Wii and GameCube controller compatibility by purchasing the vintage controller. After that, one can browse the vast selection of games and boot loaders for software available for the Nintendo Wii. Play your favorite GameCube games on your Wii by connecting a GameCube controller with the appropriate hardware and software. If you’re interested in your Wii console, you might be curious how to connect the GameCube controller to Wii. This manual will walk you through the setup procedures on How to use a GameCube controller on Wii and for your Wii to play GameCube titles.
See Also: 5 Best GameCube Emulators For Windows (Updated 2023)
Table of Contents
Explanation of how to use a GameCube on a Wii
- You must first have a memory card and a GameCube controller. Then, connect it to your console’s bottom USB slot. The controller must then be connected to either the Wii’s front-facing USB ports or the controller’s USB port.
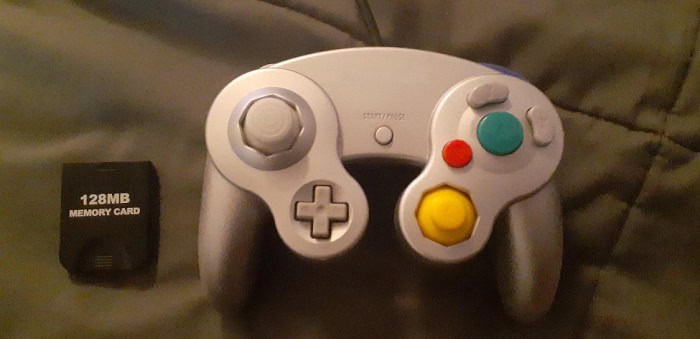
2. Finally, insert any GameCube memory cards you plan to use into the two open slots. – You can play nearly any Wii game with a GameCube controller. One of the three-button ports on the Wii should receive the controller. Then, you can download the games you want to play on your Wii machine using a USB drive.
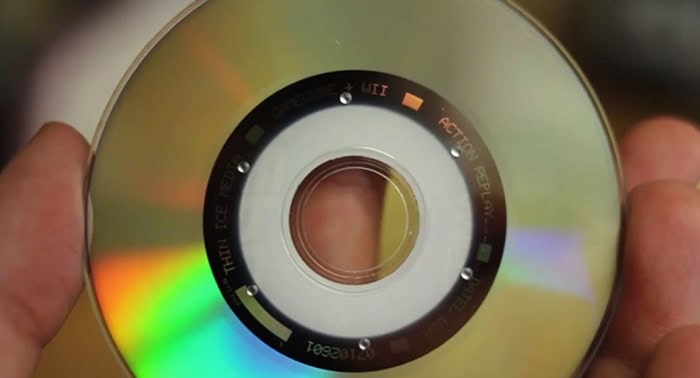
3. The opportunity to play GameCube games on your Nintendo Wii has now presented itself. Place the GameCube disc into the disc slot on the console’s top to start playing it. To load a system, place a GameCube memory card in one of the two slots on the front of the device.
4. To access GameCube software, you must first enable Wii U GameCube. Then, in the Wii parental control settings, you must make the GameCube capability available. Open the Settings menu, then select the GameCube tab. Any required gear, such as memory cards or controllers, must be enabled.
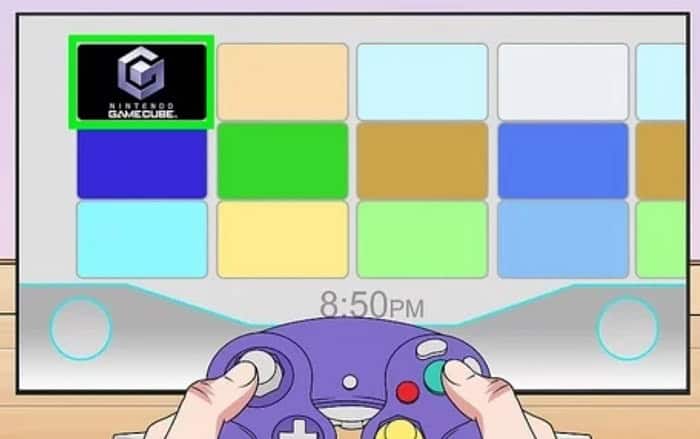
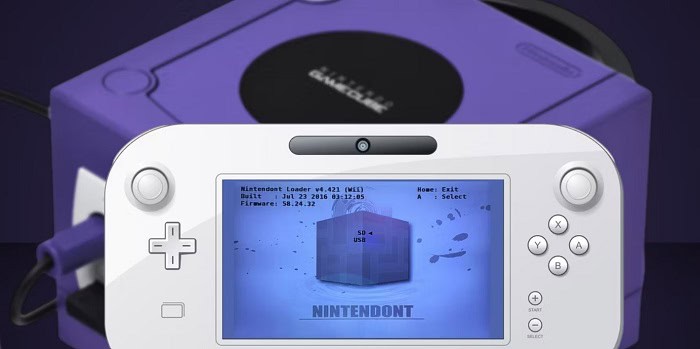
5. With a bit of tinkering, after enabling it, you can now play GameCube games on your Wii U. For instance, utilizing the original GameCube discs may require using a program like Nintendont to read physical discs.
6. You may download GameCube games from the virtual console or utilize an emulator if you have a full contemporary PC. By doing this, you can use the Wii to play GameCube games. Purchasing the classic controller and using it to play GameCube games on the Nintendo Wii is an additional choice.

See Also: Lego Game For Nintendo Switch | Best 10 Games
Points to Remember
Does the GameCube controller work on Wii? The answer is yes. The quickest method is to load your Wii before using your GameCube controller sockets on the Wii console. Next, put the connectors from each controller into the sockets on the Wii’s side. After that, put your GameCube games onto the system and ensure they are ready to play.
You must connect your SD card or external hard drive to the Wii with a USB cord.
Once connected, one can access the enormous games and software bootloaders of the Nintendo Wii. The Hackmii software can also install games for other platforms and GameCube controller compatibility on your Wii. Ensure all controller buttons are operational to ensure everyone in your home can take turns using the system to play their favorite games.
To run backups of games from other systems on your Wii remote or even your mini home, you may also employ card emulation and these top Wii Homebrew Apps.
FAQs
Will a USB GameCube adapter work with the Wii?
The most recent Wii models lack GameCube ports, so they cannot accept GameCube controllers. Therefore, the Cube controller will function if you decide to buy the adaptor. It is possible to use adapters to connect your GameCube controller to your Wii remote, which will then function as a Wii Classic Controller.
Are GameCube games on Wii good?
Before installing your GameCube games into the Wii console, ensure you have the required hardware if it is compatible with GameCube. Wii GameCube controllers are incompatible with GameCube games; you must use a GameCube controller to play them. Hence, you can play top-notch Wii games with GameCube controller support.
Is Wii being phased out by Nintendo?
Nintendo has announced that the eShops for the Wii U system and the 3DS family of systems will go down at the end of March 2023. As a result, you won't be able to use download codes, download demos, or buy any content from the stores after that date.
Why did the Wii fail?
The motion control gimmick of the Wii was just enough to persuade consumers to buy the console, but it proved to be too flimsy to handle quality games. Motion controllers were almost certainly simply a fad, as evidenced by the later copying failures of Sony and Microsoft (Kinect and Move, respectively).
See Also: How Much Is Nintendo 3DS Worth In 2023? – TechWhoop
Conclusion
The best way to play significant Wii games is a Nintendo GameCube memory card or a homebrew program dubbed “Nintendo.” You may play games on the original GameCube console while using the Wii remote to save your Wii games on a GameCube memory card. It is a great way to improve your GameCube gaming experience and save you a few dollars. This article explores How to use a GameCube controller on Wii GameCube Wii usage options and suggests improvements.
Players may easily play games on their Wii consoles thanks to Nintendo’s well-known and fantastic video games. Nintendo’s choice to leverage GameCube games to build a library of Wii games, and the rise in popularity, was successful. You can now use GameCube Controller on Wii on home entertainment devices and play most Nintendo games.
To accomplish this, gamers must either utilize homebrewed software or download an emulator. People usually ask How to use a Gamecube controller on Wii, which is quite simple.