The Cerebro Media add-on is an excellent mega addon choice offering that you are sure to love. This Kodi addon is great in its unique way because of everything it offers. You should try it at least once if you are a regular user of Kodi on your media device or personal computer. We present to you our guide on how to download and install Cerebro Addon on Kodi at Techwhoop.
Before installing the Cerebro addon on Kodi, let us first glimpse the safety tips while using any unofficial Kodi addon. Using good VPNs to hide your private activity on any device is always recommended for maximum security.
You would not want any third-party trackers to be selling your information to other websites or, worse – get tracked down by legal authorities for streaming some illegal content. If you need a cost-effective and suitable solution, try using your Kodi software with IPVanish next time. And you can also try out the Release Hub add-on for Kodi. Click here to learn how to install it.
A VPN, or Virtual Private Network, allows you to create a secure connection with another network over the Internet. VPN can access geo-restricted websites, protect your browsing activity from prying eyes on public Wi-Fi, and much more.
Table of Contents
Some Insight Regarding Cerebro Addon
- Addon: Cerebro
- First Release: October 2017
- Customized Theme: Yes
- Developer: Biglad
- Official Kodi Team Support: No
- Name of Location: Cerebro TV Repository
- URL: http://repo.cerebrotv.co.uk/
Steps to Install Cerebro Addon on Kodi v17 Krypton
- Start by opening the Kodi application on your device.
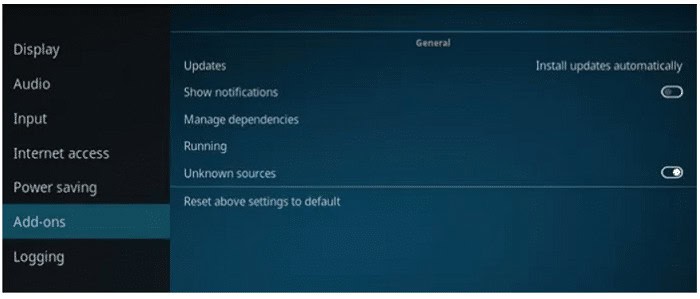
- From the Home Screen in Install Cerebro Addon on Kodi, find and click on the “Settings” icon. It looks like a gear. After going into the settings menu, you should be seeing an icon that reads “File Manager.” Select File Manager, and you will be presented with a list. Scroll down this list until you see an option called “Add Source.” Click on this before proceeding to the next step.
- In “Add Source,” you can see an option that says “Add File Source.” Click on it.
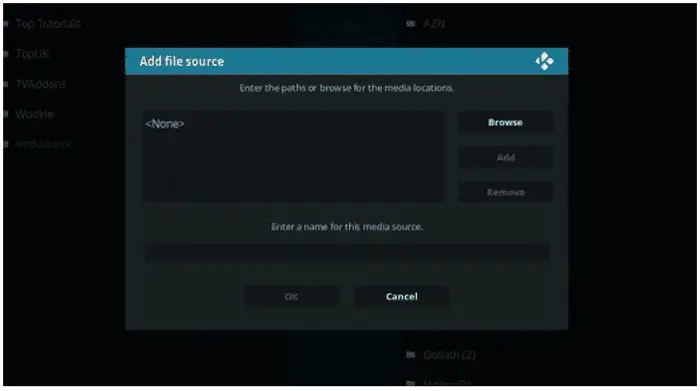
- After selecting “Add File Source,” click on the highlighted line below it that says the following “None.”
- Now, type exactly as shown in this URL: http://repo.cerebrotv.co.uk/ and press the “Done” button. The Addon source now needs a name. Enter a name like “Cerebro” or anything that you will be able to recall later easily.
- Click on the “OK” button to add this file source. After adding the source, return to your home screen and select “Add-ons.” The icon looks like an open carton box. Select it.
- In the addons option, select the button that reads “Install from zip file.”
- After selecting Install From Zip File, click “Cerebro” and Install Cerebro Addon on Kodi, then choose the repository: repository.cerebro.zip.

- After choosing the mentioned repository, wait a few seconds for the notification message to appear on your Kodi screen.
- Once done, select “Install From Repository” and click “Cerebro TVRepo.”
- Now, choose Video add-ons.
- Click on Cerebro Media and then hit the Install button.
- Just like before, wait a few seconds for the “Addon Enabled” message to appear on the screen.
- To access your Install Cerebro Addon on Kodi addon, go to Add-ons>>Video Add-ons>>Cerebro Media.
The steps shown above are only for users using the V17 or “Krypton” Kodi on their system. Adding Kodi TV addons is pretty simple and we will now brief you on the steps needed to install Cerebro Addon on Kodi if you use the V16 or “The Jarvis” version.
See also: – How to Install SportsDevil on Kodi Krypton v17 and Jarvis 16
Steps to Install Cerebro Media for Kodi V16 Jarvis
If you use Kodi Jarvis, the instructions may vary slightly but should be easy to follow.
- Open your Kodi V16 or more commonly known as Kodi “Jarvis.”
- From the home screen of Kodi, go to the System menu panel. Scroll down until you see the “File Manager” subcategory. Click on it.
- After selecting the “File Manager,” press the button that says “Add Source.”
- You will be redirected to a dialog box with the highlighted text “None.” Click on this text, then enter the URL in the empty box: http://repo.cerebrotv.co.uk/. Now click on “Done.”
- Rename the source to “Cerebro” or whatever you would like. The sole point is to name something you can easily recall later. Once you have renamed the source, click on “OK.”
- Now that you have added the source navigate to Kodi’s home screen and click on the SYSTEM menu panel.

- In the SYSTEM menu, click “Add-ons” and then select the option “Install From Zip File.”
- Choose the source “Cerebro” or whatever name you have chosen for it earlier, and then select repository.cerebro.zip.
- Wait a few moments for the notification-enabled message to appear on your screen.
- Once the notification message pops up, click “Install from repository” and select “CerebroTVRepo.”
- Open Video add-ons and click on Cerebro Media. Finally, hit the Install button.
- Wait for the notification message mentioned before.
- You can now access the addon via Videos>>Video Add-Ons>>Cerebro Media from your Kodi home screen.
You are ready to begin using the Cerebro Addon on whichever version of Kodi you own. Install Cerebro Addon on Kodi today and start streaming content as you like!
See also: – How to Install Showbox on Kodi [In-depth Guide]
See also: – How to Install Specto Fork on Kodi Krypton 17 & Jarvis 16
FAQs
What is Cerebro addon on Kodi?
Cerebro addon is a channel that can be used in Kodi, which streams live TV and sports.
How do I add Kodi addons to my Android?
Go to the menu option in Kodi, where you will find a video streaming platform that you can use to scroll down and find the one you want, and download it.
Does Kodi support Android apps?
Kodi can run on almost all applications, which include Android Apps as well.
What should I do to keep my Kodi safe?
To keep your Kodi safe, you have to install a VPN with high security.
Disclaimer
This guide has been created to let its users gain access to the content they have already purchased the rights to. We, here at Techwhoop, in no way, support piracy and will bear no responsibility for whatever the users here do with the information that has been provided.
Please also remember that Techwhoop does not host, develop or produce any of the applications, add-ons, and software mentioned in the article on its page.
Techwhoop is not affiliated with Kodi, its additions, or its comprehensive software. What you do and how you do after you Install Cerebro Addon on Kodi is entirely up to you. You bear the sole responsibility for any damages to software or otherwise.
