Wish to know how to install Release Hub on Kodi? Will you know how to download Release Hub on Kodi? This post will provide you with detailed instructions on how to install Release Hub on Kodi. These instructions will guide you through every step of the process.
Open Kodi, and Choose SYSTEM > File Management > Add Source > None after launching Kodi. The following MUST BE TYPED EXACTLY AS SEEN: Click Done at http://fusion.tvaddons.ag. Source, type “fusion,” and click “OK,” Return to the Home Screen., Choose SYSTEM > Addons Setup from a zip file, choose fusion, Choose xbmc-repos, choose English, Choose entertainmentrepobackup-x.x.x.zip as the repository, Download Helix Addons now, Choosing Video Addons, Choose Release HUB Choose Install, Release HUB has been set up.
You can find more helpful details regarding the technique in the following article. Stay tuned with us to get extra information about the same which can help you customize your Kodi interface by changing skins or getting thumbnails on Kodi.
See Also : 10 Kodi Alternatives For PC That You Need To Know
Table of Contents
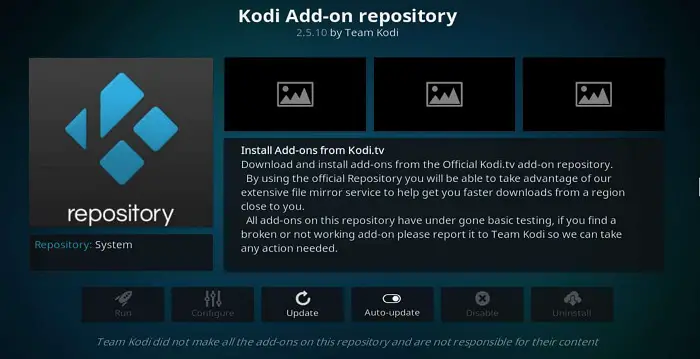
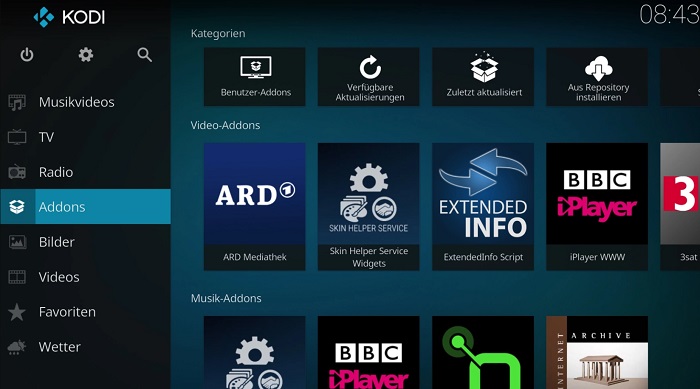
Install Release HUB Addon on Kodi 17 Krypton
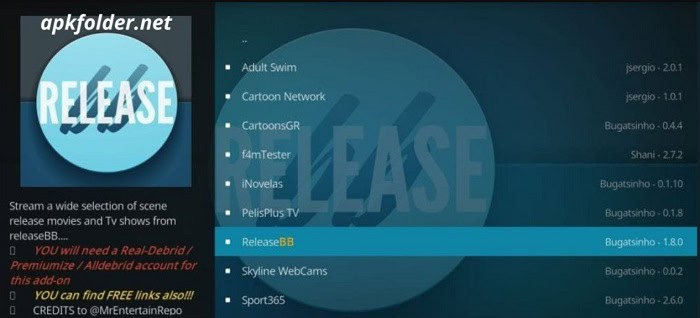
The Kodi addon known as Release Hub has content for all user groups. For instance, there are areas for music, TV shows, sports for sports fans and movies by installing Zem TV on Kodi or other similar addons, and even anime after installing the KissAnime addon.
The Release HUB addon offers links to old and new releases of films, TV series, and other entertainment, with many of the links coming from the best direct download sites.
We advise using a top-notch streaming VPN before proceeding with the instructions on how to install Release Hub on Kodi or Add Alluc to Kodi. This will help ensure your online privacy and security while using Kodi. To install the Release Hub extension for Kodi 17 Krypton, adhere to the steps below:
- Save the Kodi Bae Repository repo in a location that is accessible after downloading it. Select Kodi Addons.
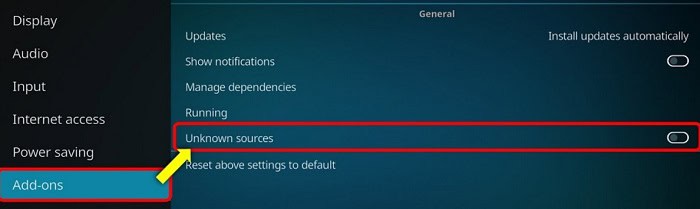
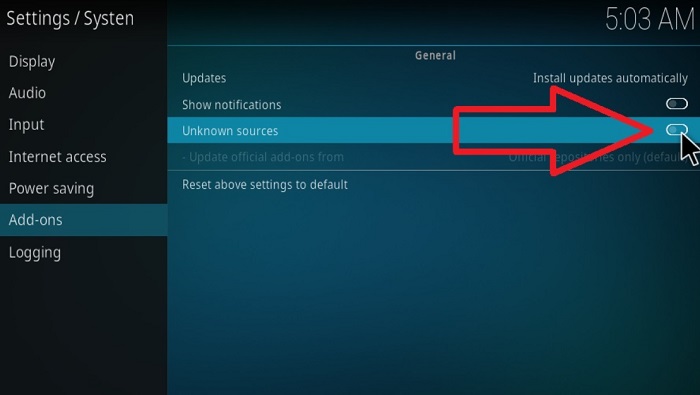
- On your screen, click the Settings icon in the upper left corner. To activate unknown sources on Kodi, choose Addons and select “Unknown Sources.” “Press Yes” when you see the warning notice.
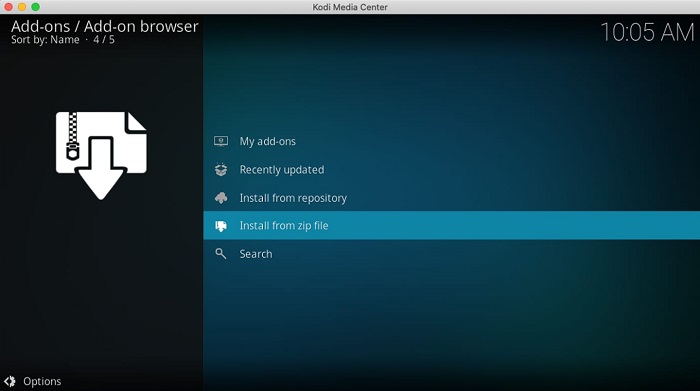
- By using the return key, move Kodi to the home screen. Choose Addon. Press the Addon Browser Icon. Choose Install From Zip File. Go to the Kodi Bae Repo you saved in step 1 and open it.
- Before selecting the repository, wait for the Addon Enabled notification to appear. Kodibae.x.x.x.zip. You have successfully installed the Kodi Bae repository. Tap Install from the repository. Enable the Kodi Bae Repository selection.

- Select Video Addons. Click on Release HUB and then on Install. The Addon Enabled notification will then appear. You have successfully set up the Release HUB Addon.
Returning to the Kodi home screen and selecting Addons will bring up the Release HUB Addon, which you can access. You may also like to check out the trending Kodi add-on ‘Incursion’ and learn how to install it.
Alternative Way To Install Release Hub Kodi Addon
https://vpnstreamer.com.au/what-is-kodi// enables consumers to watch streaming data on big screens. The entire Kodi system is of little use without addons. The video addon starts playing high-quality movie scene releases when the Release Hub Kodi addon is installed.
For users looking to expand their Kodi experience, understanding how to install Acestream on Kodi can bring additional streaming capabilities and options.
You require the Fusion Installer to complete this installation. How to install this installer is easily accessible. Follow the steps given below:
- Follow these instructions after the installation is finished. Choose Settings from the sub-menu under the SYSTEM tab.

- Choose Addons from the left to install from a zip file. Decide on xbmc-repo. Choose the repository.zip file. Choose “English” from the menu. To continue, open entertainmentrepobackup-x.x.x.zip.
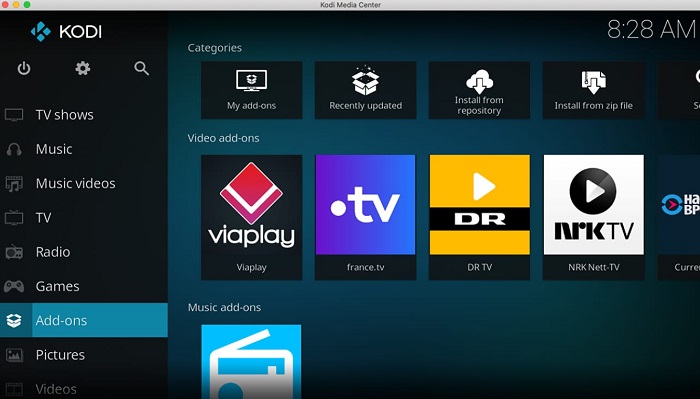
- Decide on an install repository. I am choosing Video AddOns. Choose Release Hub from the menu. Watch for the notification that says “Repo Addon Enabled” to appear.
- Choose “Install” from the menu. Release Hub is now installed and may be accessed below the Kodi program screen. Just wait for the addon-enabled notice.
The addon is now fully installed and ready for usage.
Installing the Release HUB Kodi Addon on Kodi 20
Step-by-step instructions for installing the Release HUB Kodi Addon on Kodi 20 Nexus Alpha 1 for Amazon Firestick 2022. After installing Kodi, follow these instructions on how to install Kodi 19.4 on a Firestick.
-
- On your Firestick, Fire TV, Android TV Box, Windows, Android, Mac, iOS, Smart TV, and other Fire TV devices, first launch Kodi 19.4 Matrix.

- After that, choose and press the Settings gear icon button. Choose System next. Next, choose Addons. Clicking on it will activate the “Unknown sources” option.
- Click “Yes” on the warning popup. Then, go to Settings > File Manager and click on the URL box.
- Enter https://bugatsinho.github.io/repo, add name “bugatsinho”, and store it. Return to Kodi’s main menu and click on the gear icon to access Settings.
- To install the repository, select “Addons” and then click “Install from Zip File.” Click “Yes” on the warning popup and search for “Bugatsinho.” Finally, select the repository and proceed with the installation.

- Wait while bugatsinho-x.x.zip is installed. (Depending on your internet speed, a notification can take some time to appear in the top right corner after the installation is complete.) Click “Install from Repository” at this point. Following that pick the Bugatsinho repository. Next, select Video Addons. Select ReleaseHUB Addon by clicking on Video Addons.
- Click Install the ReleaseHUB addon button, then OK on the popup. Wait for the installation to finish. A notification will appear when it’s done.
- Then, pick Video addons from the Kodi home screen menu by returning there. Then, choose and launch the ReleaseHUB Kodi Addon.
- On your Firestick, Fire TV, Android TV Box, Windows, Android, Mac, iOS, Smart TV, and other Fire TV devices, first launch Kodi 19.4 Matrix.
Launch the Hub Kodi addon. We are fixing the problem.
The following are the most efficient fixes for streaming failures and other difficulties where there is no stream available:
- To avoid problems, update Kodi to the most recent version. Use the option in your device’s settings or upkeep addons to clear the Kodi cache.
- To reauthorize Debrid services like Real-Debrid, Premiumize, and All Debrid free links, use the new ResolveURL.
- Under the addon options, change the Auto Play option to Source Select. Stop using a VPN when using Debrid services. To get past ISP limitations, utilize a proxy.
FAQS
How can I set up addons from outside sources on Kodi?
You must first enable third-party repositories if you haven't already. Click the gear symbol. Check 'Unknown sources' by heading to System > Addons and ensuring it is enabled.
Do I require a quick-Release Hub?
Trick answer: ANY quick Release will function with your car (provided it has a Short Hub Adapter). The Short Hub Adapter must be placed in addition to the Quick Release because it is not a hub in and of itself.
What is the best way to add a remote repository?
Adding a new remote repository is as simple as typing the git remote add command in the directory where your repository is stored on the terminal. Two arguments are required for the git remote add command: a name of a distant origin.
Where are the Kodi plugins set up?
Kodi comes pre-installed with various default addons, including language addons, scrapers, default skins, etc., for basic functioning. Together with the rest of the Kodi program files, these pre-installed addons, can be found in the Programs folder.
Conclusion
How to install Release Hub on Kodi is made simple by the suggestions above. We thought you had profited from our guide on installing Release Hub on Kodi. Our team has created a detailed guide that thoroughly explains the entire process. We sincerely hope the information on this blog satisfies your needs.
See Also : 20 Kodi Skins You Must Install | Updated 2023 – TechWhoop