For good reasons, Windows is the most popular desktop operating system of people’s choice. It’s speedy (most of the time), reliable (again, most of the time), and user-friendly. But sometimes, it can be crappy and frustrating to use, especially when it comes to delicate stuff that requires administrative privileges and the system’s permission OR “you need permission to perform this action”.
If you’re having trouble with file permissions, there are several methods to fix it. You can use the command prompt, manage file permissions, change ownership using cmd, change the permission of the entire directory, use a registry hack with the InstallTakeOwnership.reg file, or boot into Safe Mode. It’s important to ensure that you’re not using a standard or guest account and that you have full control over the file or folder. To do this, add yourself as a member of the Administrator account. Additionally, try running the System File Checker.

So how do we get around this annoyance, you ask? Well, I’ve got the solution. Whether you are trying to get into a folder or trying to delete one that you don’t need anymore, here are some ways by which you can fix your need for permission to perform this action prompt. Let’s begin.
See Also: What is Draw Over Other Apps? An In-Depth Explanation
Table of Contents
6 Ways to Fix You Need Permission to Perform This Action
Use the command prompt.
Give full privileges to all the existing users. To do that, follow these simple steps:
- Search for ‘cmd’ on the Windows search bar.
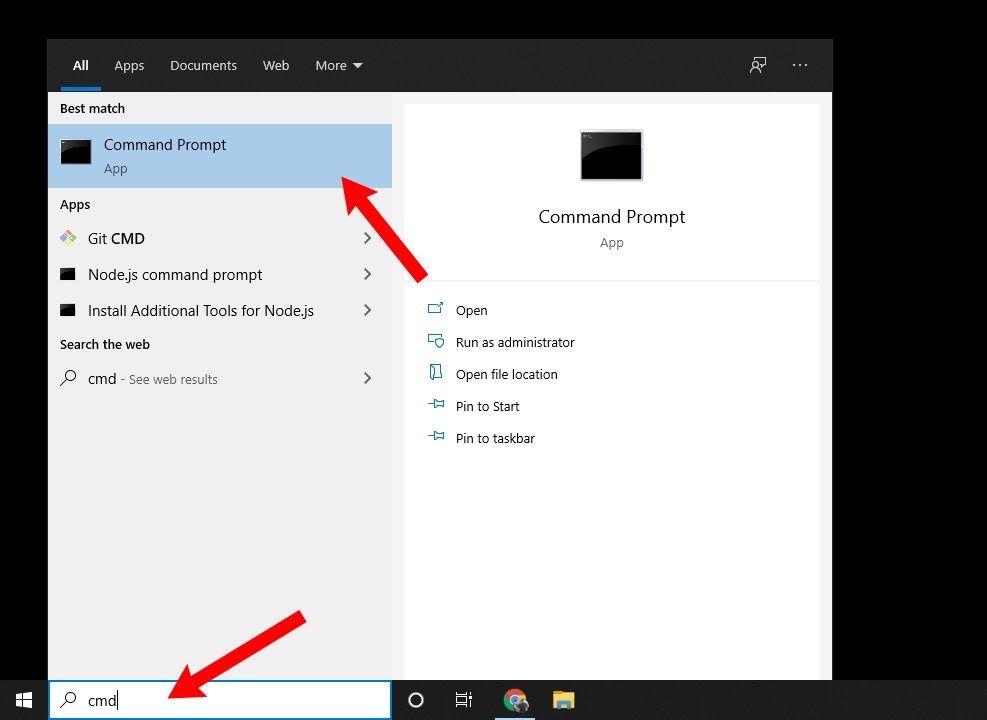
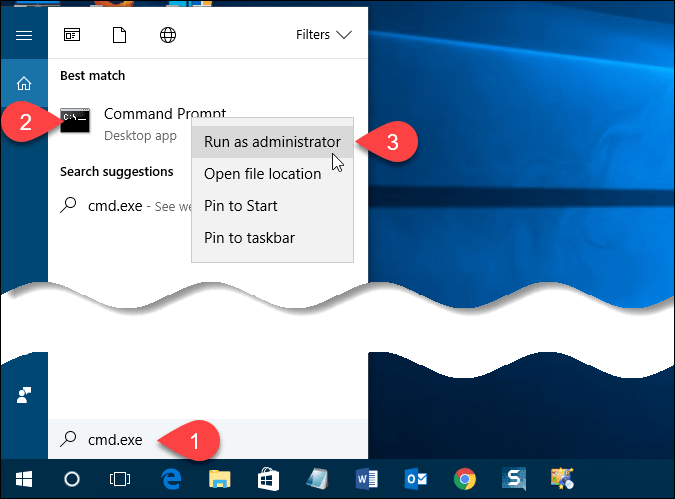
- Right-click on the search result for the command prompt and select ‘Run as administrator.‘
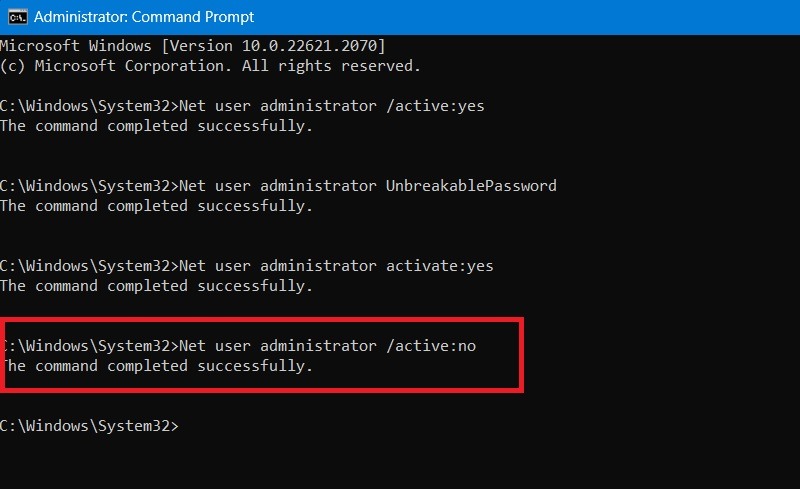
- When the command window opens, type the following command: net user administrator /active:yes and hit enter.
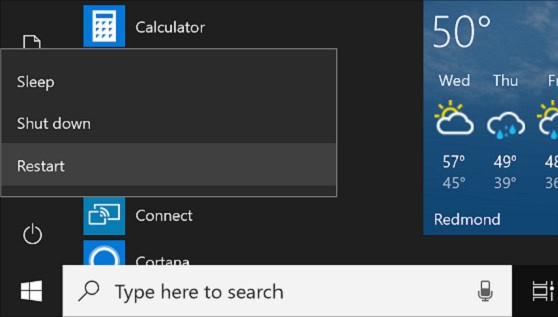
- Restart your PC.
The above command should have changed the user privileges to that of an administrator. After the computer has restarted, try to do the same thing you did before you got that ‘you need permission to perform this action message. It should work now without any permission issues.
Manage the file permissions
If that method did not work, you could try to change the present user access controls on the file. Here is how to get it done:
- Right-click on the file that you are targeting, and click on properties.
- Enter the security tab.
- Hit the advanced button on the bottom right corner of that tab.
- Click the‘ Edit’ button and go to the ‘Other users and groups’ option.
- In the text field, type your account name or just type Administrators. Then, hit the check names button.
- On the tab that says “owner’, tick the Replace owner on the sub containers and objects option and hit OK.
- Click on your account from the list on the security tab. Click on the ‘edit’ button.
- Tick the box under the allow tab that says complete control. Then, click OK.
Doing this will allow you complete control over that file and let you delete or modify it without the annoying ‘you need permission to perform this action message. Try to do what you were trying to do again. See if this change of authority made any difference.
Change ownership using cmd
If the ownership change in the above method did not work, try using the command prompt. Here is what you should do:
- Launch the cmd by searching in the Windows search tab or by pressing Win+X and clicking on Command Prompt (Admin).
- When the command window opens, type this line and hit the Enter key: takeown /f <path> /r /d y
- The above command helps you to take complete ownership of the target file. Once that is executed, type this command as well. icacls <path_to_the_folder> /grant administrators:F /T and hit Enter.
- The above command would give full ownership to the Admin groups if unavailable earlier.
This method is my preferred one, as it is fast and only takes a few one-line commands to get full access to that path. Copy and paste those commands and retry the same thing you did earlier, but get the ‘You Need Permission to Perform This Action’ alert.
Sometimes, the commands entered through the prompt will not be saved if your Windows system is old. Always apply essential Windows updates released and reboot your computer after you make any changes through the prompt. A fresh reboot pretty much always sets many things straight.
Change the permission of the entire directory
This is not entirely recommended, but you can recursively change the directory’s permission as a whole. If you change the access rights for a guide, all the usage rights for the files within it will change, irrespective of whether you want them changed. But if you change the directory permission, you can right-click on the directory and select the properties from the context menu.
- Under the Security tab, go to Group and usernames and click on the administrator option.
- As usual, you must click on the edit button to change the permissions given to the directory by default.
- After that, you can click on the advanced button below the permissions window.
- And click on the change button next to the option in the advanced permissions window.
- When a new window opens, select whether the user or a group or click on the advanced option once again, which is present in the bottom left corner of the Window.
- You need to click the button from the advanced settings that says find now.
A bunch of names and folders are stored. You can see them in the box that says search results. Select the result that says everyone and select the OK button.
No, you need to head to the admissions tab and click the add button below. Next, you need to click on the link with the search and select a principal. You must perform the same steps by clicking the advanced button and selecting everyone from the find now button.
Now you can send type to allow and then check the box for the full control option. After you finish, click the OK button to save your changes. Now, you should be able to delete or modify the file in its designated location without any Access denied error. Hope this might solve your need for Permission to Perform This Action problem.
Registry Hack using InstallTakeOwnership.reg file
Now, this might come as a surprise to you, but Windows is not precisely as robust of an operating system as you think it is. I mean, there is a stress office operating system that is pretty easy to modify. So, in this method, we will see how to use the registry to give yourself the rightful authority over a particular file with the help of a third-party tool.
- To do this, cover your first after downloading a Zip file to your Windows computer. If you are the administrator of the computer you are using, download the zip from here.
- Upon extraction, you will find that the zip file you downloaded contains two registry files with a .reg extension.
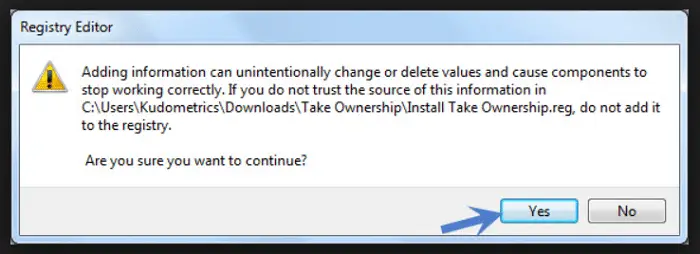
- Double-click and open the file that says InstallTakeOwnership.reg to install the registry hack.
An additional registry file Window adds a new context Menu option in the right-click menu of your computer, which will be labeled as taking ownership. So now, it becomes super easy to access any file you want to open or modify without having to change the permission of the entire directory, as I mentioned earlier.
Are you wondering why I did not mention this option on the list? This is because this method may not always work on all systems! There is always a catch, isn’t there? But it only takes a little time to realize that, so you might as well give this one a shot.
Now, all you need to do is head over to the same file you tried to ask earlier, right-click on it, and select take ownership from the context menu. This should hopefully fix the message which says, “You need permission to perform this action.”
So now, maybe you are done with this take ownership thing and want to remove it from the context menu. You can do that easily without opening the registry editor, simply by double-clicking on the second file in the same Zip you downloaded, named something like RemoveTakeOwnership.reg. It’s like the virus and the cure in the same package!
Try booting into Safe Mode
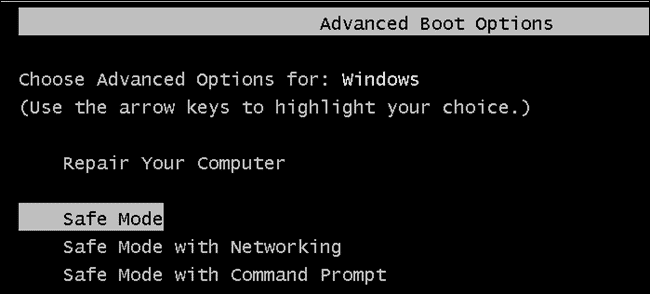
Sometimes, the other software installed on your Windows operating system is the culprit behind this error message. There is only one easy way to figure it out. You need to boot your system into safe mode.
Suppose you don’t know what a safe mode is. In that case, it is an operation where only the necessary and beaten operating system-specific files and processes will run in the background without any third-party programs in memory.
Suppose this issue regarding the unavailable file permission is caused by some third-party app for service cutting into safe mode and retrying the same modification you did. In that case, it will clarify whether or not third-party software causes the issue.
One straightforward way to boot into safe mode on your Windows system is by holding down the shift key while selecting the restart option in your system’s shutdown menu (or the power menu). Once the computer reboots, a blue screen with options is visible. Don’t worry. This is not a blue screen of death but more like a blue screen of life! Do I need to stop with these nerd jokes, eh?
You have registered on the screen; click the troubleshooting option and select the advanced options from the next screen. Afterward, you must choose the start-up settings and press the restart button. Now, your Windows system will reboot. After that, press the F4 key to enable the secure boot mode. This will hopefully fix the “You Need Permission to Perform This Action” issue you faced earlier.
FAQs
Why do you need permission to perform this action?
The occurrence of the 'You need permission to perform this action' error may indicate the presence of viruses or malware on your PC. Addressing this concern requires prompt action. By utilizing Windows Defender to run a malware scan, you proactively subject your system to a thorough examination for potentially malicious software. This cannot only detect but also eliminate these threats efficiently.
How do I force delete a folder when access is denied?
When you eliminate files or folders through Windows Explorer, apply the SHIFT+DELETE key combination to circumvent the Recycle Bin instantly, streamlining the deletion process. Another viable option entails opening a command prompt window and utilizing the rd /s /q command to initiate the removal of the specified files or folders.
How do I remove administrator permission?
Proceed to 'Control Panel' in the Windows Search Bar. From there, navigate to and click on 'User Accounts.' Subsequent action: 'Manage another account.' Within this section, you can select the user account you wish to eliminate from its administrative role, finalizing the process smoothly.
How do I give myself permission in Windows 10?
Setting Permissions 1. Open the Properties dialog box. 2. Go to the Security tab. 3. Click the Edit button. 4. In the Group or User Name section, choose the user(s) you want to grant permissions to. 5. Within the Permissions section, utilize the checkboxes to indicate the desired permission level. 6. Apply desired changes by clicking on the Apply button. 7. Confirm the modifications.
Conclusion
So there you have it. These are some of the most effective methods by which you can fix the “You Need Permission to Perform This Action” error message on your Windows computer. Among all these, I highly recommend the registry hack method, which adds an option to the right-click context menu. If you don’t succeed in one way, keep trying with the others until you get results. Best of luck!
