Are you facing an error while connecting to the internet? Is it saying that the default gateway is not available? Don’t worry. You are not the person facing the mistake? Many people are facing the same problem. They are also searching for a solution to the problem. Here is the answer to the problem. Just try restarting your router by switching it for 5 minutes and then turning it on. This typically solves the issue.
- Ensure network connections are functioning properly.
- It is necessary to either disable or uninstall the currently active antivirus software on your device.
- Update your Network Drivers.
- Do a Clean Boot Configuration.
- Make changes in the Power Management.
- Reset TCP/IP Stack to troubleshoot connectivity issues.
- Turn off the VPN connection.
- Check for the available firmware updates.
“Default Gateway is Not Available” is a standard error faced by people, and it doesn’t allow the user to access the internet and surf the net. It is pretty standard for Windows users. Here are some techniques or methods by which you can overcome the error. Keep reading the article and learn how to fix this error.
Table of Contents
How to Fix Default Gateway is Not Available Error
Remove Antivirus Programs
Uninstall the antivirus programs installed on your PC whenever you face this error. Some antivirus programs are automatically installed onto your computer as they directly get access when installing software such as McAfee. Antivirus gets installed as you install Adobe Reader. Default Gateway is Not Available. So uninstall it.
If you don’t know how to uninstall a program, don’t worry. Here are the steps to uninstall a program:
- Search for the control panel from the search box.
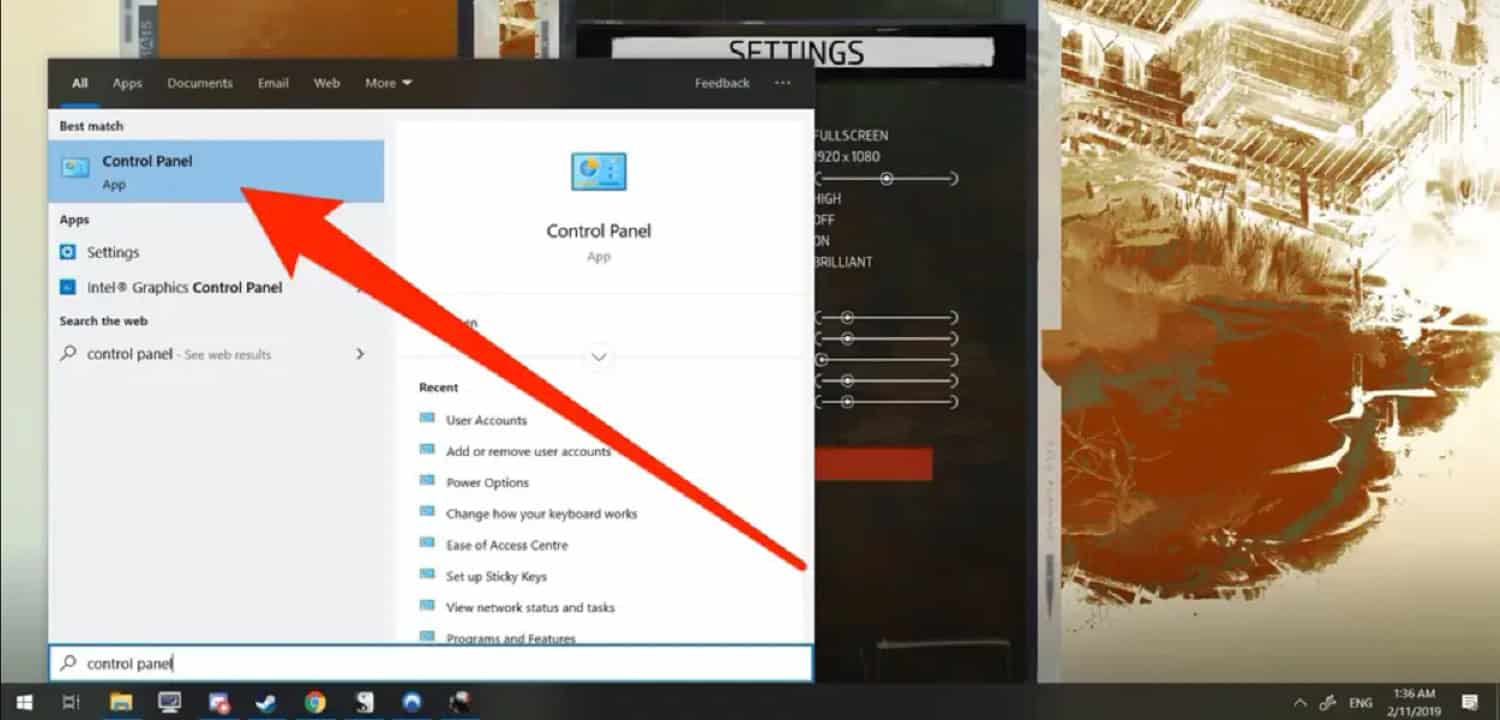
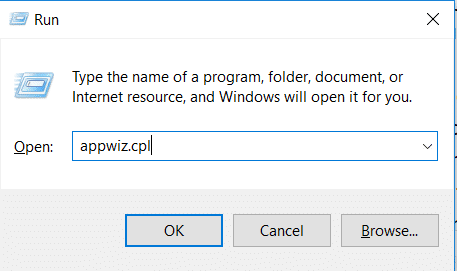
- Or press Win+R and search for appwiz.cpl
- If you have opened the control panel,
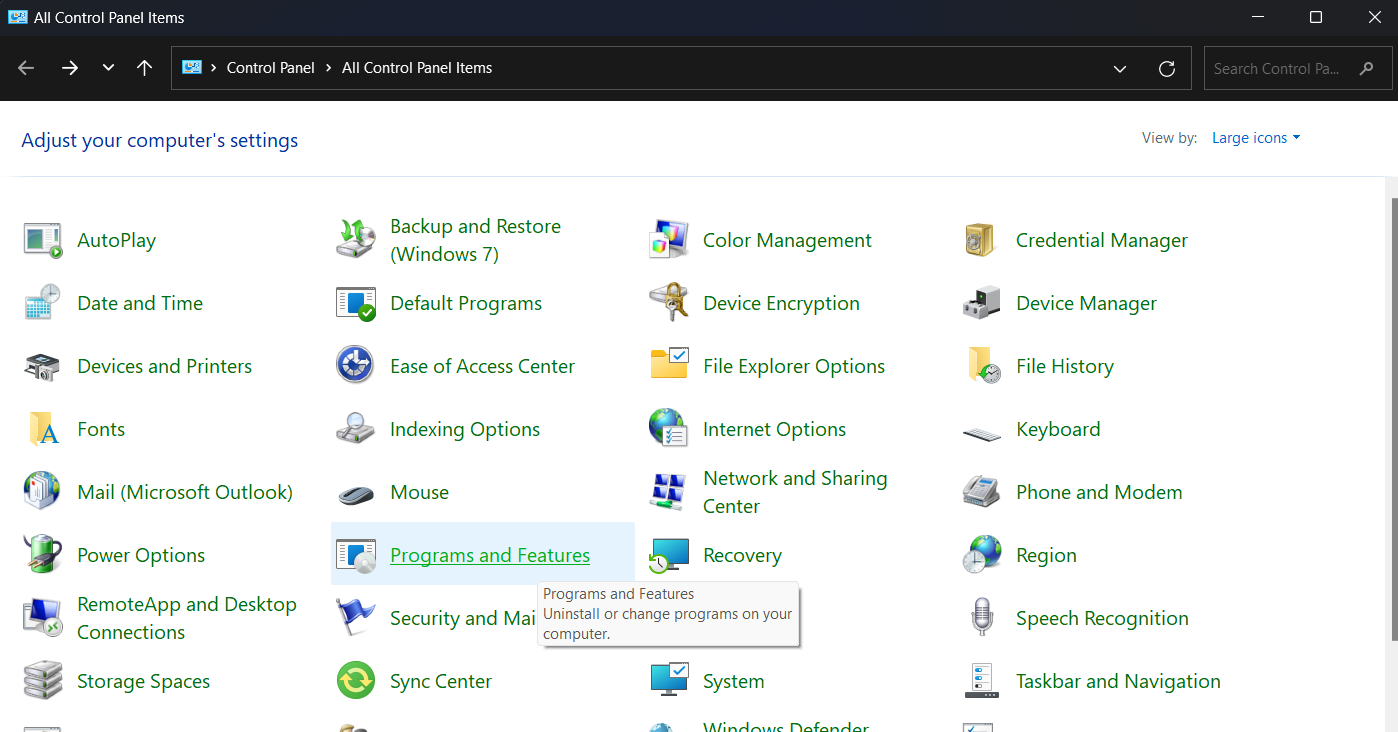 click on programs and features.
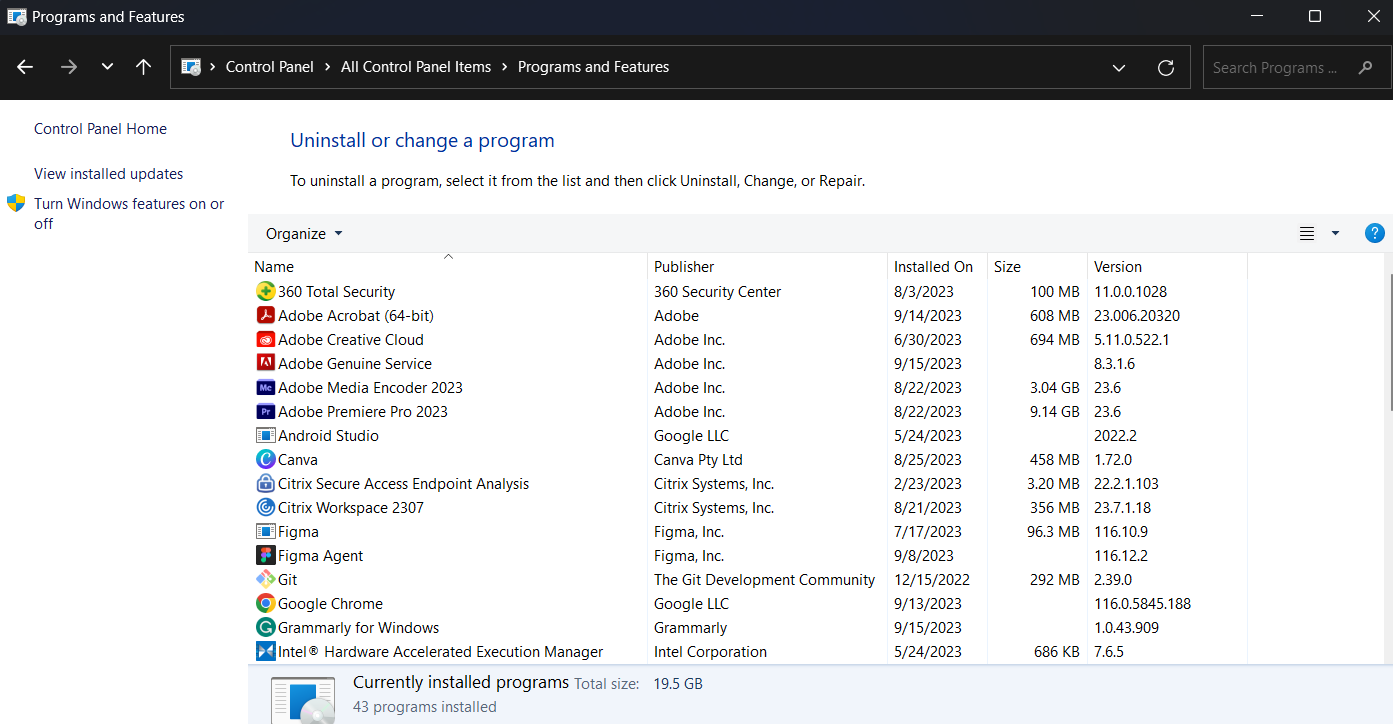
 - Then you will have a list of apps installed on your PC.
 And if you have searched for appwiz.cpl, then also you get the same result.
 - Then, select the antivirus programs installed on your computer and
 uninstall the program.
 - After a few steps, your program will be uninstalled.
You might also doubt that Windows Defender should be turned off. But for your information, Windows Defender is an inbuilt antivirus program for Windows. If you turn off when you install software or a third-party app, the app or software will be installed without any virus scanning and increase the risk of malware. So don’t turn off Windows Defender, but uninstall all other antivirus software.
See Also: – How To Permanently Disable Windows Defender on Windows 10
Update and reinstall network adapters
You are now coming to the second method. You need to uninstall the network drivers responsible for the network connectivity. After uninstalling, you need to install them again for the proper functioning of the internet.
Here are the steps to uninstall your device driver:
- Now, right-click the windows button and
 search for ‘Device Manager.’
 - Select the device manager from the list of options you have.

- Now click on network adapters.
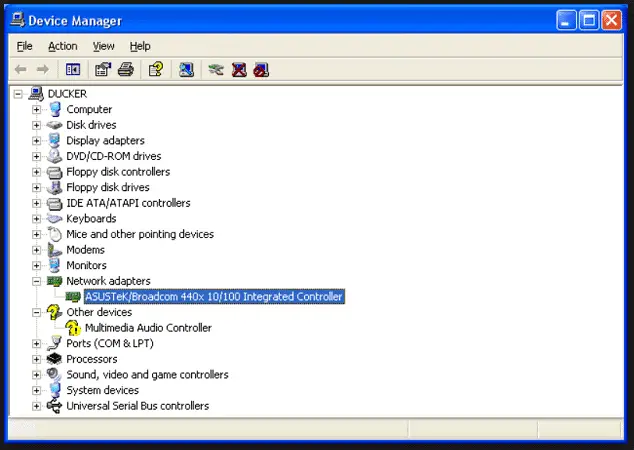
- Select the driver you want to uninstall
 by just right-clicking on the driver.
 - Now confirm your actions by clicking Uninstall.
 Your driver is uninstalled.
Here are some simple steps to update your driver:
- Search for drive quickly in your browser.
- As the site opens, it tells about the drivers required in the device.
- So now go to the driver and update it.
- This is the best way to update your drivers as you need not search for the driver, and it also prevents you from getting the wrong driver into your system.
Change the network drivers.
If you have any problem uninstalling or updating your driver, just change the default driver.
Follow these steps to change your network adapters:
- Select the device manager and choose network adapters.
- Select any random driver and right-click on it,
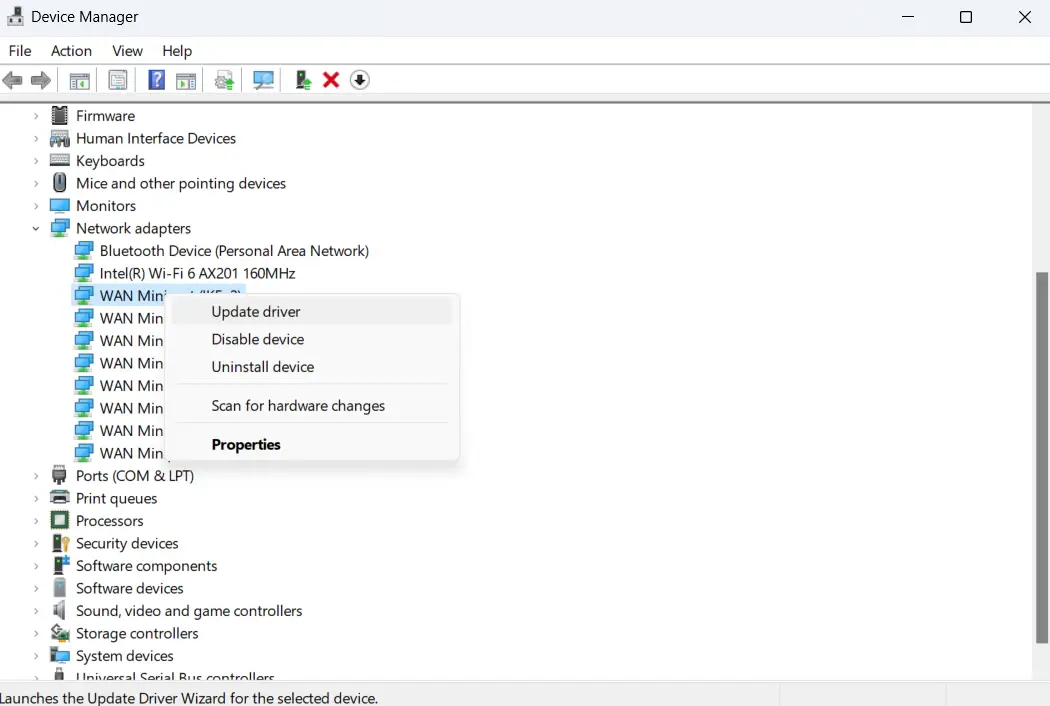 then select Update driver.
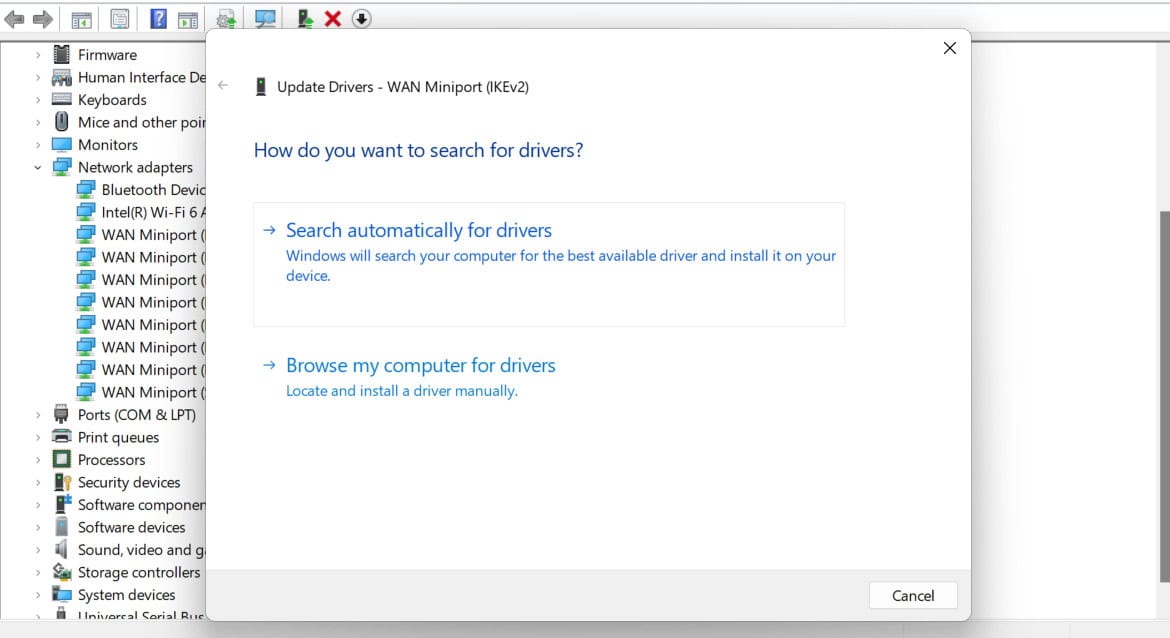
 - Now select “search driver from my computer” from the dialog box.
- You can also change the location where you want to store your drivers.
- Click “Let me select the drivers” from the dialog box.
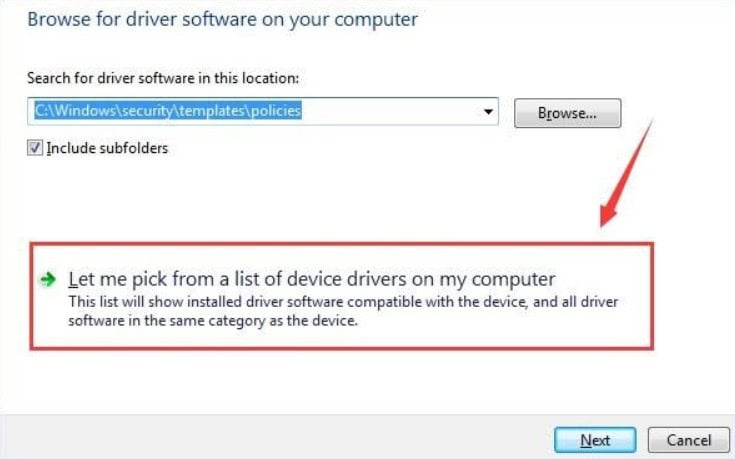
- You can select the driver and set it as default.
- Now that you have successfully changed the network adapter, close all the dialog boxes and check connecting to the internet to solve the issue.
Now, you can try connecting to the internet and solve the issue. Even if you have the same problem, you can try turning off the auto-login feature. Default Gateway is Not Available. This enables the user to automatically log in after the PC starts (the same user who used it before switching it off). So, you cannot personally turn off the feature but can assign a password to the user. So, every time the PC is turned on or locked, it asks for a password to enter to be safe and secure.
You can also try using the Reimage Plus software, which automatically scans the repositories and documents on your PC and resolves some of them. It has been very much sufficient for this kind of error. So, using the software is a small piece of advice. Get it from here.
Disabling the Auto Login feature
Microsoft had Auto login since the days of Windows 8, which automatically logs you into the user profile you left when the computer was last shut down. This feature is excellent and convenient when you do not have any other users accessing the same system when you have two different profiles for two separate work scenarios or something like that. But it becomes cumbersome and causes the issue where you get the error that the default gateway is unavailable. You must turn off this auto Login feature to work around this issue.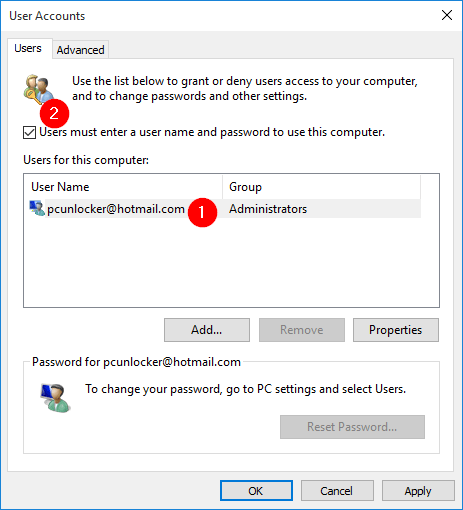
No, there is no definite way by which you can turn off this feature with the flip of a switch. There is, however, a way by which you can stop Windows from automatically logging you into the last account you used when you shut it down the last time. It would help if you set different passwords for each user profile on the system. This way, the system will not automatically be able to log into that profile and will have to prompt you to enter the password.
You can enter a silly password such as 123 or something else. It doesn’t matter. As long as it requires something to be typed physically to gain access to the profile, the auto Logon feature will be disabled. And it will hopefully not cause the default gateway is not available issue anymore.
See Also: Does Dual-Band Router Switch Automatically?
Let Windows pick your Network adapter’s drivers.
In an earlier step in this article, you are told how to possibly change your network adaptor drivers and try to fix the default gateway is not available issue. But if that does not work, you must install your network adaptor drivers and see if that fixes the problem.
Don’t be scared to install your network adaptor drivers; don’t think your system can’t use the network properties anymore because the drivers aren’t present. Windows is pretty smart, and despite what you might think, it is very robust.
It will automatically scan and install the necessary drivers required for the basic functionality of a system automatically when the system is booting up each time. So, if you uninstall your network adaptor drivers now, the proper drivers will automatically be installed the next time your system reboots.
All you need to do is:
- Go to the device manager and select the network adapters option.
- In network adapters, right-click on the network adapter you seem to be using right now, which should only be one entry,
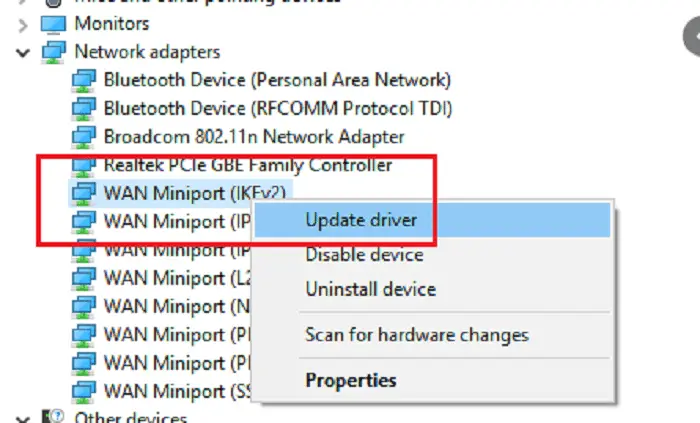 and click the update option.
 - Confirm the warning prompt which shows up next.
- After your network adapters have installed the pin,
 you must restart your computer.
Once the computer restarts, as I mentioned earlier, the network adapter will be detected, and the relevant drivers will be reinstalled automatically. If a faulty network adapter driver caused the problem, then installing and automatically installing them should hopefully fix the default gateway is not available issue.
Change the Channel of Wireless Router
If you are using a wireless router with dual bands, then the issue is that one band may not properly be recognized as a valid gateway in your Windows system. So, changing the channel of a wireless router might help you get rid of the default gateway that is unavailable if you’re on your computer.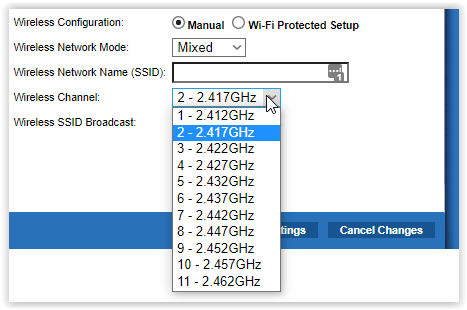
Some users who tried this reported that changing the dual channel settings to channel six seemed to fix the Gateway unavailable issue for them. But I encourage you to try other combinations because not all Windows systems are similarly problematic.
Change Power power-saving mode of the Wireless Adapter
Speaking of the wireless adapter issues, you should also try to change the power-saving mode of the adapter. And see if it makes any difference on the Gateway not available system issue.
- Search power options in the Windows query box by pressing the Windows + S keys together.
- It would be best to search for the current power plan in the power options and click the change plans settings option.
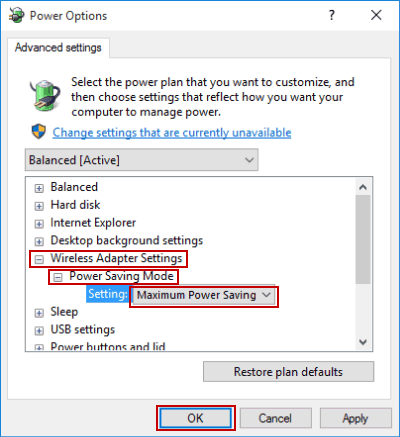
- Gen settings for the plan window, then simplify the concert. Change the advanced power settings link below.
- You need to locate the wireless adapter settings option and work on it there. You have to set it to maximum performance and then click apply.
- Then, click OK and reboot your system.
- After it boots back up, see if the default gateway is not available for the Windows issue has been fixed.
Set Wireless Mode to 802.11g
The same intelligent people who pointed out that changing the router’s channel might help eliminate the Gateway, not an available issue, also said that we should try to change the router’s wireless mode from the default to 802.11g.
- To do that, you need to open network connections by pressing the Windows + X keys and selecting the option from the menu.
- In the network connections Windows, you must search for your wireless network adapter
 and right-click on it.
 - From the context menu, choose the properties option. In the properties window,
 click on the configure button.
 - Then, go to the advanced tab.
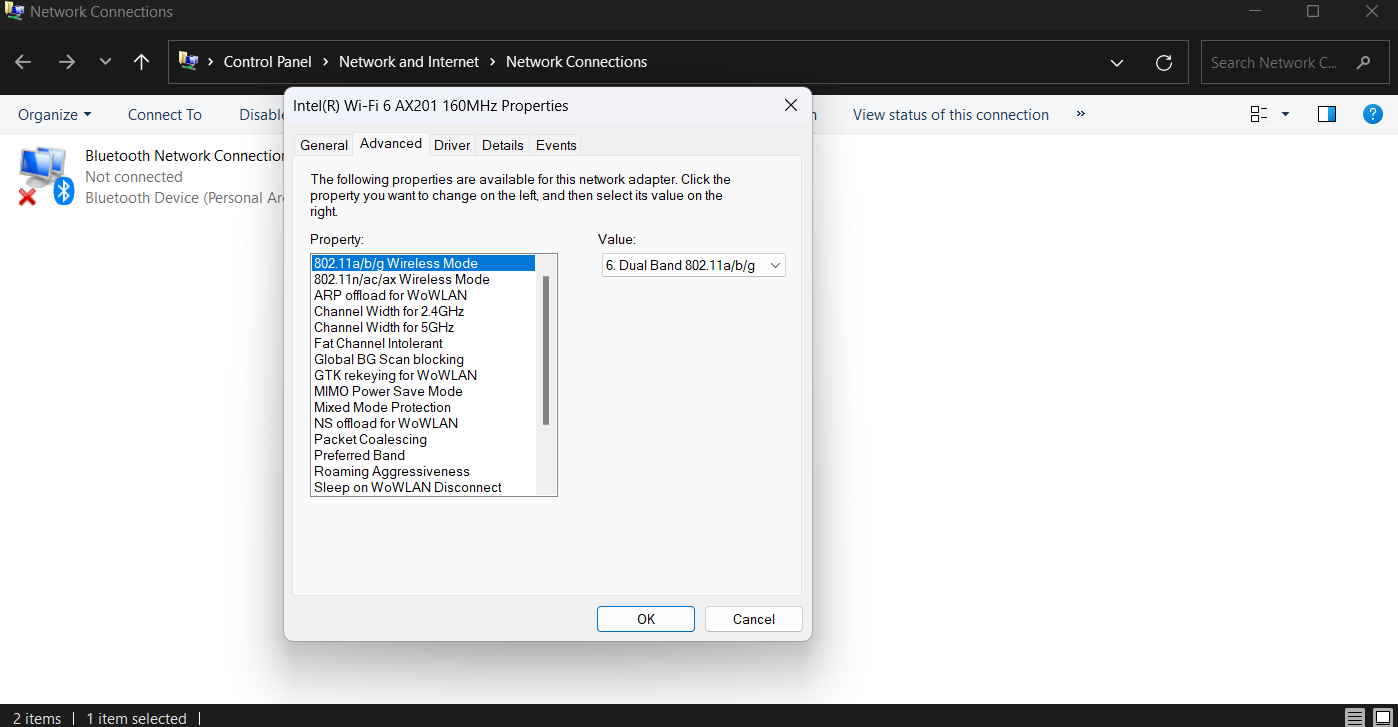 Select 802.11g from the drop-down menu and save the changes there.
 - Reboot your system again and check if the default gateway is unavailable.
So, these were some of the finest ways you could hopefully fix the default gateway, not available issue on your Windows computer. Go through this article entirely and make sure you try them all. Now, increase the chances of fixing the problem on your PC. Best of luck!
FAQs
Can antivirus or firewall software cause the Default Gateway is Not Available error?
Yes, antivirus or firewall software can sometimes interfere with network connections and result in errors. Temporarily disabling or configuring them appropriately can help resolve the issue.
Could a recent system update or software change cause the Default Gateway is Not Available error?
Yes, recent system updates or software changes can disrupt network settings and cause errors. Reverting the changes or updating relevant drivers may help resolve the issue.
Are any specific IP or DNS configurations required to avoid the Default Gateway is Not Available error?
Yes, ensuring correct IP configuration, DNS settings, and properly configured default gateway can prevent the occurrence of the error. Contacting your network administrator or internet service provider can help with the configuration.
Can malware or network-related infections lead to the Default Gateway is Not Available error?
Yes, malware or network infections can interfere with network connections and cause errors. Running a thorough malware scan using reliable antivirus software can help identify and remove infections.
Can faulty hardware, such as a malfunctioning router or network adapter, cause the error?
Yes, faulty hardware like a malfunctioning router or network adapter can cause network connectivity issues and trigger the Default Gateway is Not Available error. Replacing or repairing faulty hardware may resolve the issue.
Should I contact my internet service provider if I encounter the Default Gateway is Not Available error?
If you have exhausted the troubleshooting steps and the error persists, we recommend contacting your internet service provider. They can check for connection issues or further assist in resolving the error.
See also: 10 Best Video Chat Apps to Call Your Friends And Family With
