Home Blog

15 Best Reverse Phone Lookup Services [Updated for 2024]

There is a hell of a lot of phone lookup services nowadays. Thus, getting the perfect one for you might be a bit difficult. We have done the tough job for you and have compiled a list of the top 15 best reverse phone lookup services. In my personal opinion, they are worth each buck.

women looking at phone

We know you are already frustrated with getting calls from different numbers and not knowing who is on the other end. So, after tremendous research and testing, we have this for you. These Reverse Phone Lookup Services are the finest in the market today.

Top 15 Reverse Phone Lookup Services

Below are some of the best reverse phone lookup services you can consider today.

Intelius Background Report

Intelius is a leading company for all the unique phone search and lookup services across the states. They have a thorough search algorithm across multiple exclusive phone and people directories.

If you suspect someone, maybe one of your colleagues, associates, or your wife’s new friend, you can easily do a confidential background check on them.

Just fill in some necessary details on the Intelius website, like the person’s First Name, Last Name, current address of the individual (if known), and their living City and State. Go through Intelius Background check reviews before using them just to be sure what people are saying.intelius background check

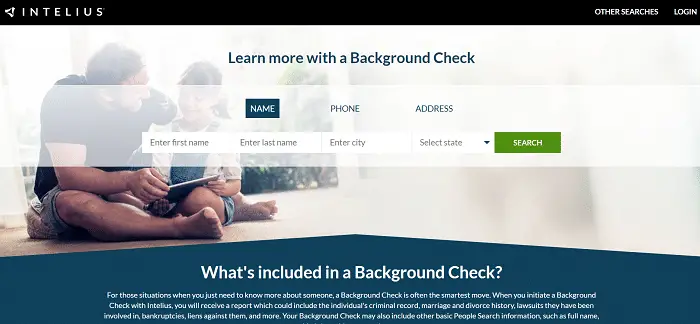
The algorithm then searches the whole web and the directories for possible criminal records, marriage records, lawsuits, and nice chunks of information like Phone Numbers, Addresses, and much more within minutes.

Pros:

  • Privacy well protected
  • No access issues

Cons:

  • Other services(listed below) are not free

Visit: Intelius Background Report

Intelius People Search Report

You can use the Intelius People Search service if you are looking for a person but have insufficient information to start the search.
Features:

  • It helps you find long-lost relatives or anyone out of touch for a long time.

Intelius People Search Report

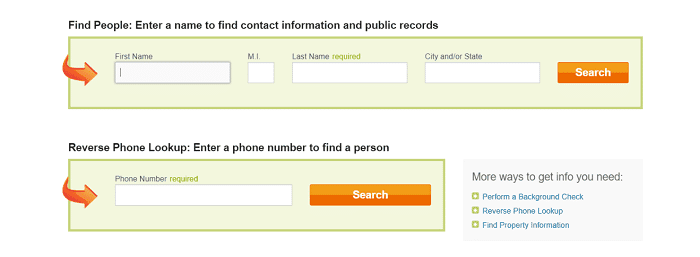
You may look for a person you had once met but have forgotten details about now, a long-forgotten family member, or look into more information about someone you have just met.

Using the millions of information available online and the data mining expertise, Intelius gives you a detailed report of the people you seek. The search engine of the website is relatively simple. Where you have to input the person’s first and last name, you can also narrow down your result using filters like location. Intelius People Search

Intelius Public Record Report

Public record means official documents that are not confidential and hence available when required. Each has many public records like- marriage/divorce information, driver’s license, Address information, etc.
Features:

  • Intellius uses these public records to find information about a person.

intelius public record report

Some state laws allow specific records to be optionally public. For example, in California, couples are given the option of confidentiality for their marriage license. Thus if they choose for it to be confidential, it will not be available online.

Using the Intelius Public record report service, you can comprehensively review all public records about a single person. It saves the hassle of tracking down each document individually. From this search, you will get all the public records available online for the person. Intelius Public record

Intelius Criminal Check

Criminal history checking is an essential part of reviewing anyone’s application. Generally, you would not want to let a person with a severe criminal history rent your empty flat or take up the vacant position in the office.

Features:

  • Intellius can find out if a person has a criminal history before you get involved with them.

intelius criminal check

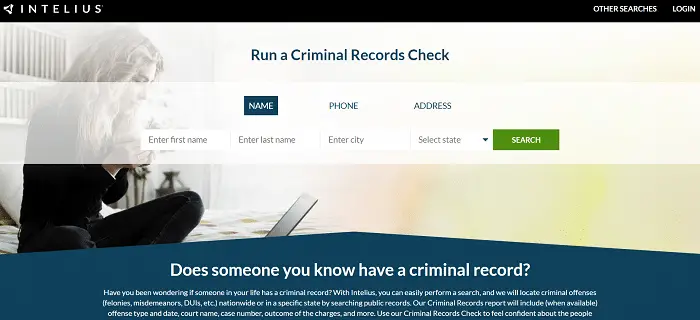
But pulling out criminal records can be cumbersome work. The Intelius reverse phone lookup services do the work for you.

A professional court record researcher verifies the records of the person in question and sends you a detailed criminal history report. This report includes details of the person’s criminal cases and special notes from legal experts.

Visit: Intelius 

Intelius Criminal Check

Truecaller

It’s one of the world’s most widely used reverse phone lookup services. It works well on both Android as well as iOS platforms. In no time, this application lets you know the details of anonymous calls.

tr uecaller

This app also allows you to block calls and report them as scams. You can use it for free and get a premium account too. The premium account allows the users to access the page where they can see “who viewed their profile” with no annoying ads and pop-ups.

All you have to do is enter your phone number and your email address to sign up and create an account. Truecaller will do the rest and notify you about the information related to the caller directly.
Pros:

  • Easy access
  • Instant verification of numbers

Cons:

  • You cannot check who has viewed your profile until you sign up for Pro.

Visit: Truecaller

BeenVerified

It’s one of the decent reverse phone lookup services. You can always extract helpful information and data from anonymous callers. Even if the numbers of the unfamiliar callers are not registered, BeenVerified can let you recognize the person and provide you with other information related to him.

beenverified

A fantastic feature of this website is that it enables users to dig into the criminal files of unfamiliar callers. The searches are covert and confidential, and it doesn’t notify the person you’re browsing. This explains the growing popularity of the application BeenVerified among people.
Pros:

  • Finds unlisted numbers.
  • Research is entirely confidential.

Cons:

  • Features are not free.

Visit: BeenVerified

PeopleFinders

Besides being accessible in the US, PeopleFinders is a phenomenal free reverse phone lookup stage that offers more highlights than an essential opposite telephone query administration.people finder .com

Clients can see the guest’s location history and complete itemized historical verifications, which is only the tip of the iceberg. Also, the site is not difficult to explore and allows clients to do exhaustive exploration with simply a telephone number.


PeopleFinders likewise values staying up-to-date, ensuring you’ll discover important information on dubious calls.

A straightforward telephone number hunt can incorporate the guest’s name, address, email ID, and another. Be that as it may, clients should record, if they wish, full admittance to reports and public quests. This is one of the best free phone number lookup services available.
Pros:

  • Along with identity, you can look up any information about the person.
  • User-friendly interface

Cons:

  • Not free.

PeopleFinder People Search

People Search is a service that allows you to find confidential information about people using the information available on internet databases. However, it is not a very good website.
Features:

  • Finds confidential information about people using the information available on internet databases.finds people online


PeopleFinders gives this service of finding people among the 700 million people on their databases. The website has a simple User Interface and an integrated search engine. It allows you to search the site with ease.

The best part of this website is that it is a free service. Along with finding the necessary people, you can also find out relevant social, professional, and other contact information.

SpyDialer

It’s one of the best reverse phone lookup services available in cyberspace. It’s free to use and works well with cell phones and landlines. The ratings and popularity of this application are pretty high, and downloads run into millions.

spydialer

What makes this app stand out from the rest is its unique feature of collecting public information. They do this to provide the users with names and images of unfamiliar callers.
Pros:

  • Collects public information and makes a cohesive database.
  • Free

Cons: 

  • The site interface may get stuck sometimes.

Visit: SpyDialer

SPYTOX

If you’re looking for a website that can let you make calls for free, then you are in the right place. SPYTOX is one of the most valid reverse phone lookup services. From searching for people to looking at their social media profiles, this application has wrapped it all up for you.

spytox

SPYTOX permits clients to exploit its converse telephone query includes for nothing. Just enter the email ID or telephone number you wish to discover data on, and you’ll get speedy admittance to the data you need.

Moreover, it lets you recognize the place of call, phone number, and email ID of hidden callers. You will certainly gain the best experience while using it. So what are you waiting for? Click the link below to learn more about this site and its features.
Pros:

  • Has information from social media.
  • Has a free calling option.
  • Free

Cons:

  • There are no cons to this site.

Visit: SPYTOX

WhitePages

WhitePages is perhaps the most suggested free phone number lookup by name pursuit administrations. The assistance is accessibly liberated from cost and can be accessed on both the web and the application. The site was established in 1997 and has cases to have contact subtleties of more than 200 million grown-ups across the USA.whitepages You can set up a telephone number on the site and discover the individual’s name and address. You can likewise play out an everyday pursuit by setting up the individual’s name. Aside from that, the site again offers a converse location search where you can look into one’s location.

Pros: 

  • Splendid directory with old numbers.
  • Good app to trace an ancient phone.

Cons:

  • The interface is fundamental.

Visit: WhitePages

ZLOOKUP

Another free cell phone number lookup site, ZLOOKUP, offers a primary interface that guarantees that looking through a telephone number is pretty much as straightforward as expected.zlookup software

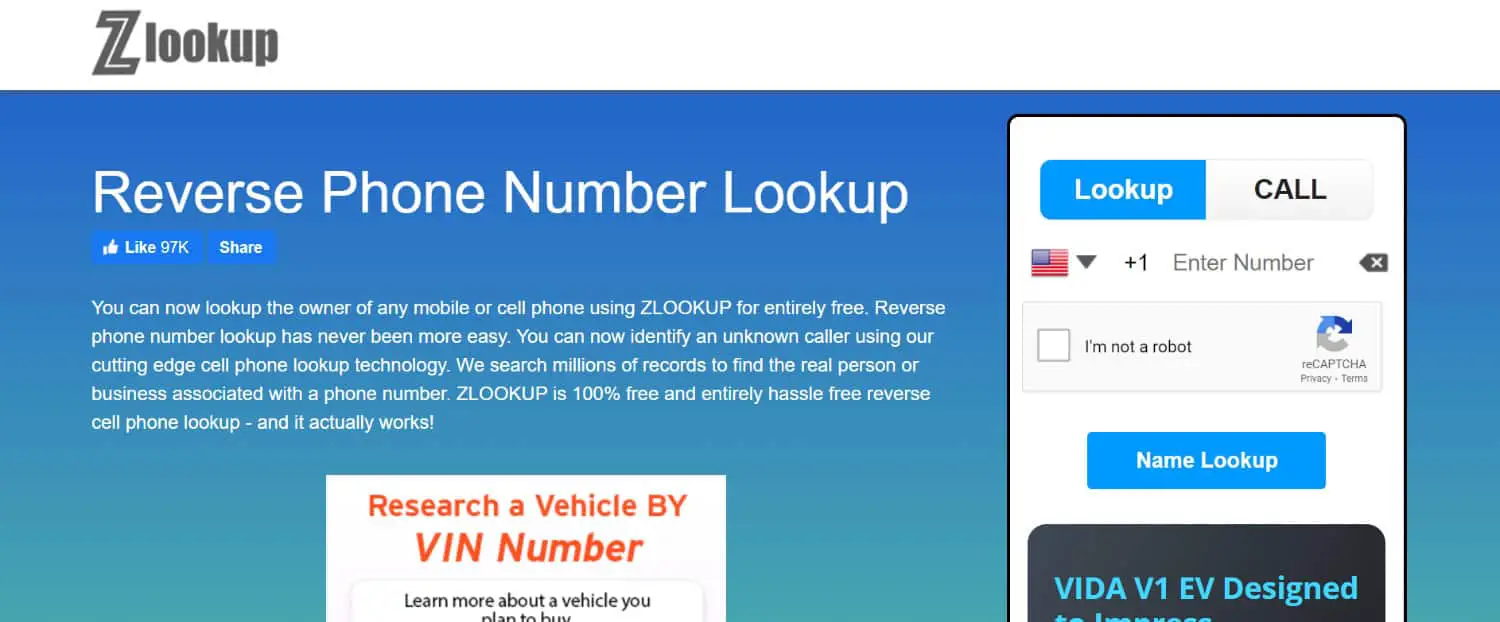
The site uses many records to accumulate data regarding the business or number you want to explore. Searches are limitless, unknown, and secure.


The solitary drawback is that clients can’t look into email locations, names, or data other than an avalanche or cell number.
Pros:

  • Unlimited free searches.

Cons:

  • I cannot access any more details like email than just phone numbers.

Visit: ZLOOKUP

Hiya

If you’re looking for a website that is easy to use and can give you reliable results, then Kudos, your quest has ended. Hiya has an interface that’s user-friendly and not very complicated. However, this reverse phone lookup service works only on iOS devices and not on Android platforms.

hiya

You can know the details of US-based callers and get information about international calls. It’s open for all and identifies all incoming calls. You can have a free or premium account based on your needs. Click on the link below to visit this website and uncover new features!
Pros:

  • User-friendly interface.

Cons:

  • It is not supported on Android.

Visit: Hiya

TruthFinder Phone Lookup

An exceptional safe & legit phone lookup service that helps you repeatedly find the one you’ve been squandering the yellow pages.

Reconnect with your family, your long-forgotten friends, and your childhood classmates. Search for suspicious relatives or your associates quickly using the TruthFinder services.truthfinderlogo

It doesn’t work like any regular search engine like Google or Bing. TruthFinder uses deep web search algorithms to get the details of a person across various social media. It can help you find images, videos, and photos lying on hundreds of websites.

You can quickly identify the caller using the Reverse Cell Phone Lookup services of TruthFinder and the carrier name, possible location coordinates, and demographic data. Search for every possible identity across the United States for free.

However, before generating details, you can go through Truthfinder reviews available on the web for security.

Pros:

  • Can provide images and videos available on the public platforms
  • Has access to demographic data
  • Free

Cons:

  • The site could be a potential threat to your internet security.

Visit: TruthFinder Phone Lookup

Instant Checkmate Background Check

With more than 30 different data sources, Instant Checkmate is one of the vast & legit reverse phone lookup services available.instant checkmate.com

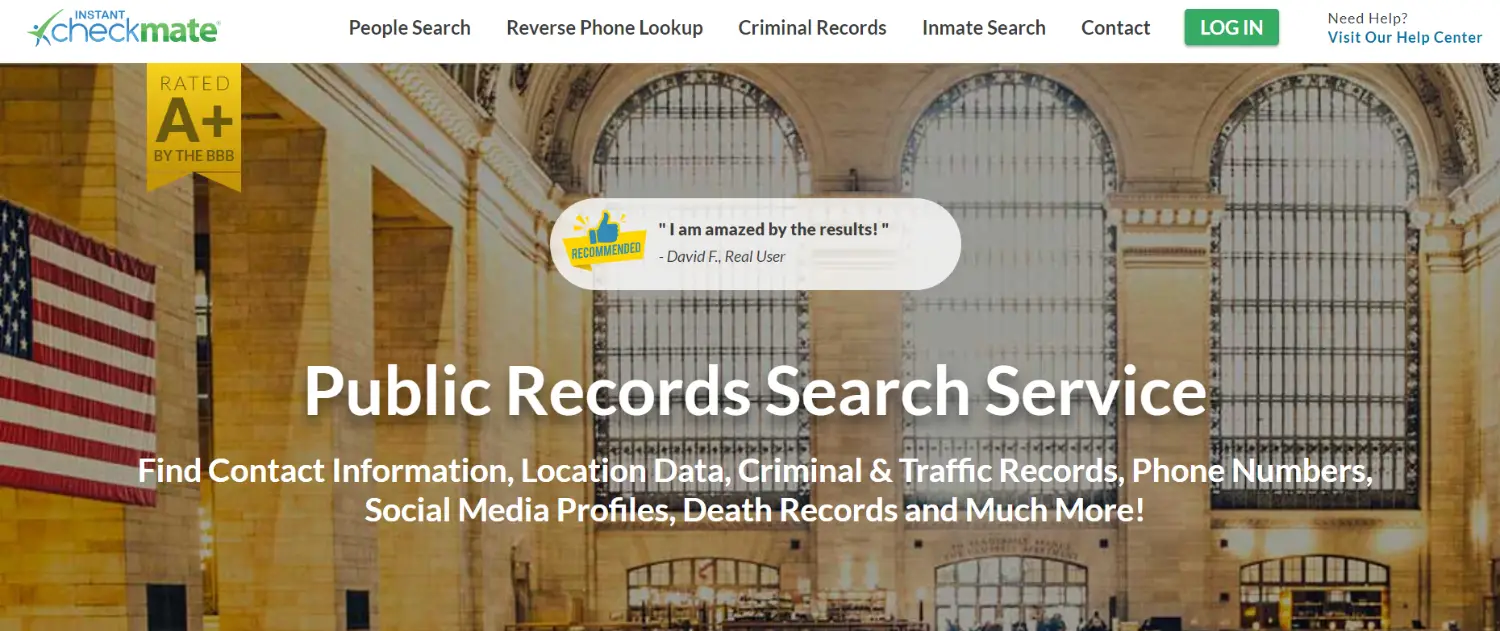
A simple search through several public records and a background-checking tool instinct can help you find whatever you want.

Suppose you suspect someone across from you who can have a history of violence or any possible criminal charge; then you should look up them using the Instant Checkmate Background Check services.

Search criminal records and directories for a person who might be a criminal. However, checking instant checkmate reviews before using it is always advised.

Using manually through different websites and search engines is usually time-consuming, and you don’t even find something concrete about the person looking.

A background check requires minimum details like Name, State, etc., and you’ll be presented with the results instantly. Moreover, the service also offers premium reports for a reasonable price.

Pros:

  • Fast service.
  • Looks up even criminal records.

Cons:

  • Not free.

Visit: Instant Checkmate Background Check

Livewire Reverse Phone by Instant Checkmate

Instant Checkmate services are already famous for their lookup services and, therefore, trustworthy and reliable. The service works fantastic as it scours the web with a bright, deep search-analytical engine.instant checkmate background check

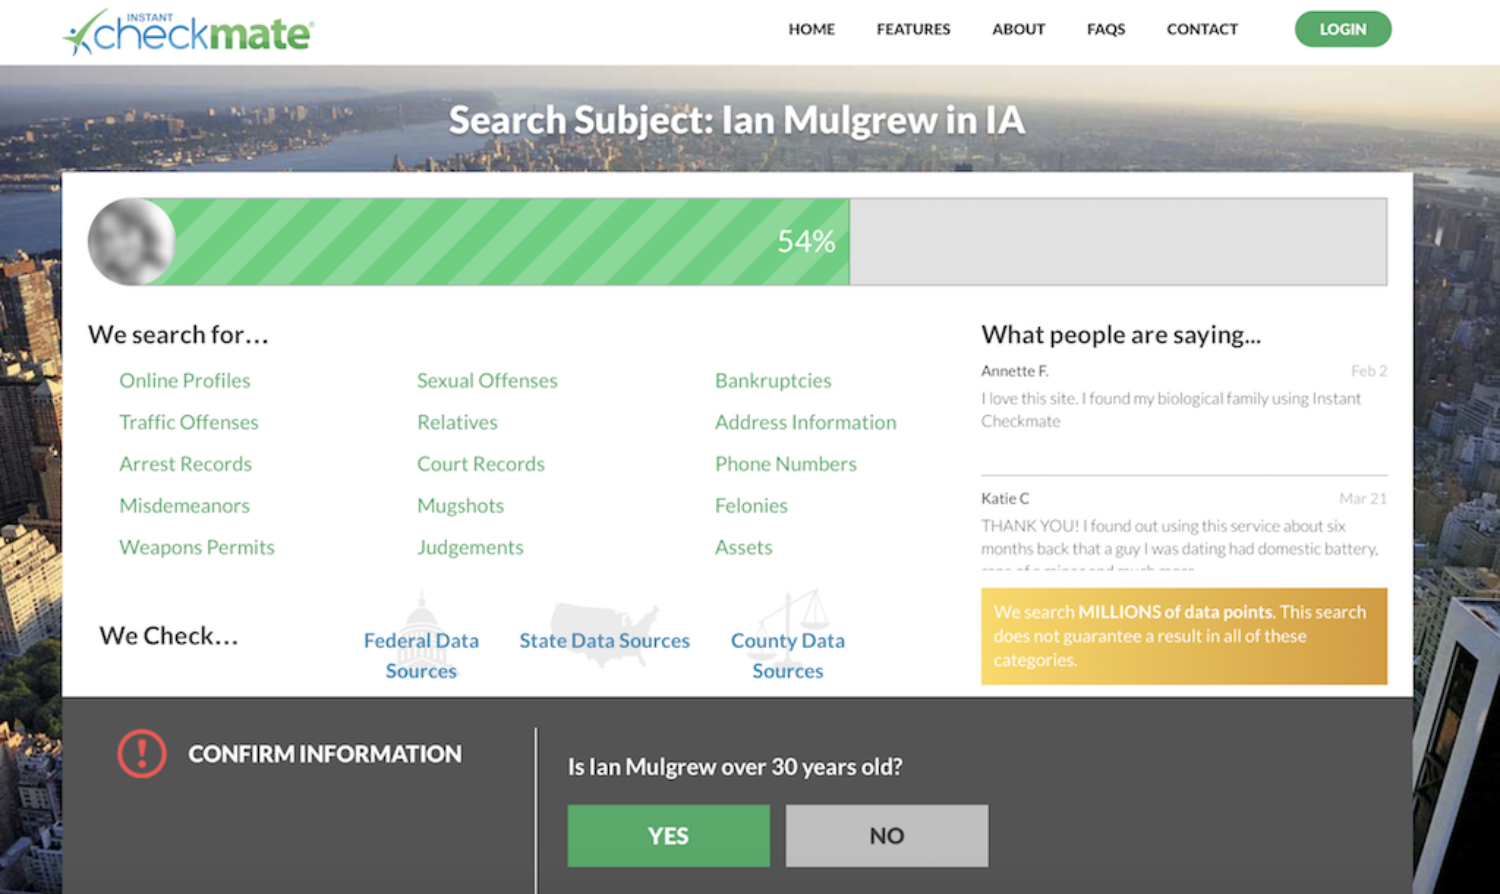
It only requires the Phone Number of the person you’re searching for.

Features:

  • It looks in all possible databases and finds information about a person from their phone number.


So, once you enter the number of the person, Livewire starts tracing all the possible information relatable to the person and presents you with a report of all the social media accounts, Personal details like Name, Address, Gender, Location, etc. precisely.

But wait, most of the information is privileged for the respective privacy policies. So, you need to access the report details using some premium services too.

Pros:

  • Fast service.
  • Provides all kinds of personal details.

Cons:

  • Not free.

Visit: LiveWire Reverse Phone 

SeekVerify Public Record Search Phone Search

Unknown numbers can be a source of constant annoyance as well as intrigue.

Although anonymous to you, this number is registered in someone’s name, and using the SeekVerify Phone Search option, you can quickly reveal that ‘someone’ is behind the phone number.seek verify public record search phone search

Also, you can run this search with complete privacy but get all the relevant information regarding the exciting phone number.

The website is highly lauded for its fast searches and reliability, thus making phone number searching comfortable and dependable.

Pros:

  • Complete Privacy
  • Very Reliable

Cons:

  • No practical scams to this.

Visit: SeekVerify

See Also: Top 10 Best & Fastest Free Public DNS Servers – TechWhoop

Text Magic Phone Number Validation

We will directly give our honest review for this without beating around the bush. It is the best available tool in the industry. The service will provide you with 98%+ results with extreme accuracy.

Here are a couple of facts that you might find interesting:

It is the most preferred service selected by private investigators. We strongly recommend this service as getting the premium will enable you to have endless searches all year.everify phone lookup

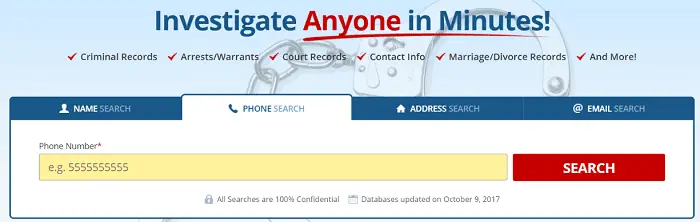
Any number can be found, including Cell Residential, Pager, Business, Unlisted and Toll-Free numbers. The best point for using this service is that they guarantee to provide you with a complete refund if they cannot find out the information you requested.

Pros:

  • Complete Privacy
  • Massive database.

Cons:

  • No practical scams to this.

Visit: Text Magic

NumberGuru Phone Lookup

No matter how much the user tries to hide their confidentiality, this one of the Reverse Phone Lookup Services will find the history of that particular number. Phone Detective shows the result,  including the owner’s name, carrier, address, and other details depending on availability.numberguru

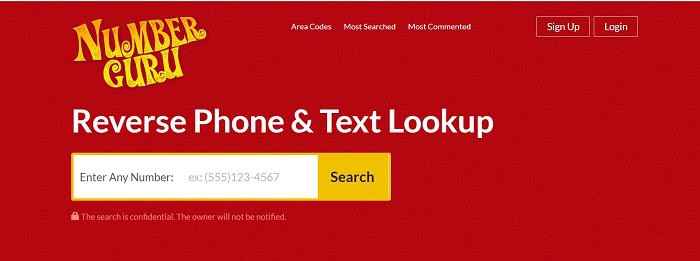
However, Numberguru makes sure that your privacy is thoroughly maintained. Also, it won’t compromise on the functionality that it claims to possess. The user interface is straightforward to access and describes the unlisted numbers.

There are multiple options to choose from. But 1-year premium membership is our strong recommendation. It will allow you to look up as many unknown number details as you want for an entire year.

Pros:

  • Complete Privacy
  • Access to unlisted numbers.

Cons:

  • No practical scams to this.

Visit: NumberGuru

PhoneRegistry

PhoneRegistry gives you reverse cell phone lookup alongside the number and name with a simple registration process. This service provides endless searches on phone numbers with the owner’s name. This data is from a billion telephone records in their database.

They gather information after conducting numerous searches and investigations. This service is mainly meant for US citizens and allows printing out reports.phoneregistry

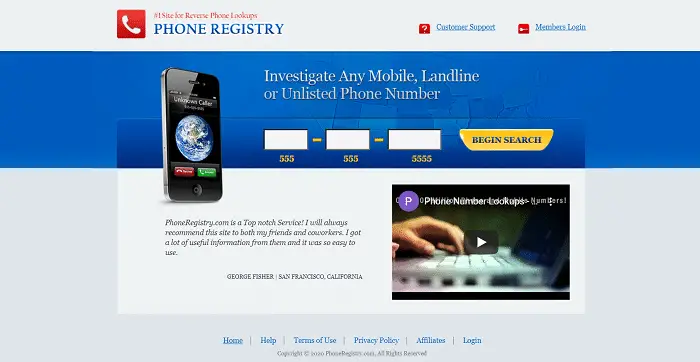
You can try these two options before buying it:

  1. $2.95 Trial, then $19.95/month (This gives infinite Reverse Phone Lookups)
  2. $2.95 Trial, then $29.95/month

(Unlimited Access for five days. Reverse Phone Lookups on above a Billion Records with complete Background Reports and more.)

Even though being a premium service, you won’t regret buying this. This service will provide you with results from the first search itself.

Pros:

  • Complete Privacy
  • User-friendly interface.

Cons:

  • Not free.
  • Requires subscription and registration.

Visit: PhoneRegistry

FAQs

Can you really find anyone by reverse phone lookup services?

Most services are pretty head-on if a person owns the number for a long time. However, for landlines and prepaid phones, that job becomes significantly harder.

What if these services cannot identify a number?

This usually means its a private number or someone is hell-bent on protecting their identity. In these cases, it's a good idea to file a complaint to the nearest police station in case calls come in incessantly.

Conclusion

This is probably the most exhaustive list of online reverse phone lookup services. This is your one-stop solution if you get annoying spam calls all day or you want to trace a number that has been bugging you for a while. Whatever your reasons, these apps have got you covered.

Stellar Windows Data Recovery Software Review

Stellar Windows Data Recovery Software is designed to retrieve lost or damaged files easily. Whether it’s precious photos, critical documents, or entire partitions, Stellar is your safeguard against data loss. Act now to protect your data before it’s too late!  This Stellar Windows Data Recovery Software Review will investigate its capabilities to determine if it’s truly the go-to software for data salvation.

Here’s a table showcasing Stellar Windows Data Recovery Software Review:

FeatureDetails
SafetyStellar is renowned for its safe recovery process, avoiding further data damage.
EffectivenessHighly effective in recovering a variety of file types and data scenarios.
Company ReputationStellar has built a strong reputation for reliability in the data recovery industry.
CostOffers a free version; paid versions provide more extensive features.
Best ForBest for individuals and businesses needing robust data recovery solutions.
PrivacyMaintains user privacy with secure data handling practices.
Success RateHigh success rate in data recovery, trusted by professionals worldwide.
FeaturesIt supports encrypted drives, RAID recovery, drive cloning, and more.
UsabilityUser-friendly interface that simplifies the recovery process.
Support and UpgradesExcellent technical support with regular software upgrades.

Stellar Windows Data Recovery Software Review

Stellar Windows Data Recovery Software is a comprehensive solution to the most pressing data recovery challenges. Its user-friendly interface and powerful features make it a reliable tool for retrieving lost or corrupted files, repairing damaged partitions, and recovering data from encrypted drives.

See Also: 5 Incredible Benefits Of Field Service Management Software

Overview of Features of Stellar Windows Data Recovery Software

  • Data Recovery: Recovers lost or deleted files from various storage media.
  • Data Recovery from Corrupted Drive: Recovers Data from corrupted drive.
  • Lost Partition Recovery: Retrieves data from lost or deleted partitions.
  • Encrypted Drive Recovery: Safely recovers data from encrypted drives and partitions.
  • 4K Drive Support: Supports 4K drives, ensuring compatibility with modern storage technologies.
  • Photo and Video Recovery: Recovers lost or deleted photos or videos easily, preserving precious memories.
  • Recovers Data from any file system: Recovers Data from NTFS exFAT, FAT(FAT16/FAT32)
  • Preview Before Saving: Allows users to preview recovered data before saving, ensuring accuracy.
  • Dual Monitor Support: Enhances user experience with support for dual monitor setups.
  • Deep Scan: Performs thorough scans to locate and recover even the most deeply buried data.
  • Optical Media Recovery: Recovers data from optical media such as CDs and DVDs, expanding recovery options.
  • RAW Recovery: Recovers data from RAW drives or file systems, providing comprehensive data retrieval capabilities.
  • Bootable Drive Recovery: Recovers data from bootable drives, minimizing downtime in critical situations.

In-Depth Analysis of Stellar Windows Data Recovery Software

Performance

Stellar Windows Data Recovery Software boasts impressive performance, with high success rates in retrieving lost data and repairing corrupted files. Its advanced algorithms ensure swift and thorough scans, minimizing downtime and maximizing recovery efficiency.

User Experience

The software’s user-friendly interface makes it accessible to users of all levels, from beginners to experts.user experience With guided wizards and intuitive navigation, recovering lost data becomes a hassle-free experience.

Reliability

Stellar has established itself as a reputable data recovery brand, earning users’ trust and recognition worldwide. Its commitment to quality and continuous improvement is reflected in the reliability of its software.

Customer Support

Stellar provides excellent customer support, with a dedicated team ready to assist users with queries or issues. Their support staff is knowledgeable and responsive, from technical assistance to product inquiries.

See Also: Craigslist Flagging Software: Everything You Need To Know About

Common Data Loss Scenarios of Stellar Windows Data Recovery Software

  • Accidental Deletion: Users mistakenly delete important files or folders, leading to data loss.   
  • Formatting Errors: Accidental formatting of drives or partitions erases data, requiring recovery.
  • Corrupted Files: Files become corrupted due to system errors, software glitches, or malware attacks.corrupted files
  • Partition Loss: Partitions may become inaccessible or lost due to partition table corruption or accidental deletion.
  • Hardware Failure: Hard drive failure, SSD corruption, or damage to storage devices can result in data loss.
  • Virus or Malware Infections: Malicious software infections can corrupt or render files inaccessible.
  • Operating System Crashes: System crashes or errors can lead to data loss, especially if files were unsaved or improperly saved.
  • Unexpected Power Outages: Sudden power outages or system shutdowns can cause data loss if files are not properly saved or closed.
  • Software Errors: Errors in software applications or updates can lead to data corruption or loss.
  • Human Errors: Data loss can result from accidental actions such as overwriting files, moving files to incorrect locations, or improper storage media handling.

See Also: Server Backup Software – List Of Top 12 To Use In 2024

Data Backup and Prevention Tips of Stellar Windows Data Recovery Software

  • Regular Backups: Perform regular backups of important data to an external drive, cloud storage, or network location.
  • Automated Backup Schedule: Set up automated backup schedules to ensure consistent data protection without manual intervention.
  • Multiple Backup Locations: Store backups in multiple locations to mitigate the risk of data loss from a single point of failure.backup
  • Verify Backups: Periodically verify backup integrity to ensure data is properly backed up and retrievable.
  • Use Reliable Storage Media: Choose reliable and durable storage media for backups to prevent data loss due to hardware failure.
  • Encryption: Encrypt sensitive data in backups to protect against unauthorized access or data breaches.
  • Update Software Regularly: Keep Stellar Windows Data Recovery Software updated with the latest updates and patches to ensure optimal performance and compatibility.
  • Educate Users: Educate users on safe data handling practices, including avoiding risky behaviors like clicking on suspicious links or downloading unknown files.
  • Implement Security Measures: Implement security measures such as firewalls, antivirus software, and intrusion detection systems to prevent malware infections and data breaches.
  • Monitor System Health: Monitor system health and performance to detect and address potential issues before they lead to data loss.

Is stellar data recovery safe?

Yes, Stellar Data Recovery is known for its safety and reliability in recovering lost or corrupted data.stellar data recovery logo

With advanced algorithms and secure processes, it ensures that your data remains intact throughout the recovery process, minimizing the risk of further damage or loss.

Is Stellar a good software?

Stellar Data Recovery Software is highly regarded in the industry for its effectiveness and user-friendly interface. Its robust features, such as data recovery, corrupted file repair, and encrypted drive recovery, make it a valuable tool for users facing data loss scenarios.download stellar

With a stellar reputation and proven track record, Stellar stands out as a reliable choice for data recovery needs.

Is Stellar a good company?

Yes, Stellar is widely recognized as a reputable company in data recovery. With years of experience and a strong commitment to quality, Stellar has earned users’ trust worldwide.stellar data solutions pvt ltd

Its dedication to innovation, customer satisfaction, and ethical business practices makes it a top choice for those seeking reliable data recovery solutions.

FAQs

Is Stellar Data Recovery really free?

No, Stellar Data Recovery offers both free and paid versions. The free version allows limited recovery, while the paid version provides full access to advanced features such as corrupted file repair and encrypted drive recovery. Prices start at $59.99 for the Standard edition, $89.99 for the Professional edition, and $99.99 for the Premium edition.

Is Stellar Data Recovery the best?

Stellar Data Recovery is among the top choices for data recovery due to its high success rate, user-friendly interface, and comprehensive feature set, including RAID recovery and drive cloning.

Is Stellar data recovery private?

Yes, Stellar Data Recovery prioritizes user privacy and data security. Encrypted drive recovery capabilities keep your recovered data confidential and protected from unauthorized access.

What is the success rate of Stellar Data Recovery?

Stellar Data Recovery has successfully retrieved lost or deleted files, repaired corrupted files, and recovered data from lost partitions. Its advanced algorithms ensure thorough scans and maximum recovery efficiency.

React Native vs. React.js: What Causes a Disparity?

If you’re unfamiliar with RJS and RN, you may be wondering about web and mobile development. However, RJS and RN are distinguishable, even if they are similar.

The React.js development services and RN will be examined in this post, along with their godsends and disservices. By the judgment, you will thoroughly understand both of them and their unique use cases.

First, it’s essential to learn how websites are rendered on web browsers to understand the distinctions between RJS and RN.

How Websites Get Rendered

The short guide by Celadonsoft:

When you enter a website’s URL into your browser’s address bar and press enter, the browser sends a request to the web server, which response by sending an HTML file back to the browser.

The HTML file encompasses linked files like stylesheets, videos, and graphics in addition to the content of the webpage. After parsing the HTML file, the browser creates a DOM, a hierarchical design that holds the page’s elements.

Subsequently, the user’s computer receives the associated files as downloads from the browser. After parsing these files, which include CSS and JS, the content is styled to make it seem good. The browser displays the material on the screen when all files have been downloaded.

Additionally, the browser executes any JS code to add interactivity to the page. For instance, if a user submits incorrect information in a form, JS can dynamically insert a `<div>` element into the page to display an error message.

However, a significant challenge arises when inserting elements into the DOM using JS: the code is not easily reusable. For example, if you need to insert the same button into the page multiple times with different background colors, you must duplicate the element creation code in JS.

Detailed UI complicates this issue, leading to lengthy and convoluted code. React was developed to address this problem by presenting a more organized and reflexive strategy for making web cases.

What is React.js?

Simply put, RJS allows developers to construct a website’s visible and interactive parts displayed within a browser window.

So, what sets React apart from plain JS? React streamlines the UI design process, enabling the creation of reusable elements across different parts of a website or application. Previously, using JS alone meant duplicating code to create identical elements with other properties, leading to complexity, especially in large projects.

What is React.js

React’s component-based architecture effectively addresses this challenge. Each UI element, such as a button, is defined as a component—a function that returns JSX, HTML-like syntax specifying the component’s presentation and appearance in the browser.

Consider the necessity of having a single button in many different colors for different areas of a website. With React, developers can easily generate variants by using the same element and passing multiple color values as props, eliminating the need to manually code each button with distinct color parameters.

This approach promotes simplicity and organization, core principles of the RJS library. Additionally, React encourages the separation of concerns, meaning a component’s data, logic, and presentation layers remain distinct. This separation enhances component understandability and composability.

In summary, React simplifies front-end development for web applications by offering a structured and efficient approach to building UI components.

Differences between React Native and React.js

The primary unlikeness of RJS and RN lies in their app domains:

  • React JS is primarily employed to construct the UI of web applications operating within web browsers.
  • In contrast, RN is utilized to craft applications compatible with iOS and Android devices, facilitating the development of cross-platform mobile applications.

While React employs HTML, CSS, and JS to engineer interactive UI, RN utilizes native UI components and APIs to fashion mobile apps.

Despite this contrast, React JS and RN share commonalities:

  • Both use a component-based design and the same core React framework, which makes it possible for developers to successfully modularize their projects.
  • Both use JS as their programming language and JSX is their templating language.
  • Virtual DOMs are used by both React DOM and RN to render apps quickly.
  • Although they use comparable stylistic elements and approaches, RN’s methodology can be a little different.
  • Both platforms’ apps may be debugged using Chrome DevTools.
  • For functionality, they make use of the same JS APIs.
  • It’s interesting to note that both were created at Meta; RN evolved from a hackathon project, while React was the brainchild of software developer Jordan Walke.

Moreover, several libraries commonly used with React for web development, such as Axios, Bootstrap CSS, and Tailwind CSS, also offer mobile versions compatible with RN, facilitating seamless integration between the two frameworks.

Conclusion

The article compares RJS and RN, two similar but distinct web and mobile development tools. First, it explains how websites are rendered on web browsers using HTML, CSS, and JS. It then introduces RJS as a library that simplifies front-end development by offering a more organized and intuitive approach to building UI components for web applications. RJS is based on a component-based architecture that promotes simplicity and organization, making creating reusable elements across different parts of a website or application easy.

5 Salesforce Data Cleansing Best Practices to Follow in 2024

Salesforce data cleansing best practices refer to fixing the data inside the database by removing copies, making formats the same, correcting mistakes, adding extra information, and deleting old parts. Maintaining a clean and efficient database helps ensure data accuracy and reliability, enhances user productivity, and supports better decision-making. Special tools inside Salesforce or other apps are often used to help with this cleaning.

Some of the Salesforce Data Cleansing Best Practices are:

  • Implement regular data audits.
  • Use automated data cleansing tools.
  • Enforce strict data validation protocols.
  • Regularly update and enrich data.
  • Eliminate duplicate data and inconsistent formatting.

Salesforce Data Cleansing Best Practices

Using salesforce data cleansing best practices is important for making business processes work best and making good choices.salesforce data cleansing tools best practices Here are the best practices to ensure your data is not only clean but also highly functional:

Schedule Regular Data Audits:

Conduct data audits periodically to identify issues like duplicate data and inconsistent formatting. Regular audits help maintain accuracy and reliability, ensuring your data reflects current business conditions. This doing-things-early way helps you avoid troubles before they impact your work.

Example: A retail company schedules monthly audits of its customer data in Salesforce to identify duplicate customer profiles, incorrect contact details, or outdated addresses. It uses a dashboard highlighting common data issues and tracking improvements over time.

Automate Cleansing Processes:

Utilize automated data cleansing tools such as Plauti Duplicate Check to streamline corrections and updates, reducing human error and saving time.duplicate check by plauti Automation ensures that Salesforce data cleansing best practices happen continuously and consistently, preventing the accumulation of errors and keeping your data at its highest quality without manual intervention.

Example: An insurance firm uses a Salesforce-integrated tool like Cloudingo to automate detecting and merging duplicate claims entries. This tool is set to run every night, ensuring that the data is fresh and accurate for the next business day.

Enforce Data Validation Rules:

Implement strong data validation measures to ensure all incoming data meets your criteria before it’s entered into your CRM. Validation rules help prevent the introduction of erroneous data, protecting your system from inaccuracies that could lead to costly mistakes in your business operations.

Example: A financial services company implements data validation rules in Salesforce to ensure that all new customer records have a valid email format and that the phone numbers contain the correct number of digits. This prevents common data entry errors.

Continually Enrich and Update Data:

Keep your data relevant by regularly enriching and updating records to reflect current information, enhancing data enrichment efforts. This practice improves the quality of your data and ensures it remains valuable for analytics and decision-making, helping you stay responsive to market changes and customer needs.

Example: A marketing agency uses Data.com Clean within Salesforce to automatically update and enrich potential clients’ contact data with additional details such as industry, company size, and LinkedIn profiles. This enables more personalized and effective outreach campaigns.

Eliminate Redundancies:

Remove redundant or obsolete data to keep your Salesforce environment clean and efficient. This frees up storage space and improves system performance and user experience. It makes it easier for your team to find and use the needed data without wading through outdated or irrelevant information.

Example: A healthcare provider uses DemandTools to scan their Salesforce database quarterly for redundant patient records, merging duplicates and purging records that are no longer relevant, such as old treatment plans or outdated insurance information.

Following these best practices can significantly improve your Salesforce data quality, which is critical for making informed business decisions and maintaining CRM data integrity.

What is Dirty Data in Salesforce Data Cleansing Best Practices?

Dirty data in Salesforce refers to inaccurate, incomplete, or unreliable information stored within the CRM system. This includes duplicate data, outdated records, inconsistent formatting, and incorrect details. Dirty data can lead to poor decision-making and inefficiencies in business processes, emphasizing the need for effective data cleansing practices to maintain CRM data integrity.

Steps of Data Cleansing

Effective data cleansing not only corrects errors but also enhances the overall data quality, making it a valuable asset for strategic decision-making. Here are detailed steps to ensure thorough data cleansing:

Identify Errors and Inconsistencies:

Start by detecting any inaccuracies, duplicate data, or inconsistent formatting in your dataset. Use specialized tools or scripts to scan your data systematically, ensuring no errors go unnoticed. This first step makes a strong base for a good data cleansing process.

Validate Accuracy:

Use data validation techniques to ensure the information is correct and relevant to your business needs. This includes checking data against known values and rules, such as validating postal codes or ensuring email addresses are formatted correctly. Validation is essential to preserving the accuracy of your data.

Correct Data:

Correct or eliminate inaccurate data. If available, employ automated data cleansing tools to speed up this process. Correction may involve fixing typographical errors, aligning disparate data formats, or resolving mismatches in records. Quick error correction prevents them from causing further issues.

Standardize Formats:

Ensure all data entries follow a uniform format, simplifying analysis and storage. Standardization may include converting date formats, standardizing address fields, or aligning numerical data to a consistent decimal place. This step is essential for ensuring that data from different sources can be integrated smoothly.

Enrich Data:

By using data enrichment techniques to add missing information, you can improve the quality of your data.data quality This might involve appending additional data from external sources or filling in gaps identified during the validation stage. Enrichment adds value to your data, making it more complete and informative.

Purge Unnecessary Data:

Remove any information no longer necessary or pertinent to keep your database compact yet effective. This includes removing outdated information that no longer serves a business purpose or purging duplicate records identified earlier. Regular purging helps maintain your database’s performance and usability.

Following these steps ensures that your data is clean, organized, and valuable for your business operations, paving the way for accurate analytics and informed business decisions.

Difference Between Data Cleaning and Data Cleansing

Knowing the differences between data cleansing and cleaning will greatly influence how you run your data quality plan. Here is a table showcasing the differences between Data Cleaning and Data Cleansing:

AspectData CleaningData Cleansing
DefinitionFinding and fixing or removing bad or wrong records from the data set.A broader process that involves cleaning data also involves making data better, checking data, and making data work best for use.
FocusPrimarily, it is about fixing typos and inconsistencies and removing duplicates.Extends beyond error correction to improve the overall quality and value of data.
ActivitiesRemoving duplicate data, Correcting typos, Standardizing data formatsIncludes all data cleaning activities, Data enrichment (adding data), Data validation (ensuring accuracy)
GoalTo fix errors to guarantee that the data is correct and useful.To improve the data's functionality and increase its operational and decision-making value.
OutcomeCleaner data that is more accurate and consistent.High-quality data that is accurate and comprehensive enhancing its analytical value.

In essence, while data cleaning is about fixing mistakes, data cleansing is about enhancing data to support strategic business decisions. Data cleansing ensures data is accurate, rich, and aligned with the broader business objectives. It is a critical process for companies looking to derive the most value from their data assets.

How to Cleanse Data in Salesforce Data Cleansing Best Practices

Maintaining clean data within Salesforce is essential for maximizing CRM efficiency and supporting accurate decision-making. Here’s how to effectively cleanse your data:

Identify Dirty Data:

First, find problems like copied data, old information, and inconsistent formats. Use reports and dashboards within Salesforce to regularly scan for and identify these common data problems. Working on these problems early can prevent them from growing and harming the quality of your database.

Use Data Cleansing Tools:

Leverage Salesforce’s built-in or third-party automated data cleansing tools to correct errors efficiently.salesforce tools Tools like Data.com Clean can automate identifying and merging duplicates, correcting discrepancies, and updating records with verified information, thus streamlining the data cleansing process.

Implement Validation Rules:

Organize validation rules in Salesforce to prevent future data input errors. These rules can include checks for data completeness, format consistency, and logical correctness, ensuring that only high-quality data is entered into your CRM system.

Standardize Data Entry:

Make the same rules for entering data to maintain consistency in all data fields. This involves setting up templates and predefined formats for common entries like phone numbers and addresses, which helps reduce data entry errors and improve the consistency of the data collected.

Regularly Review Data:

Schedule periodic reviews and data audits to maintain data cleanliness over time. These reviews should focus on assessing the accuracy and relevance of the data, identifying new sources of error, and updating data cleansing strategies as necessary.

By doing these things, you can make sure your Salesforce data stays nice and neat, and you can trust it. This will help your business work better and give you good ideas.

Salesforce Data Cleansing Best Practices Tool

Salesforce provides a suite of tools to assist with data cleansing, with Data.com Clean being among the most effective. These tools integrate seamlessly with Salesforce, enhancing data management capabilities:

Automatic Updates:

Keeps your Salesforce records automatically updated with accurate and verified data from Data.com. This feature helps maintain the relevance of your data, ensuring that your CRM contains the most current information available without manual intervention. It’s especially beneficial in dynamic industries where data changes frequently.

Data Matching:

Identifies and merges duplicate data in your CRM, ensuring each record is unique and up-to-date. This tool uses sophisticated algorithms to detect duplicates, even minor discrepancies, helping to consolidate data and reduce clutter. It also preserves the integrity of your data by ensuring that all customer interactions are linked to the correct, singular customer profile.

Data Enrichment:

Enhances your data by adding valuable insights and information, improving the overall data enrichment quality. Data.com Clean can add more fields like social media, company info, and work-type data. salesforce data comThis gives you a bigger picture of customers and people who may buy. This enriched data supports better targeting and personalization strategies.

Reporting:

Makes detailed reports to show how good your data is. This helps you see where you need to make things better. These reports provide insights into data quality issues, trends, and the effectiveness of your current data management strategies. By understanding these metrics, you can better prioritize your data cleansing efforts and measure the impact of changes.

Here is a table detailing some Salesforce Data Cleansing Tools along with their specific functionalities:

ToolFunctionality
Data.com CleanAutomatic updates with verified data; Merges duplicate records; Enhances data with additional insights
DemandToolsMass data manipulation, Data deduplication, Data quality control
DupeCatcherIdentifies duplicates as data is entered, Customizable to fit specific organizational needs
CloudingoMerges duplicates, Cleanses data across multiple objects, Automates data cleansing processes
DataGroomrUses machine learning to identify duplicates, No configuration required, Visual merging tools

These tools correct current issues and help prevent future data quality problems through continuous monitoring and updating.

See Also: 10 Best Software Development Environments Best Practices | 2024

FAQ 

What are the 3 points to cleansing data?

1. Find and eliminate copied data. 2. Check and fix data that needs to be corrected. 3. Continuously enrich and update data for relevance and accuracy.

Is data cleansing part of ETL?

Yes, data cleansing is a critical part of ETL (Extract, Transform, Load) processes. It focuses on improving data quality through validation, cleaning, and transformation before loading into a target system.

How do I reset all data in Salesforce?

To reset data in Salesforce, utilize the data cleansing tools available within the platform to purge outdated or irrelevant data systematically, ensuring data integrity and CRM efficiency.

Can NRIs Open a Demat Account in India

A Demat Account (short for Dematerialized Account) allows investors to hold their securities electronically. It enables the trading and transferring stocks, bonds, and other financial assets in the Indian stock market. This raises the question: Can NRIs open a Demat Account in India?”

This process negates the necessity of physical share certificates, thus making transactions easy and reducing risks usually associated with paperwork. NSDL and CDSL Depositories manage demat accounts, enabling investors to access their investment portfolios conveniently through their stock broking apps.

But what about Non-Resident Indians (NRIs)? Can NRIs open a Demat Account in India? Let’s find it out.

Can NRIs Open a Demat Account in India?

Yes, definitely! Non-resident Indians (NRIs) can open a Demat Account in India. To put it more simply, Indians can easily access the Indian stock market. Thus, demat accounts are opening up to non-resident Indians (NRIs) and residents of India who wish to invest in shares on the stock exchange.
NRIs open an NRI Demat account, but an NRI trading account should also be opened. However, NRIs must follow additional rules and formalities before opening a Demat account.demat for nris

For starters, the maximum amount of paid-up capital an NRI may retain in an NRI Demat account is 5%. Accessing IPOs on a repatriable basis may call for using the NRE or Non-Resident External (NRE) account by NRIs. To open an NRI Demat account or initiate an online NRI account opening, one must have resided outside the country for at least 182 days.
Therefore, if anyone already owned demats before getting into NRI status, that investor’s NRI demat gets converted into an NRO one instead.

Rules for Opening and Using an NRI’s Demat Account in India

Here are some rules for opening and using an NRI’s Demat account in India:
● To open an account, you must have lived outside of India for at least 182 days
● You can open two types of Demat accounts: Non-Resident External (NRE) Demat Account and Non-Resident Ordinary (NRO) Demat Account. NRE Demat Account allows NRIs to trade in Indian stocks, bonds, and mutual funds, whereas the NRO demat account is a non-repatriable account that allows NRIs to trade in equity stocks, futures, options, bonds, and mutual funds
● You can only hold up to 5% of your paid-up capital in an NRI Demat accountdemat account● You can participate in ETF investments, futures, and options trading, but not intraday trading
● You can use an NRE account to invest in Initial Public Offers (IPOs) on a repatriable basis
● You can switch your Demat account to the NRO category to trade stocks even if you move abroad.

Conclusion

NRIs can indeed open Demat accounts in India, provided they fulfill the eligibility criteria and follow the regulatory guidelines. While benefits include ease of trading and investment diversification, NRIs must carefully consider the associated risks and choose reputable brokerage firms.

How to Install Whitecream on Kodi | step by Step Guide

Have you ever wanted to stream all your favorite movies and TV shows directly to your TV but weren’t sure how? Installing addons for Kodi, such as Ultimate Whitecream, makes accessing a vast entertainment library right from your couch easy. Follow this guide, “How to install Whitecream on Kodi.

To install Ultimate Whitecream on Kodi, enable Unknown Sources, add the source “https://fusion.tvaddons.co,” install the repository and addon, then access it from the Addons section in Kodi’s main menu.

Expand your streaming options by installing Stream Hub for even more content and a seamless streaming experience. Become a streaming pro with these addons on your Kodi device. Install Ultimate Whitecream on Kodi for a vast library of movies and shows.

See Also: How To Install Mad Titan On Kodi? Complete Guide (2024)

Is it safe to install Whitecream on Kodi?

Yes, the Ultimate Whitecream addon for Kodi is considered safe to install. However, using a VPN while streaming content through Kodi addons, including third-party ones like Ultimate Whitecream, is always recommended. 

A VPN helps protect your privacy and identity and bypass certain restrictions imposed by your internet service provider. So, to ensure a secure streaming experience and maintain your online anonymity, a trusted VPN service like IPVanish or IVACY VPN is advisable.vpn

See Also: How To Use Plexus Kodi? Plex Addon Installation Guide

How to Install Whitecream on Kodi? Addon

Here are the steps to go ahead with your doubts about how to download Ultimate Whitecream on Kodi.

Enable Unknown Sources

Follow the steps on How to install Whitecream on Kodi: 

1. Open Kodi and go to the Settings menu (gear icon).kodi settings

2. Select System or System Settings.system settings

3. Choose Addons.add ons

4. Toggle the Unknown Sources option to enable it. add ons and unknown sources5. Confirm the warning message.warning

Now, after you have enabled the unknown sources, follow the following: 

  1. To install the latest white cream on Kodi further, open Kodi and click on the gear icon (Settings) at the top left corner of the screen.kodi settings
  2. Select “File Manager” in the Settings menu.file manager
  3. Click “Add Source.” and then a window will appear. Click on the text box that says “<None>.” add source
  4. Enter the following URL: https://fusion.tvaddons.co. Then click “OK.”enter the url
  5. In the same window, you will see a box where you can enter a name for the source. Type “Ultimate Whitecream” and click “OK.”
  6. Go back to the Kodi main menu and select “Addons.”add ons
  7. Click on the open box icon at the top left corner (Install from zip file).
  8. A list of options will appear. Select “Ultimate Whitecream” (or the name you gave the source).
  9. Inside the source folder, select “Kodi-repos.”kodi repos
  10. Choose “xxx-adult” from the list to go further on installing ultimate Whitecream on Kodi.
  11. Select “Repository.kodiadult-1.0.0.zip” to install the repository.click on the selected option
  12. After the installation is complete, choose “Install from Repository.”install-repository
  13. Look for “TVADDONS.CO Adult 19+ Addon Repo” and click on it.
  14. Select “Video addons” and find “Ultimate Whitecream” in the list.video add ons
  15. Click on “Ultimate Whitecream” and then click “Install.”
  16. A pop-up window will appear. Choose “Version 1.1.99 (TVADDONS.COM Adult 18+ Addon Repo)” and click “OK.”
  17. Wait for the addon to install. You will see a notification in the top right corner saying that Ultimate Whitecream has been installed.ultimate whitecream add on installed
  18. To access the addon, return to the Kodi main menu and select “Addons.” Ultimate Whitecream should be listed there. This is how to install Whitecream on Kodi. 

See Also: How To Install Vidtime On Kodi? Everything To Know

FAQs

What is the Whitecream app?

The Whitecream app is an addon for Kodi that provides adult entertainment content. It allows users to stream videos and live shows.

How do I install everything on Kodi?

To install the Whitecream addon and its requirements on Kodi, follow the steps listed in the installation guide on the website. This includes enabling unknown sources, adding the repository, and then installing the addon from the repository.

What is Whitecream used for?

The Whitecream addon is used to access adult entertainment content like videos and live shows. It provides a directory of streams that can be played within the Kodi media player.

How does Whitecream work?

The Whitecream addon scraps external links to adult content from various sites. It organizes these links into a browsable directory within Kodi. When selected, a link will attempt to play the stream using the Kodi player. It relies on maintained external links to provide updated content to users.

Conclusion

Installing Ultimate Whitecream on Kodi is straightforward, as shown in this guide on how to install Whitecream on Kodi. By following a few simple steps, including enabling Unknown Sources, adding a source with the provided URL, and installing the addon from the repository, users can access Ultimate Whitecream and enjoy its features. 

Once Ultimate Whitecream is installed, users can explore other popular addons like Phoenix on Kodi, further enhancing their streaming experience. Always follow legal guidelines, obtain necessary permissions, and use addons responsibly.

How to Install No Limits Magic Build on Kodi (2024 Update)

Are you tired of the same old Kodi home screen? Wishing you had an easy way to access all the best addons in one place? Then, you need to try the Kodi No Limits Magic Build. Follow this guide to learn “How to install No Limits Magic Build on Kodi.”

How to install No Limits Magic Build on Kodi, follow these steps:

  1. Enable Unknown Sources.
  2. Add the URL “https://www.nolimitswiz.appboxes.co“ as a source.
  3. Install the No Limits Wizard addon
  4. Select and install the desired build.
  5. And restart Kodi. Enjoy No Limits Magic on Kodi.

As one of the most popular and fully loaded Kodi builds, No Limits Magic makes it simple to discover new content. With just one click, you’ll gain access to thousands of movies, TV shows, live TV channels, sports streams, and more. Say goodbye to spending hours searching for different addons—everything is neatly organized on the home screen. Let us see how to install No Limits Magic Build on Kodi.

Is The No Limits Magic Kodi Build Legal?

The No Limits Magic Kodi build might not be entirely legal for use. This build is not found in the official Kodi addon repository. It must be installed from an external source instead of the official place. When addons come from outside areas, it can be a sign they might share copyrighted content without permission.

Big media companies own most of the content on No Limits, such as movies and TV shows. Sharing their shows and movies without paying for them could get users in trouble. However, some content, like public domain things, can be used freely. But it’s hard to know what’s public or not on the No Limits build.

The best thing is to be careful while using it. Only stream public things that are free to share. And use a VPN to stay anonymous online. Users must choose what they watch on the No Limits Kodi build.vpn

How to Install No Limits Magic Build on Kodi: 3-Step Guide

Follow this simple 3-step guide to install it and start streaming your favorite movies and TV shows.

Step 1: Enable Unknown Sources on Kodi

Follow the steps:

  1. Open Kodi on your device.
  2. Click on the Settings icon, which looks like a gear.kodi settings
  3. In the Settings menu, navigate to System Settings and click on it.system settings
  4. Scroll down and select Addons from the left-hand menu.add ons
  5. You will see a toggle switch next to Unknown Sources on the right. Click on the switch to enable it.add ons and unknown sources
  6. A warning message will appear. Please read it and click Yes to confirm that you want to enable Unknown Sources.warning

Step 2: Install No Limits Wizard

Follow the steps to further go ahead with your download No Limits Magic Build:

  1. Return to the Kodi main menu by pressing the back button or the home icon.
  2. Select File Manager, typically located in the top row of the main menu.file manager
  3. Click on Add Source. A dialog box will appear. Click <None> to enter the URL for the No Limits Wizard.add source
  4. Enter the following URL exactly as shown: https://www.nolimitswiz.appboxes.coenter the url in the box
  5. Click OK to proceed.
  6. In the next dialog box, you will see an input box under “Enter a name for this media source.” Enter a name for the source, such as “No Limits Wizard.” Click OK to save the source.enter a name for this media source
  7. Press the back button or the home icon to return to the Kodi main menu.
  8. Select Addons from the main menu.add ons
  9. Click on Install from Zip File.install from zip file
  10. A list of sources will appear. Look for the source you added earlier: “No Limits Wizard.” Click on it.
  11. Choose the file “plugin.video.nolimitswizard18.zip” if you are using Kodi 18. For Kodi 17 Krypton users, select “kodi” > “nolimits” > “wizard” > “plugin.video.nolimitswizard.zip”.choose the file from zip fie
  12. Wait until you see a notification in the top-right corner saying the addon has been installed.
  13. You may receive a prompt asking if you want to run the addon. Click Continue to proceed.
  14. Another prompt may appear, asking if you want to ignore the build version. Click Ignore.

Step 3: Install No Limits Magic Build

Follow the steps: 

  1. Return to the Kodi main menu.
  2. Select Addons.add ons
  3. Choose Program Addons.program add ons
  4. Look for the No Limits Wizard or No Limits Wizard18 Addon and click on it.no limits wizard
  5. Select INSTALL/UPDATE NO LIMITS BUILDS in the No Limits Wizard menu.choose install or update no limit builds
  6. You will see a list of available No Limits builds. Choose the one you prefer, such as No Limits Magic (No XXX Section).go to no limits wizard
  7. Select FRESH INSTALL (Erase, then Install New Build) for Kodi Leia and Kodi Krypton.fresh install
  8. A warning message will appear. Could you read it and click Continue to confirmno limits magic no xxx section
  9. Wait for the download process to complete. This may take some time, depending on your internet speed.
  10. After the download and installation are finished, you will see a prompt. Click Force Close to shut down Kodi and apply the changes.force close
  11. Reopen Kodi on your device. Allow the No Limits Magic build for Kodi to complete the remaining steps, such as setting up the skin and creating the menu. To avoid errors, it’s recommended that you leave it idle for around 15 minutes.
  12. Once complete, you can use the No Limits Magic build on Kodi. Here are a few easy steps to install the No Limits Magic Build on Kodi.

See Also: Best Kodi Builds For Sports: Live Sports Streaming Made Easy

Troubleshooting: No Limits Magic Build Not Working

Exploring the best Kodi Builds on Ares Wizard can offer alternatives if the No Limits Magic Build needs to be fixed despite installing the No Limits Magic Build version. But let us try a few things first to correct the problem: 

  • Check your Kodi version – Make sure you install version 17 or 18, as the build only works with these. kodi icon
  • Check your internet connection- The builder needs an excellent connection to stream shows and movies. If the connection is slow, restart your router.internet connection
  • Clear the Kodi cache – Old cached data can cause issues. Clear the cache to fix problems.clear kodi cache
  • Reinstall the build – If the above doesn’t help, uninstall the build completely, then reinstall it again from the No Limits Wizard. This often fixes lingering problems.
  • Update Kodi and the build – When new, compatible versions are out, update them for security fixes that can help.
  • Ask for help – If none of the above work, search online communities for similar issues others had and how they fixed them. You can also get help from the build creators.

Hope this helps you get the No Limits Magic Build Kodi working smoothly again! 

FAQs

Does no limits build still work?

Yes, the No Limits Magic Build works only on Kodi versions 17 and 18. It is not compatible with newer versions.

How do I update my no limits magic?

No Limits Magic Build updates are released periodically. To get the latest version, uninstall the current one and reinstall from the No Limits Wizard add-on.

How do you add no limits to magic build?

First, you need to download and install the No Limits Wizard add-on. Then, you can use the wizard to find and install the No Limits Magic Build version you want.

How do you set up a no limit build?

Here are steps to set up a No Limits build on Kodi: Go to the home screen on Kodi > Click on 'Add-ons.' > Choose 'Program add-ons.' > Find and click on 'No Limits Wizard.' > Click on 'Install/Update No Limits build.' > Choose the No Limits build you want from the list of options

Summing Up

We saw how to install No Limits Magic Build on Kodi, a simple process that enhances your streaming experience. By following the step-by-step guide provided, you can easily enable Unknown Sources, add the No Limits Wizard source, install the build, and enjoy the wide selection of movies and TV shows it offers.

If you’re looking for the best Kodi builds today, No Limits Magic Build should be on your list. Its user-friendly interface and extensive content library make it a great choice. Upgrade your Kodi experience with No Limits Magic Build now.

How To Install From Zip File On Kodi? Full Guide

Have you ever found an excellent Kodi add-on but need to know How to install from zip file on Kodi? Installing from a zip file is the easiest way to add new add-ons to your Kodi media player. All you need is the zip file containing the add-on and a few simple steps.

To install from a zip file on Kodi, enable unknown sources, download the zip, navigate to install from zip file option, select the downloaded zip, and Kodi will unpack and install the new addon to your Kodi library.

Installing addons from zip files on Kodi expands media options beyond the official repository. It helps install addons like Mad Titan. Zip files allow easy manual installation, keeping Kodi flexible and customizable. Let’s learn How to install from zip file on Kodi.

See Also: How To Install Phoenix On Kodi? Full Guide

How to install from zip file on Kodi? 

Let us see How to install from zip file on Kodi easily with a few easy steps: 

  1. Open Kodi, navigate the Settings menu, and go to System Settings.
    system settings
  2. Select Addons and toggle the Unknown Sources option to enable it. This allows you to install addons from external sources.add ons and unknown sources
  3. Now, download the ZIP file for the addon you want to install. You can find addons in repositories or on websites that offer them.
  4. Return to the Kodi Settings menu.
  5. Select Addons from the list of options.add ons
  6. Choose the option “Install from the zip file.”install from zip file
  7. A pop-up window will appear. Navigate to the location where you downloaded the ZIP file.
        For Windows users, navigate to C:/ > Users > (your username) > Desktop. 
    For Mac users, navigate to the Home Folder > Downloads.
  8. Once you find the ZIP file, click on it to start the installation process.
  9. Kodi will install the addon, which usually takes only a few moments. You’ll see a notification in the top-right corner of the Kodi interface indicating the successful installation.warning
  10. Return to the Kodi home screen and select Addons from the main menu.add ons
  11. Navigate to the addon you installed and click on its title or icon to open it.
  12. That’s it for installing from a zip file on Kodi! You have successfully installed a Kodi addon from a ZIP file.

See Also: How To Use Plexus Kodi? Plex Addon Installation Guide

Troubleshooting Common Issues

Installing addons from zip files on Kodi is very straightforward. However, sometimes issues can come up. Here are some potential problems and their solutions:

Addon Not Showing Up

If the addon does not appear in your addons list after installing it from a zip file, close Kodi fully and restart it. This refreshes the addons database.

“File Not Found” Error

Double-check that you have navigated to the correct location of the downloaded zip file.files not found

Common places are the desktop or downloads folder.

“Dependency Not Met” Warning

Some add-ons require other dependencies to be installed first. Check the zip file description or comments to see what else is needed.

Zip File is Corrupt

If an error occurs during installation, try re-downloading the zip file from the source to see if it was corrupted during the download process.zipped folder is corrupted or invalid

If the zip file is still corrupted after trying these steps, there was likely an issue during the download or transfer process, and you may need to obtain a new copy from a different source or contact the provider for assistance.

Unknown Sources Disabled

Ensure you have enabled “unknown sources” in your Kodi settings to allow the installation of external addons, not those from the official repository.add ons and unknown sources

We hope these tips help if you encounter issues with “How to install from zip file on Kodi.“ Feel free to search online if you have any other specific error messages.

See Also: How To Install Stream Hub On Kodi? [2024 Updated]

FAQs

Why can't I install it from a zip file on Kodi?

You may be unable to install from zip files if you have not enabled unknown sources on your Kodi. Go to settings, system, addons, and toggle on 'unknown sources' to allow the installation of addons from external locations.

Where is the get more button on Kodi?

The 'Get More' button is not present in newer versions of Kodi. To install new addons, go into settings, system, addons, and select 'install from zip file' to add an addon from a zip package.

How do I enable addons on Kodi?

To enable addons on Kodi, you need to install them first. Go to settings, system, addons, select 'install from repository' or 'install from the zip file,' and choose the addon you want. Once installed, the addon can be accessed from the main Kodi interface.

Why is the zip file blocked?

A zip file may be blocked if the file is corrupt or damaged. Try downloading the zip file again from the source to see if it installs properly. The zip file could also be blocked if your Kodi does not have unknown sources enabled to install from external locations.

Conclusion

Installing addons or programs from a zip file on Kodi is straightforward. By downloading the zip file containing the addon and then selecting the install from the zip file option, you can quickly add new content to Kodi.

This makes it very easy to install video addons like Vidtime, which allow you to watch free movies and TV shows directly on your Kodi home screen==

How To Add Navi X to Kodi: A Step-by-Step Guide

Are you a Kodi user looking to expand your streaming options? If so, then consider adding the popular Navi-X addon. Firstly, in just a few simple steps on how to add Navi X to Kodi, you can access a vast library of live TV, movies, shows, and more right through your Kodi device. Additionally, Navi-X is widely regarded as one of the best addons for Kodi, providing access to a wide range of content sources. Moreover, it is user-friendly and regularly updated, ensuring a seamless streaming experience. Furthermore, by following the straightforward installation process outlined in this guide, you’ll be able to start enjoying the benefits of Navi-X in no time. Consequently, if you’re seeking to enhance your Kodi setup, adding Navi-X should definitely be on your list.

To add Navi-X to Kodi for Krypton Version 17.6 or lower, follow the steps:

  1. Open Kodi
  2. Enable unknown sources
  3. Add the repo URL as the source
  4. Install the repo zip file
  5. Select repo in Addons
  6. Find Navi-X in Program Addons
  7. Click install

To begin with, the Navi X Kodi addon is one of the most downloaded and highly rated. Subsequently, it provides extensive content from various sources to browse, search, and watch. Furthermore, with Navi-X, you’ll find everything from recent blockbuster movies to live sports and events streaming in high quality. Moreover, best of all, adding Navi-X is a breeze. In addition, this short guide will walk you through the quick and easy process. Consequently, follow the steps, and you’ll stream with the best Kodi addon. Finally, let’s get started with how to add Navi X to Kodi.

See Also: How To Install Mad Titan On Kodi? Complete Guide (2024)

Is Navi-X safe for Kodi?

Navi-X is generally considered a safe addon for Kodi use. As one of the most popular Kodi addons, Navi-X provides an extensive library of movies, TV shows, live TV, and more for users to stream. 

However, since Navi-X is offering this content without licenses, there are always legal risks to consider. The streams themselves do not pose security or malware risks. navi x

However, users should only install Navi-X from trusted sources like those mentioned in the article to avoid potential issues. Overall, Navi-X can safely access a wide range of free entertainment through Kodi if used responsibly and with precautions.

See Also: How To Install Stream Engine On Kodi? Complete Guide

How to Add Navi-X to Kodi: Installation Guide

Installing Navi-X on Kodi is simple. It allows you to access a vast library of free online media content. 

Follow the step-by-step installation guide below to seamlessly integrate Navi-X into your Kodi setup and enhance your streaming experience.

For Kodi Krypton Version 17.6 or Lower

Here are the step-by-step instructions on how to add Navi X to Kodi for Kodi Krypton Version 17.6 or lower:

Navigating to Addons

  1. Open Kodi on your device and click on the settings icon (it looks like a gear or cog) in the top left corner of the Kodi home screen.kodi settings
  2. In the Settings menu, select “System Settings”.system settings
  3. Within System Settings, navigate to “Addons” and toggle on the “Unknown Sources” option. This will allow you to install addons from unknown sources.add ons and unknown sources
  4. A warning message will appear, but you can safely proceed by clicking “Yes.”
  5. Go back to the Settings menu and select “File Manager.”file manager
  6. Then, in File Manager, choose “Add Source.” A dialog box will appear. Click the “<None>” option to enter a custom URL.add source
  7. Enter the URL for either the Kodil Repo or Fusion repository. Here are the URLs you can use:           
    For Kodil Repo: http://kdil.co/repo/
           For Fusion: http://fusion.tvaddons.ag
  8. After entering the URL, click “OK”. You will be prompted to enter a name for the media source. Name it according to your preference, such as “Kodil Repo” or “Fusion.”fusion
  9. You can return to the Kodi main menu by pressing the back button on your device or clicking the home icon.

Installing the Addon

  1. Select “Addons.” from the main menu and click on the open box-shape icon at the Addonstop left corner of the Addons screen. This is the “Package Installer” button.package installer
  1. Choose “Install from Zip File”. A list of available sources will appear. Find and select the source you added in step 5.install from zip file
  2. Inside the source, you will see a list of files. Look for the repository file, which will have a .zip extension. You can name it something like “repository.kodil-x.x.zip” or “repository.xbmchub-x.x.zip.” Select the repository file.repository aresproject
  3. Wait for the repository to install. You will see a notification in the top right corner of the screen once it’s done.program add ons
  4. After completing the repository installation, go to the Addons menu and select “Install from Repository.”install from repository
  5. You will see a list of available repositories. Select the Kodil or Fusion repository, depending on the source you added.
  6. Inside the repository, navigate to “Program Addons”.
  7. Then, look for “Navi-X” in the list of program addons and click on it.
  8. A window will appear with information about Navi-X. Click on the “Install” button to install Navi-X.click on install
  9. Wait for the installation to complete. Once it’s done, you will see a notification in the top right corner of the screen saying, “Addon enable.”add on enabled

Congratulations on being done with how to add Navi X to Kodi! You have successfully added Navi-X to Kodi on Kodi Krypton Version 17.6 or lower.

To expand your entertainment options, consider installing Stream Hub on Kodi. This additional addon will enhance your streaming experience by providing access to various media content. 

For Kodi Jarvis Version 16 or Higher

The main difference in How to add Navi X to Kodi for Jarvis and Krypton is the placement of the main menu. In Jarvis, the main menu is located at the bottom of the screen instead of on the left side.

Other than that, the process of downloading and using Navi-X remains the same for both versions.

Troubleshooting Common Issues

Here are the common issues faced with Navi-X and how to troubleshoot them:

When Navi X is not working on Kodi 

Sometimes, the Navi-X addon may stop loading streams or showing content. This can happen if an older version of Kodi or Navi-X is installed. The easiest fix is removing both programs and fully reinstalling the latest versions.

Addon Not Found

Navi-X may show as “addon not installed” even after installing. This usually means a previous version still needs to be entirely removed. myaddons Go to Settings > Addons> My Addons and delete any Navi-X files listed. Then, reinstall the latest version.

Streams Taking Too Long

An overloaded server or a weak internet connection could cause slow streams. Try accessing content from Navi-X at non-peak hours or switching to a faster WiFi/mobile data connection.clear kodi cache Clearing Kodi’s cache may also help.

Error Message After Install

Errors after installation typically mean the source needs to be more reliable.uninstall Uninstall Navi X for Kodi to avoid potential issues and install only from trustworthy sources mentioned in the guide, like Kodil or TVAddons repositories.

FAQs

Does Navi X still work?

Yes, Navi-X continues to be one of Kodi's most popular and working add-ons. While some content sources may come and go, Navi-X generally keeps working with regular updates from developers.

What version of Kodi should I use?

You should use the latest stable version of Kodi, currently 19.4. It has the most support and is less likely to cause issues with add-ons like Navi-X. Older versions may be partially compatible.

Which VPN is best for Kodi?

A paid VPN with a no-logs policy, like ExpressVPN or NordVPN, provides maximum security and privacy. It effectively hides your online activity from your ISP and allows access to geo-restrict streaming libraries.

Can one install an older version of Kodi?

You can install older Kodi versions, but they may have known security flaws or incompatibilities. Stick with the latest stable version for the best experience and safety. Only install older Kodi if you need specific addons that don't support recent versions.

See Also: How To Install Vidtime On Kodi? Everything To Know

Summing Up

After completing the steps to add Navi X to Kodi, you can then enhance your streaming experience further by installing The Crew. The Crew. Firstly, by following the simple steps for installing The Crew on Kodi, you’ll gain access to a vast array of live TV, movies, shows, and more.

Moreover, with Navi-X and The Crew combined, you can effortlessly explore and enjoy various entertainment options within the Kodi platform. Additionally, you can make the most of your Kodi setup by integrating these top-rated addons and consequently elevate your entertainment choices. Furthermore, not only will you have access to a wide range of content, but you’ll also be able to seamlessly navigate between the two addons, thereby maximizing your overall streaming experience.

How to Install Gorilla Build on Kodi? Full Guide

Have you heard about Gorilla Build Kodi but need to know how to install it? Gorilla Build is a popular Kodi build that can transform your experience. It gives you access to many movies, live TV shows, and sports. Installing Gorilla Build is easy and will save time when searching for different kodi add-ons.

Here are the quick steps on how to install Gorilla Build on Kodi:

  1. Open Kodi settings
  2. Enable unknown sources
  3. Add Gorilla Build URL
  4. Install repository zip
  5. Select Gorilla addon
  6. Run wizard
  7. Restart and enjoy!

Gorilla Build comes preloaded with many great addons that ‘just work.‘ Once installed, you can start watching your favorite entertainment right away without any hassle. This guide will walk you through the simple steps to install Gorilla Build on your Kodi setup. So, are you ready to take your Kodi to the next level? Let’s get started with how to install Gorilla Build on Kodi and unlock a world of free movies, shows, and live TV!

Is it Safe to Install Gorilla Build on Kodi?

Many users wonder if installing Gorilla Build is safe for their Kodi devices. The good news is that Gorilla Build is generally safe to install as it comes from a trusted source. Like any Kodi build, there is always a small risk of installing malicious addons. safety

However, Kodi Gorilla Build comes preloaded with popular addons that developers regularly check. You can enhance safety by only installing Gorilla Build from the official website and using a VPN while streaming content. So, in most cases, it is safe to install Gorilla Build to improve the Kodi experience. Follow this guide to learn “how to install Gorilla build on kodi”.

How to Install Gorilla Build on Kodi? Step-by-Step Guide

Let us look at how to install Gorilla Build on Kodi quickly:

  1. Open Kodi and click on the Settings icon.kodi settings
  2. Select “System” or “System Settings” in the Settings menu, depending on your Kodi version.system settings
  3. Scroll down and click on “Addons”.add ons
  4. To enable “Unknown Sources,” toggle the switch to the right.add ons and unknown sources
  5. A warning message may appear, but you can proceed by clicking “Yes.”warning
  6. Go back to the Settings menu and select “File Manager.”file manager
  7. Click on “Add Source” and then choose “<None>”.add source
  8. Enter the following URL for the Gorilla Build source.enter the url
  9. Give the media source a name, such as “fierce gorilla.”
  10. Return to the Kodi home screen and select “Addons” from the left menu.add ons
  11. Click the open box icon (Addon Browser) at the top left corner.package installer
  12. Choose “Install from zip file.”install from zip file
  13. Select the media source you added earlier, “fiercegorilla”.
  14. Choose the file “repository.fiercegorilla-1.0.zip” and wait for the addon installation notification.
  15. Select “Install from Repository.” install from repository
  16. Select “Fierce Gorilla Repository.”
  17. Go to “Program addons” within the repository.program addons
  18. Click on the wizard to launch it. The name may vary, but it should be related to the Gorilla Build.
  19. Follow the prompts and options provided by the wizard to install the Gorilla Build.
  20. Once the installation is complete, restart Kodi to finalize the changes.
  21. After restarting, you can access and use the Gorilla Build from the Kodi home screen.

FAQs

Is Gorilla Build compatible with all Kodi devices?

Yes, Gorilla Build is compatible with most Kodi devices, such as Android TV boxes, Firestick, Windows and Mac computers, etc. It supports Kodi versions from Krypton to Matrix.

Can I customize Gorilla Build after installation?

Yes, you can customize Gorilla Build after installation. You can rearrange add-ons and change settings and skins as you prefer. Gorilla Build provides a lot of flexibility for customization.

Are there any risks associated with installing Gorilla Build?

As with any third-party Kodi build, there is a small risk of installing malware-laden add-ons. But Gorilla Build comes from a trusted source, and add-ons are checked regularly. Using a VPN while streaming further enhances security.

How do I update Gorilla Build on Kodi?

To update Gorilla Build, open Kodi settings and select the 'System' option. Then click on 'Add-ons' and select 'Update'. Gorilla add-ons will auto-update when new versions are available.

Will installing Gorilla Build affect my existing Kodi add-ons?

Installing Gorilla Build will not affect or remove your Kodi addons. It works as a separate build without interfering with your existing Kodi setup.

See Also: How To Use Plexus Kodi? Plex Addon Installation Guide

Summing Up

Congratulations on installing Gorilla Build on Kodi! You have successfully installed one of the best Kodi builds – Gorilla Build. With this build, you can easily access all your favorite movies, TV shows, live sports, and much more from one place.

Gorilla Build is especially great for sports fans as it provides access to various live sports channels and events. If you enjoy watching live sports, Gorilla Build is one of the best Kodi builds for sports. You can now start exploring different add-ons and enjoy unlimited entertainment on your Kodi setup.

How to Remove Add Ons from Kodi? Full Guide

Do too many add ons occupy too much space on your Kodi home screen? Do you want to remove that annoying add ons from Kodi that keeps crashing? To proceed and learn How to remove add ons from Kodi, we’ll walk you through the process in a few easy steps.

To remove add ons from Kodi, open the add ons menu and find the one you want to remove. Click on it and select “Uninstall.” Once it’s uninstalled, go into your files and remove (or delete) any leftover files, too. This ensures it’s completely gone from your device.

You may need to remove Kodi add ons for a few reasons, such as outdated ones causing issues, abandoned add ons that no longer work properly, or add ons engaging in sneaky activities like tracking your viewing habits. Removing these problematic add ons can protect your privacy and ensure a smoother Kodi experience. Once you’ve cleaned the house, you can explore the best addons available for Kodi Krypton, further enhancing your setup.

How to Remove Add Ons From Kodi Safely

Let us see How to remove add ons from Kodi safely:

Step 1) Through the Kodi interface

Follow the steps:

  1. Open the Kodi application on your device. You can find the Kodi icon just like any other app.
  2. Once Kodi opens, click on the “Add-ons” option on the left side of the menu.add ons
  3. Then select “My Add-ons.”my add ons
  4. Here, you will see different add ons, such as video and audio. Choose the category of the Kodi add ons you want to remove.
  5. Locate the Kodi add ons you want to remove or uninstall. Click on it once.
  6. A menu will now appear on the right side of the screen. Click on the “Information” option.click on information
  7. On the information window, click on the “Uninstall” button.click on uninstall
  8. Kodi will show a confirmation message. Click “Yes” to obliterate the add ons.click on yes

Step 2) Deleting leftover add-on data.

Follow the steps to further move on How to remove add ons from Kodi:

  1. Open Kodi and go to “Add-ons”.add ons
  2. Then, go to “My Add-ons.”my add ons
  3. Select the category and locate the uninstalled add ons.
  4. Right-click on it and select “Information.”click on information
  5. Now click the “Clear Data” option to remove (or delete) leftover files and cache.
  6. Confirm by clicking “Yes” when prompted
  7. With the data cleared, right-click again and select “Uninstall” to remove the add ons from Kodi entirely.

Step 3) Removing Kodi repositories and sources

Follow the steps :

  1. Launch Kodi and navigate to “Settings.”kodi settings
  2. Click on “File Manager”.file manager
  3. Locate the repository or source you want to remove or delete under the list.
  4. Right-click on it and select “Delete” or “Remove Source.”remove source
  5. Confirm the deletion by clicking “Yes.” So that is all for How to remove add ons from Kodi.

See Also: How To Add TV Add-ons To Kodi: Complete Guide For Beginners

FAQs

How do I get more add ons on Kodi?

To get more add ons on Kodi, add external sources. Install add-on repositories that offer a wide range of add ons. Find popular repositories online and install them using Kodi's 'Add-on Browser' option. Repositories enable you to browse, install, and update numerous add ons from Kodi.

How do I clear my cache on Kodi?

To clear cache in Kodi : Go to Settings > Select System > Click on Clear Cache >Select 'Yes' to clear all cached data and free up storage space > Clearing the cache regularly can improve Kodi's performance.

How do I automatically update Kodi add ons?

You can enable automatic updates for add-ons in Kodi. This ensures your add ons on Kodi stay up-to-date without manual intervention: Go to Settings > Select Add-ons > Click on 'My Add-ons' > Select the add ons you want to auto-update > Click on Information and enable 'Automatic Updates.' > Kodi will then automatically download and install updates for that add ons.

Why use add ons on Kodi?

Add ons expand Kodi with live TV, movies, and more. Stream media within Kodi; no other apps are needed. Easy to install, enhancing the all-in-one entertainment experience.

See Also: 16 Best Sports Add-ons For Kodi [Updated List]

Conclusion

You should now feel confident on how to remove add ons from Kodi setup which are unwanted or problematic. Keeping your add-on library clean helps ensure the best experience, and with add-ons removed, you have space to try new ones. 

Top live TV add-ons worth checking include The Crew, Titanium, and IPTV. Each provides access to different live channels from around the world. Installing is simple—find, download, and enable. So finish your cleanup with this guide on how to remove add ons from Kodi and explore the tremendous live TV options to enhance your Kodi experience!